
Overview
Workflows automatically perform tasks such as assigning customers to available team members, sending personalized welcome messages, adding tags based on customer behavior, and requesting ratings.
Step 1: Add a workflow
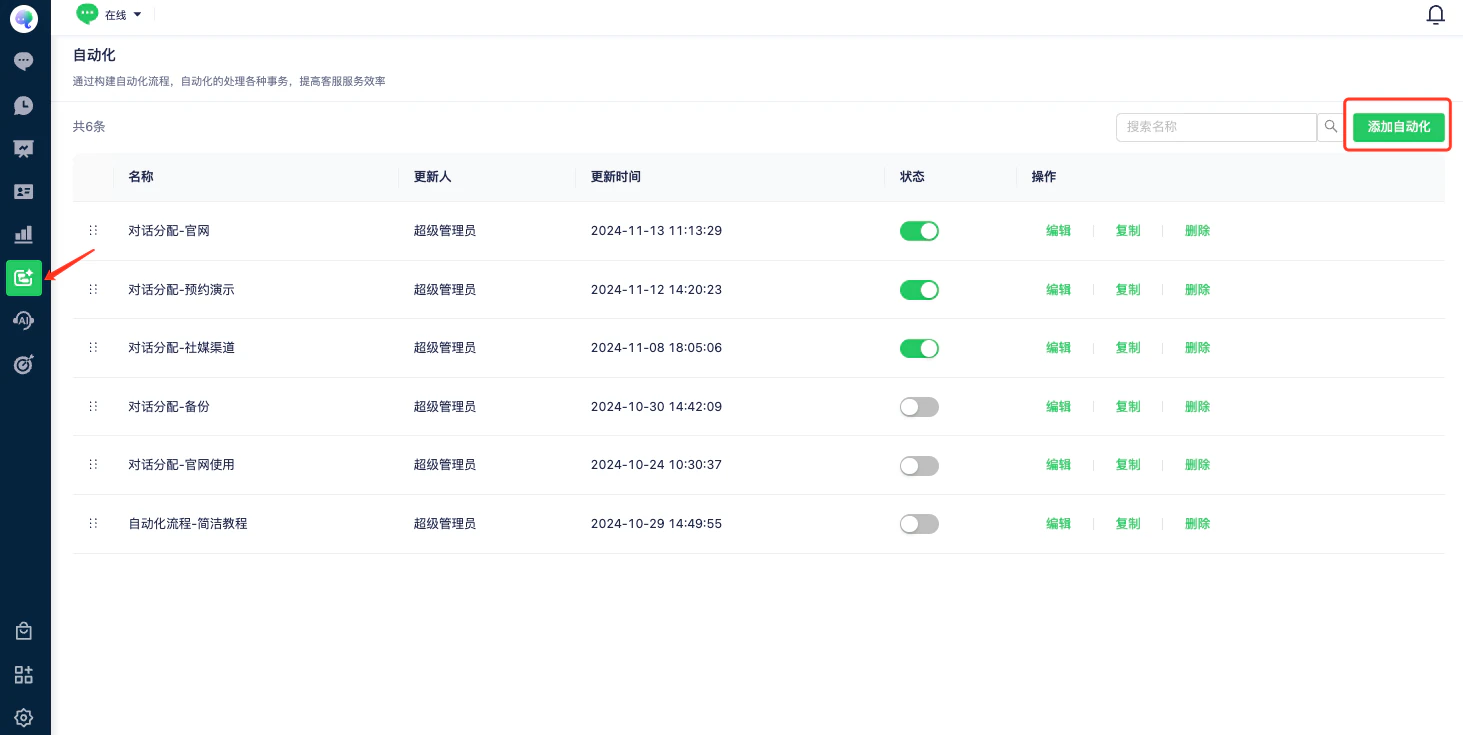
Open Automation and select Add Automation.
Step 2: Select the target audience
Choose between All Users and Custom Rules to define the workflow’s audience.
Select All Users to apply the workflow across all channels.
Select Custom Rules to restrict the workflow to users who match your conditions.
Custom rules
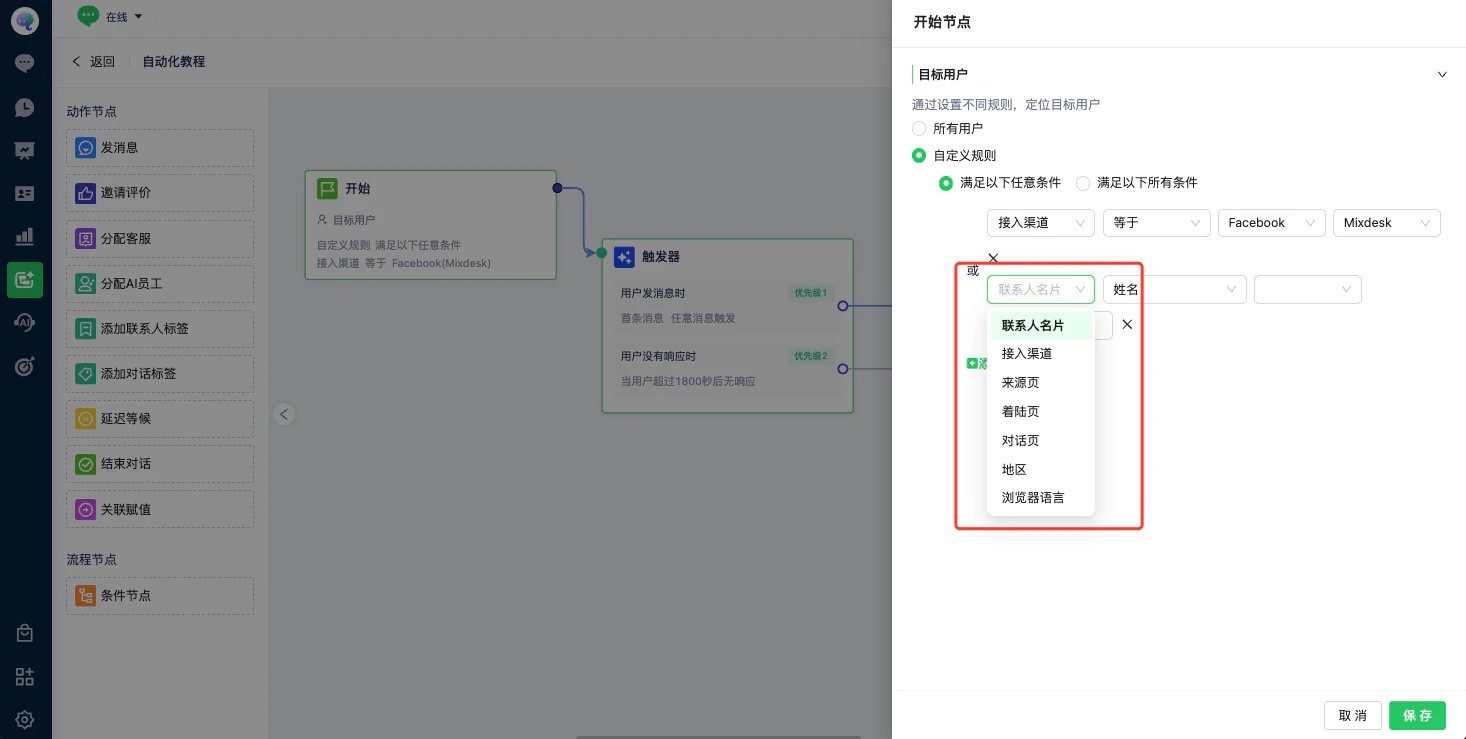
1. Configure one or more conditions, then select Add Condition to add a condition.
2. Available condition types include contact details, connected channel, referrer page, landing page, conversation page, region, and browser language; select those you need.
3. Choose Match Any Condition or Match All Conditions (one option only).
4. Select Save.
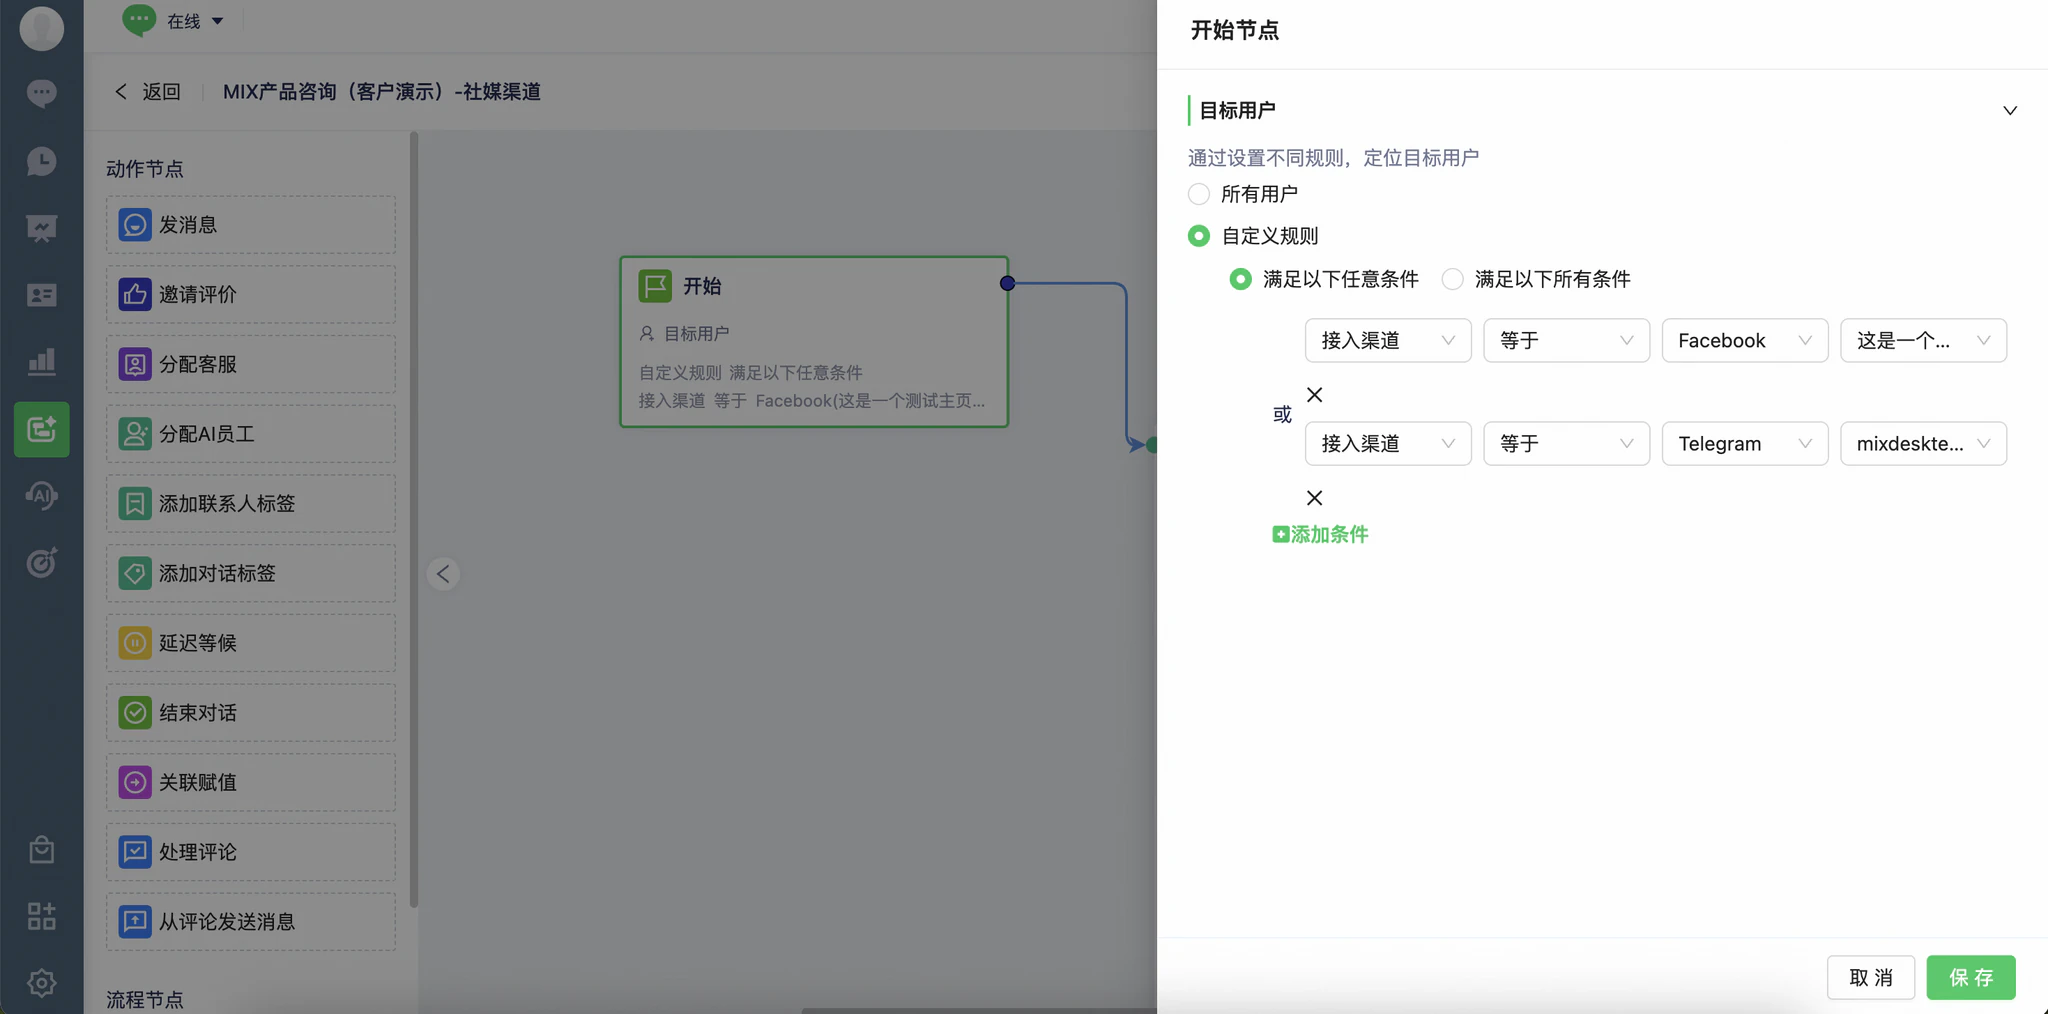
Example: Target Facebook and Telegram users
Step 3: Add a trigger template
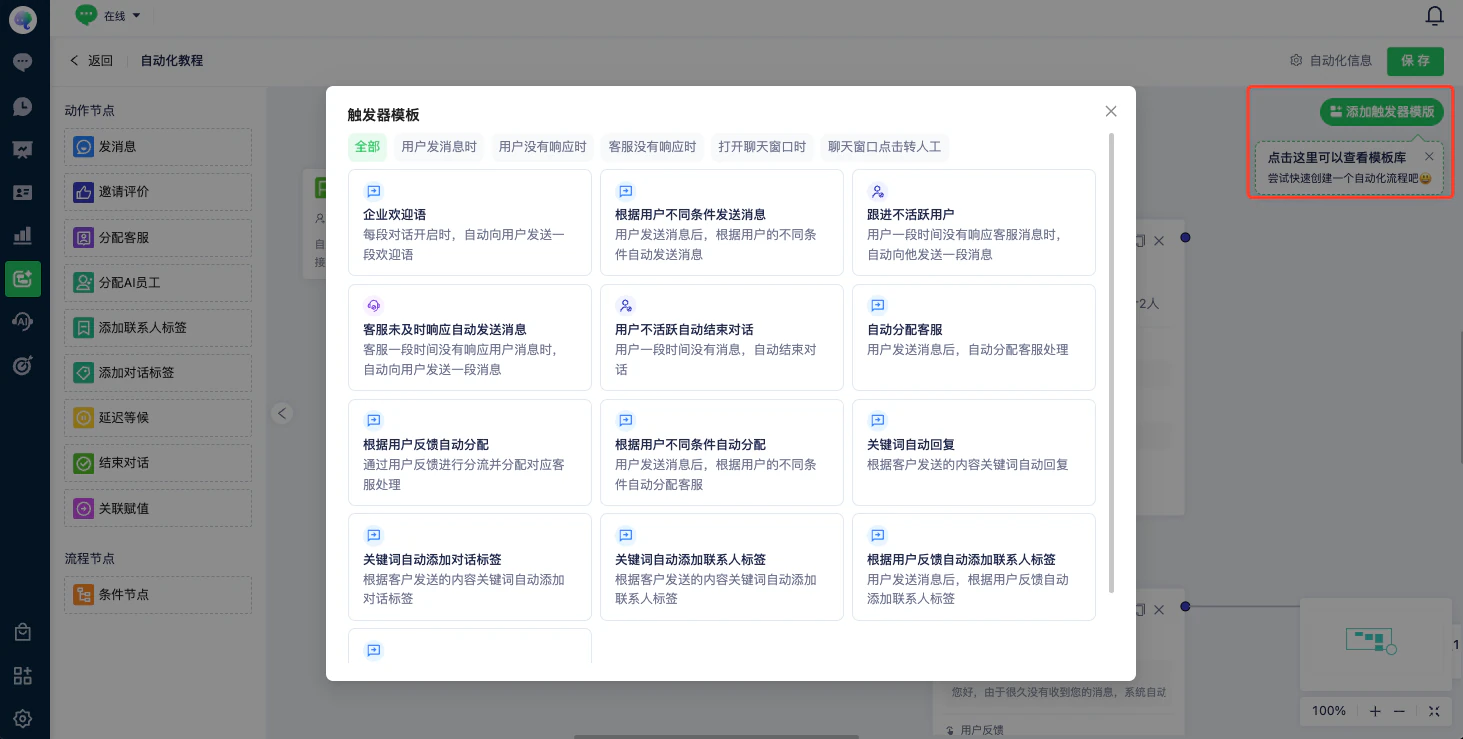
Select Add Trigger Template and choose a preset that suits your needs.
Templates include a workspace welcome message, automatic team-member assignment, and automatic closure for inactive users.
Step 4: Configure triggers
Trigger templates provide a starting point for understanding how triggers work.
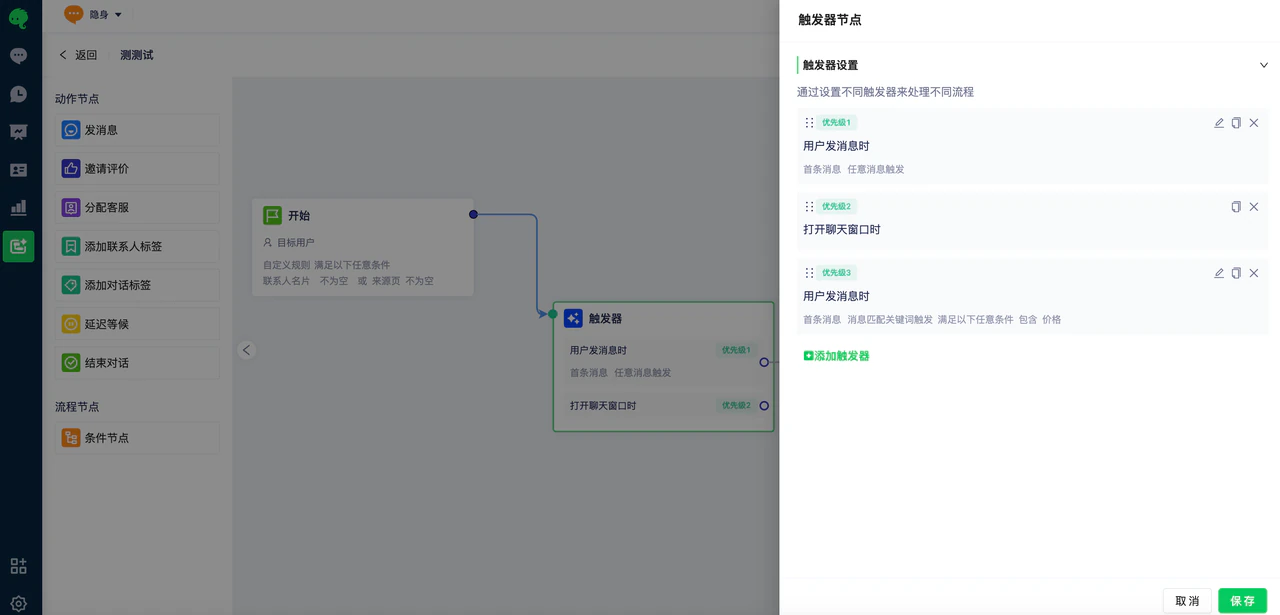
A trigger starts actions when its conditions are met. Different triggers can lead to different actions, and their priority determines which takes precedence.
1. Select Add Trigger
2. Configure the trigger conditions
For example, a user sending a message, a user not responding, a team member not responding, or the chat window opening can trigger a workflow.
1. When the chat window opens: Applies to Website and App SDK channels. The workflow starts when a visitor selects the chat button and opens the window.
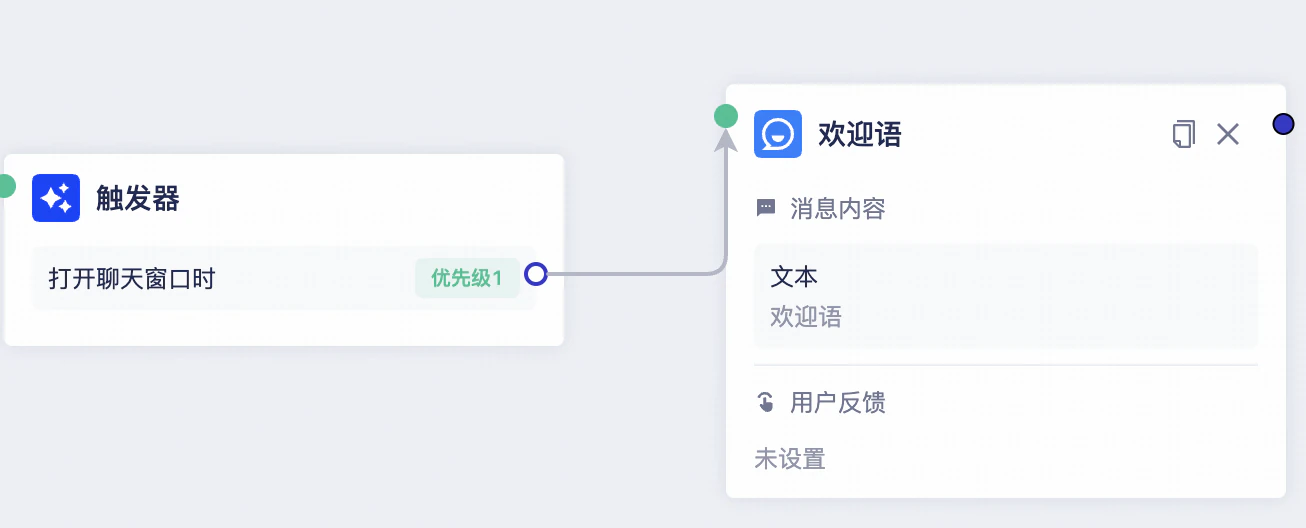
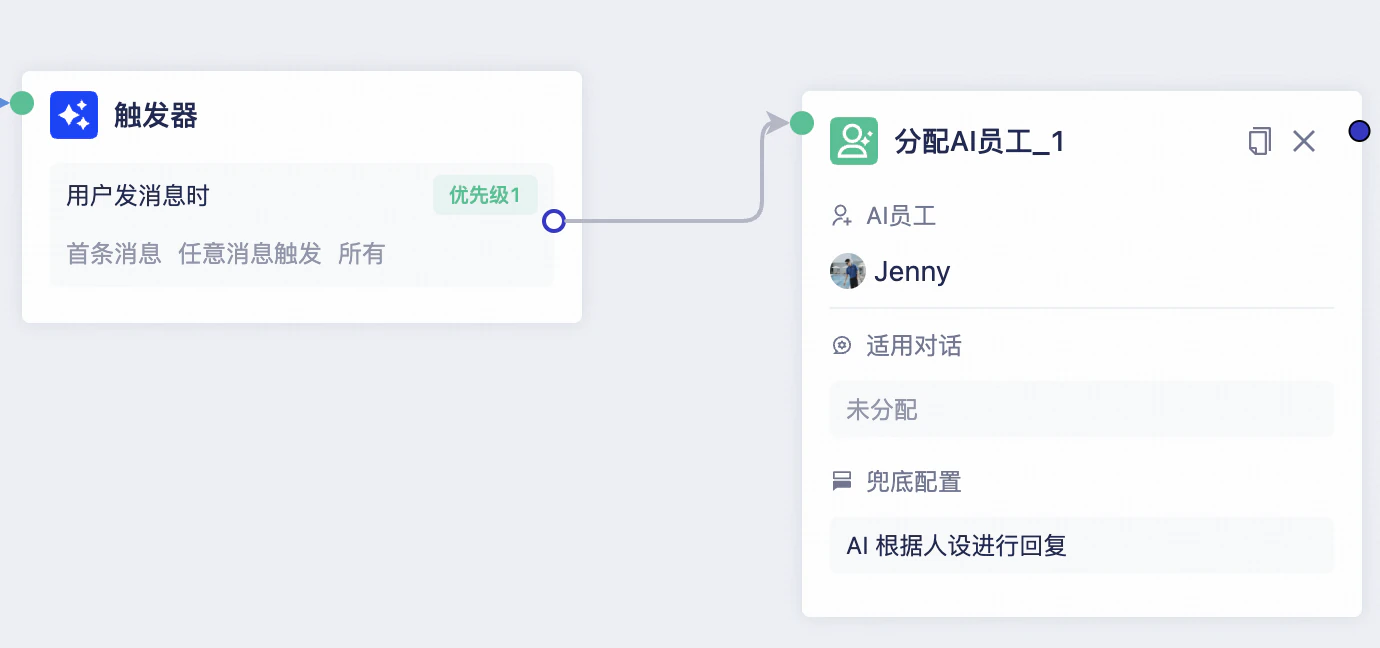
2. When a user sends a message: Applies to all channels. Connect this trigger to an AI Agent or team-member assignment node. Select the applicable conversation state: Unassigned for new inquiries, Assigned to AI for human handoff, or Assigned to Human for transfers between team members or back to AI through a quick action.
Configure trigger limits, rules, and conversation type. Intent-based triggers include three default intents. Add more under AI > Intent Management before using them.
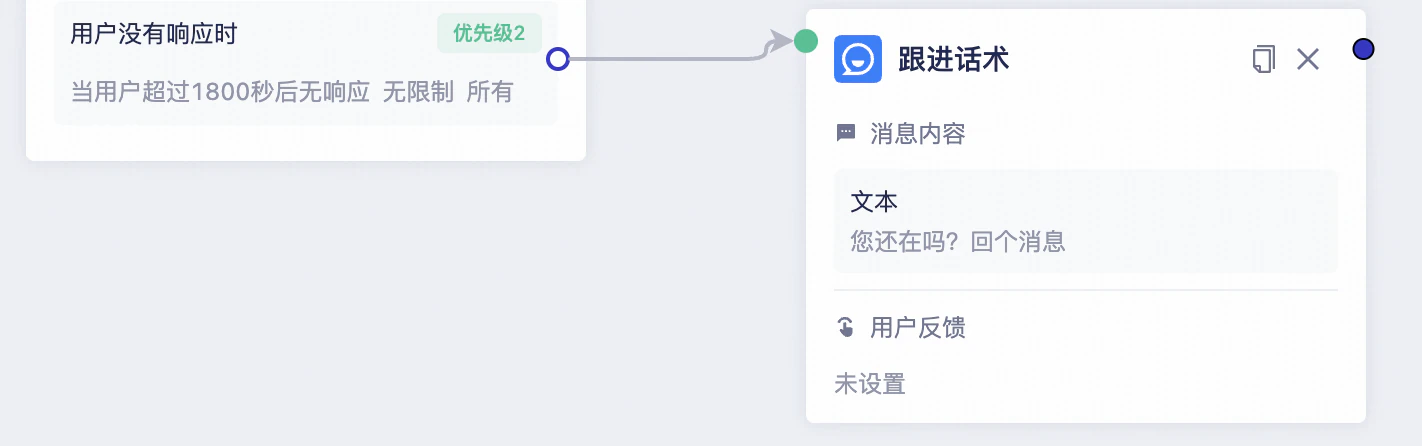
3. When a user does not respond: After a configured number of seconds without a user response, continue to an action such as ending the conversation or sending a follow-up.
4. When a team member does not respond: After a configured number of seconds without a team-member response, continue to an action such as sending “Our team is busy. Please wait.”
5. When a visitor requests a human: Applies to Website and App SDK channels using AI Agents. This trigger adds a human-transfer button to the chat window. Make sure team members are online to receive these requests.
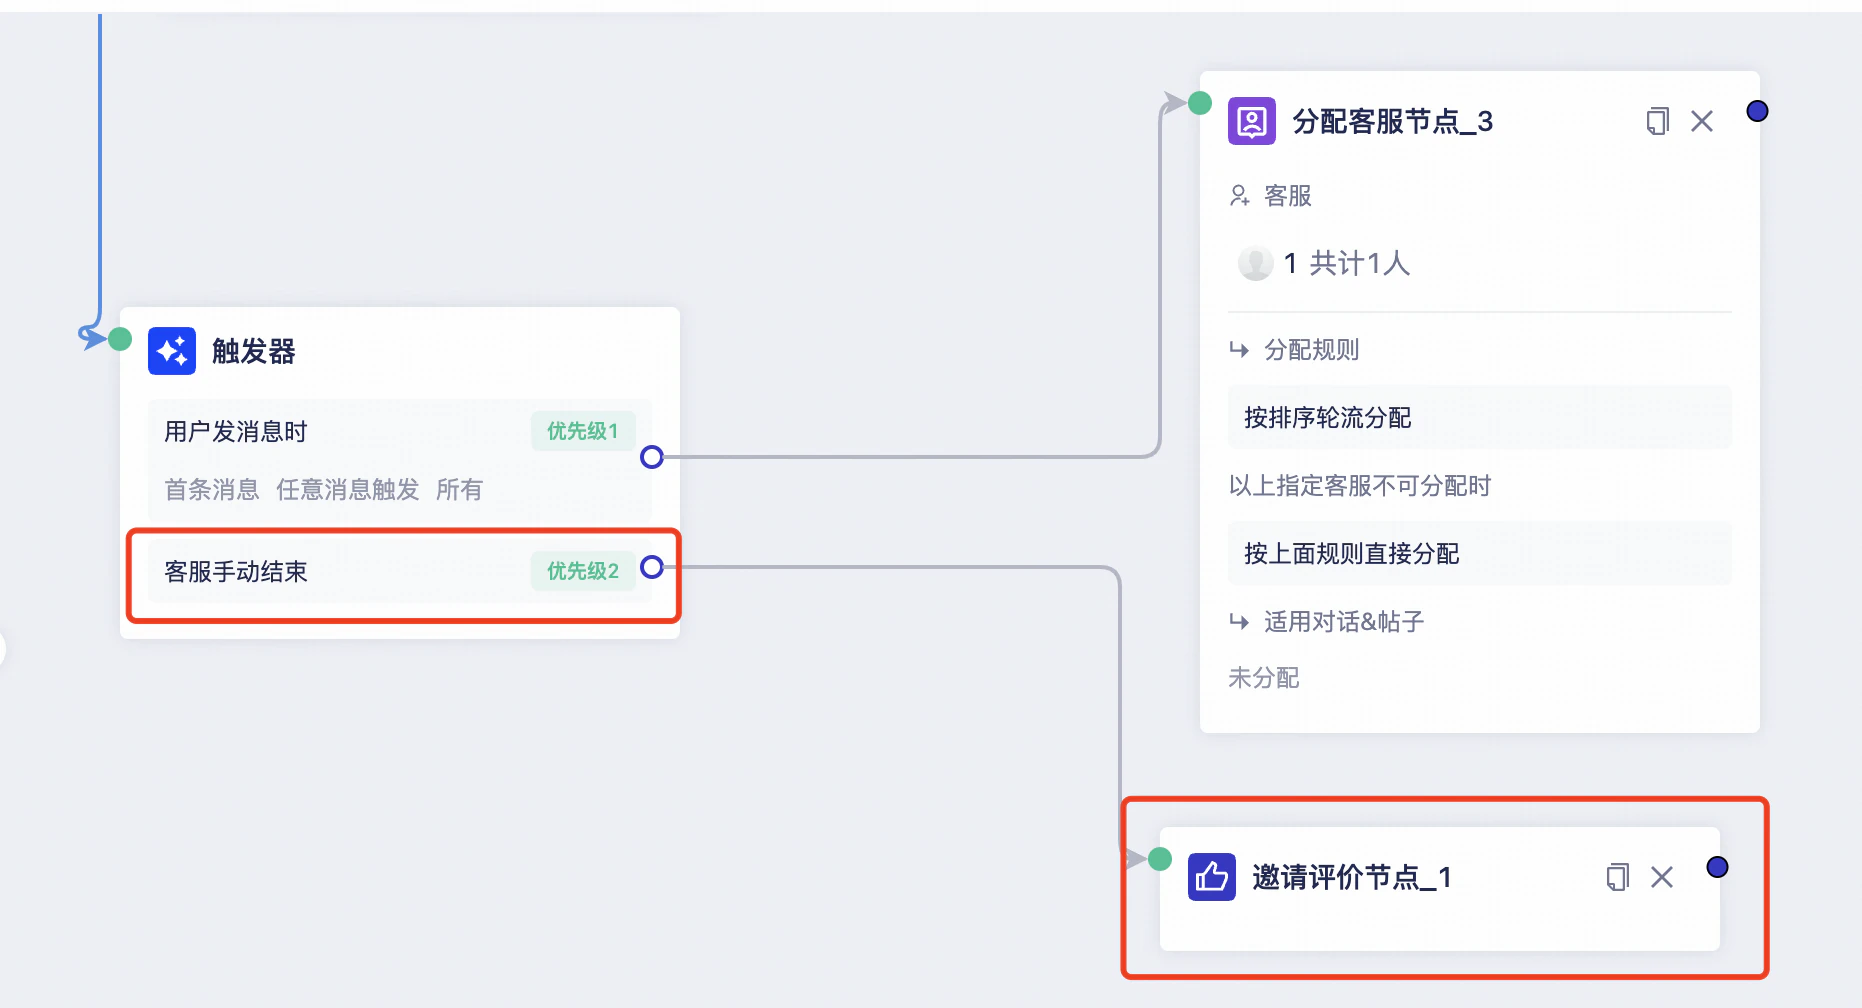
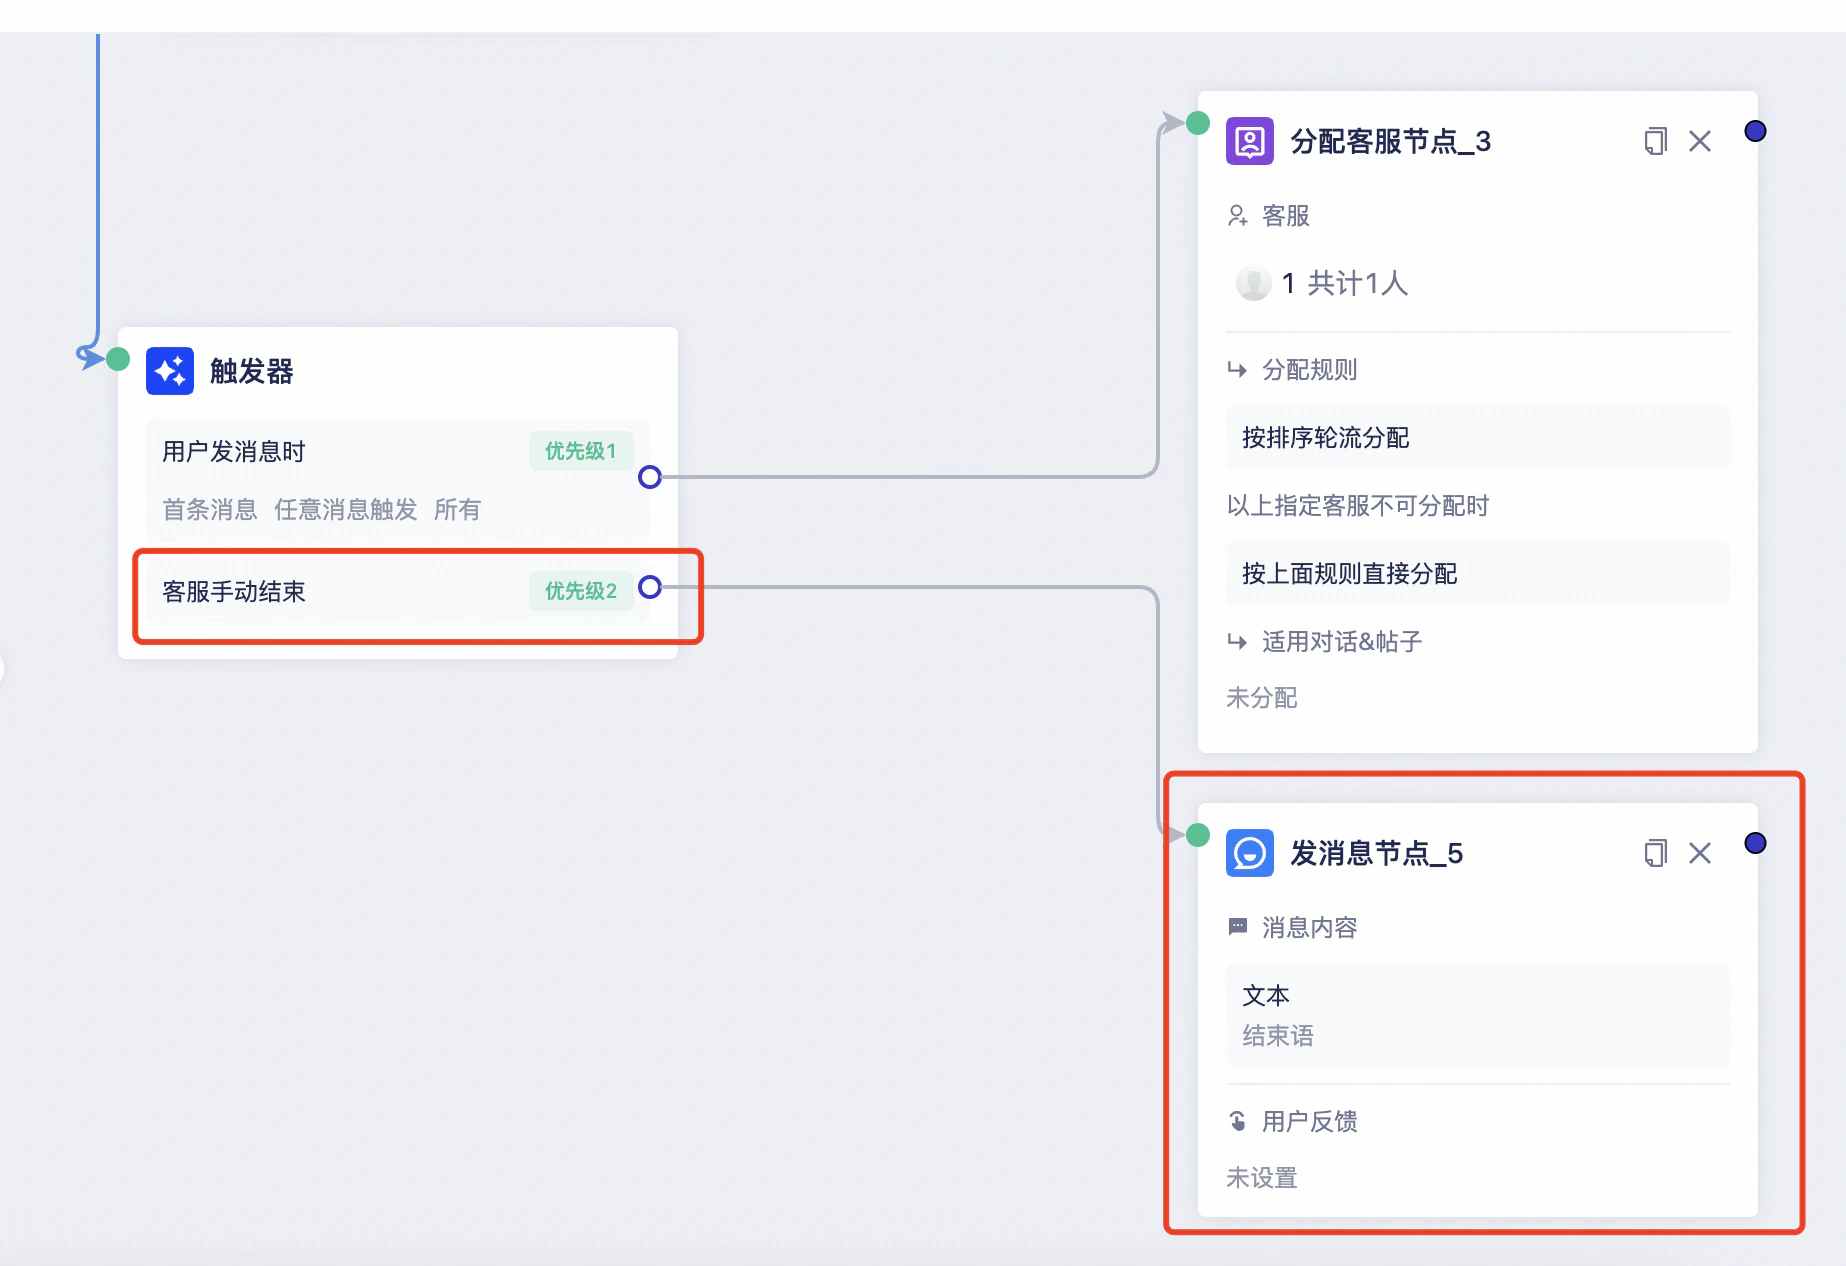
6. When a team member ends the conversation: Starts when a team member manually ends a conversation. On Website and App SDK channels, it can send a rating invitation. On other channels, it can send a message.
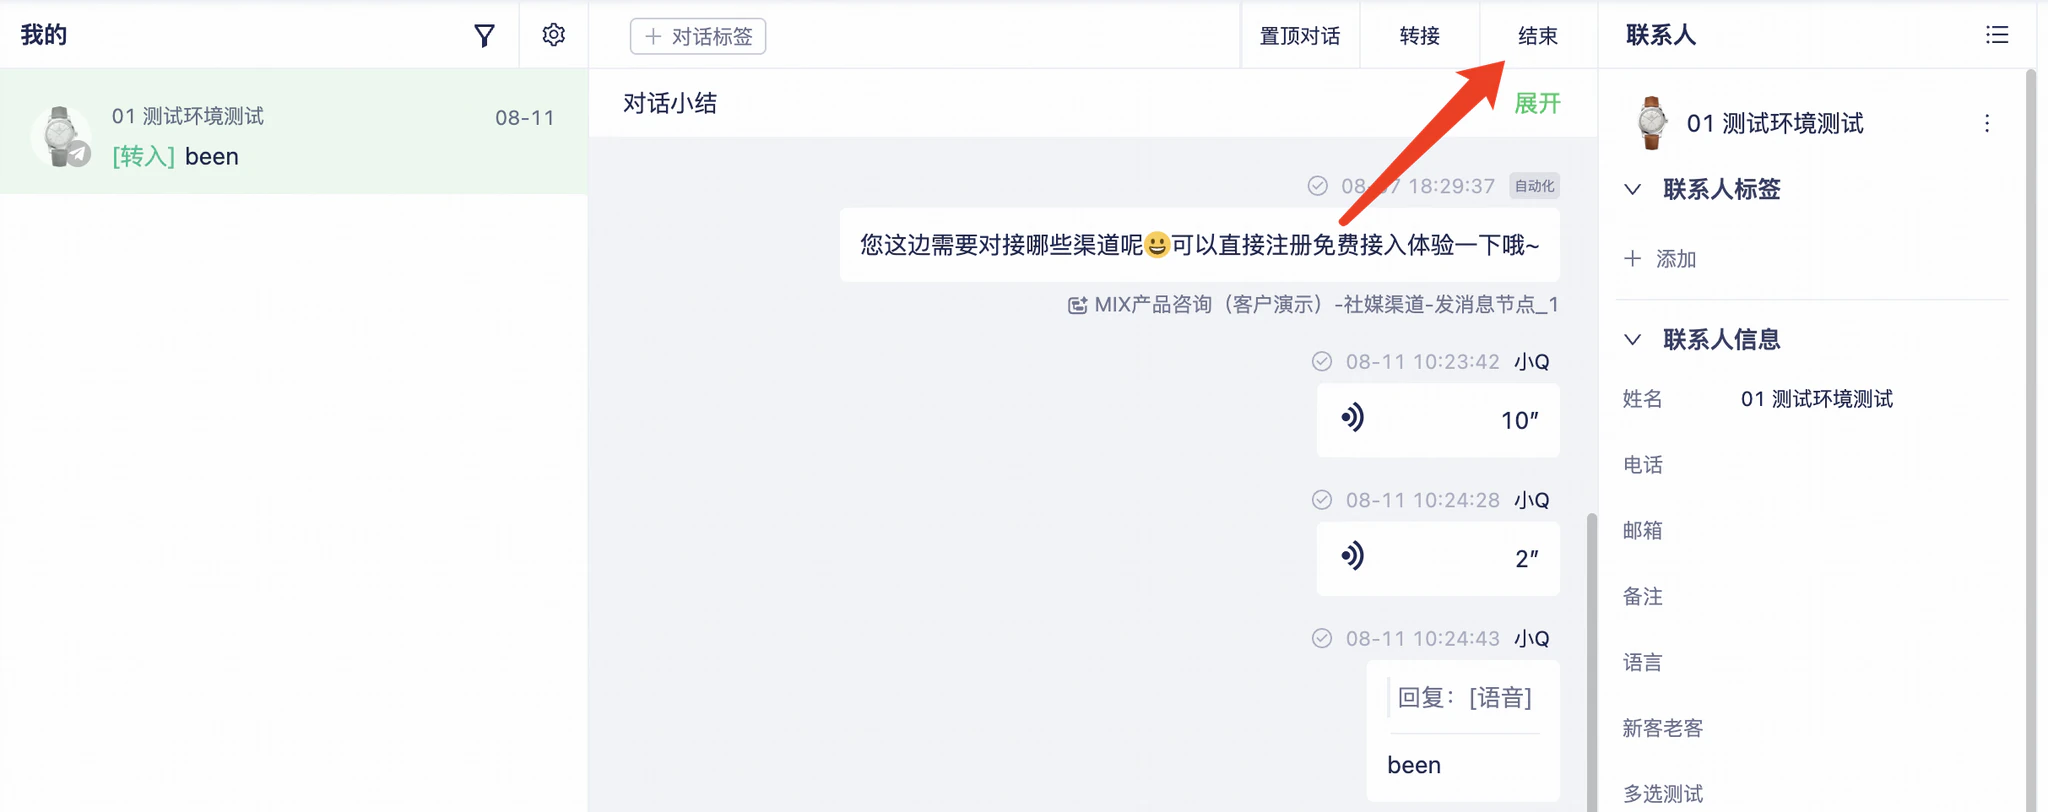
Website and App SDK channels:
Instagram, WhatsApp, Telegram, and other channels:
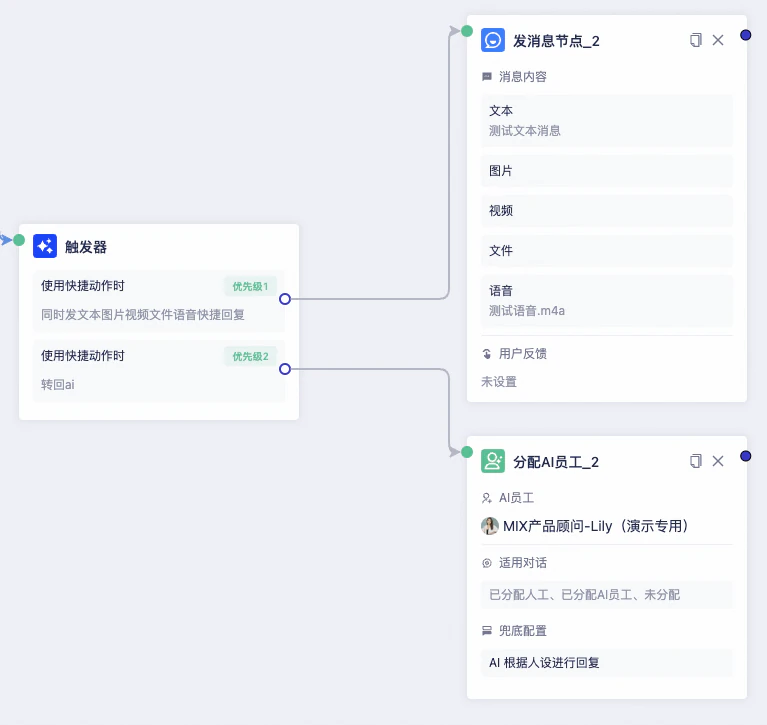
7. When a quick action is used: Names support up to 100 characters and need not be unique, so choose recognizable names.
Quick actions can transfer a conversation from a human back to an AI Agent or send saved text, images, videos, files, and audio.
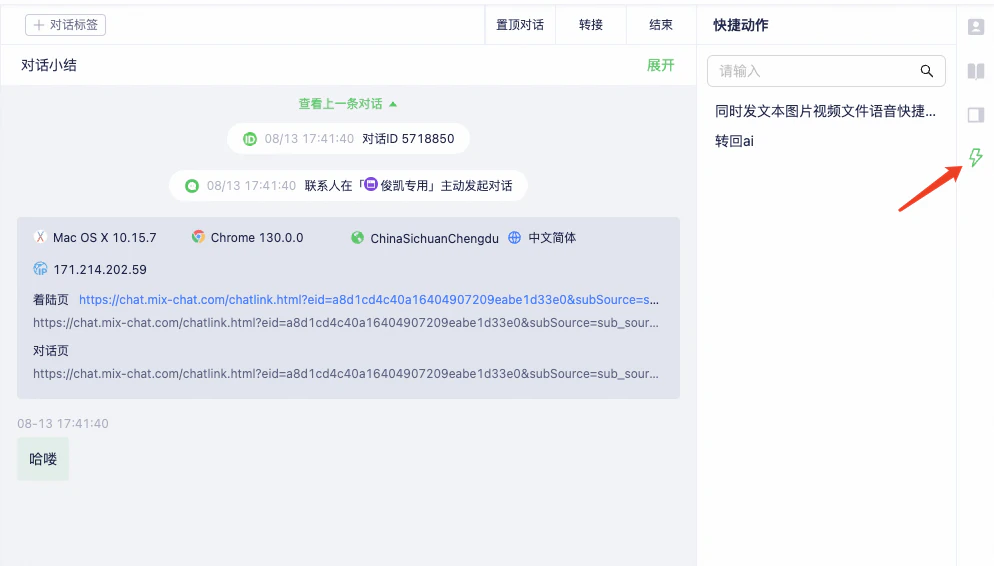
Where to use quick actions:
8. When a user comments: Applies to Facebook comments. Like, hide, delete, or reply to the comment.
9. When a user visits a specific page: Send a message or assign a team member when the user enters that page.
3. Adjust trigger order
Drag triggers to change their priority.
Step 5: Configure action nodes
Connect action nodes to triggers to send text, images, videos, or files; assign AI Agents or team members; add tags; or set information such as phone numbers.
1. Send Message: Configure text, images, videos, or files, and add quick buttons or user-feedback buttons.
Configure quick buttons first under Settings > Quick Buttons.
Quick buttons support copying content, calling a phone number, opening a link, sending a message, showing an image overlay, and self-service Q&A. Channel support varies; see the configuration page.
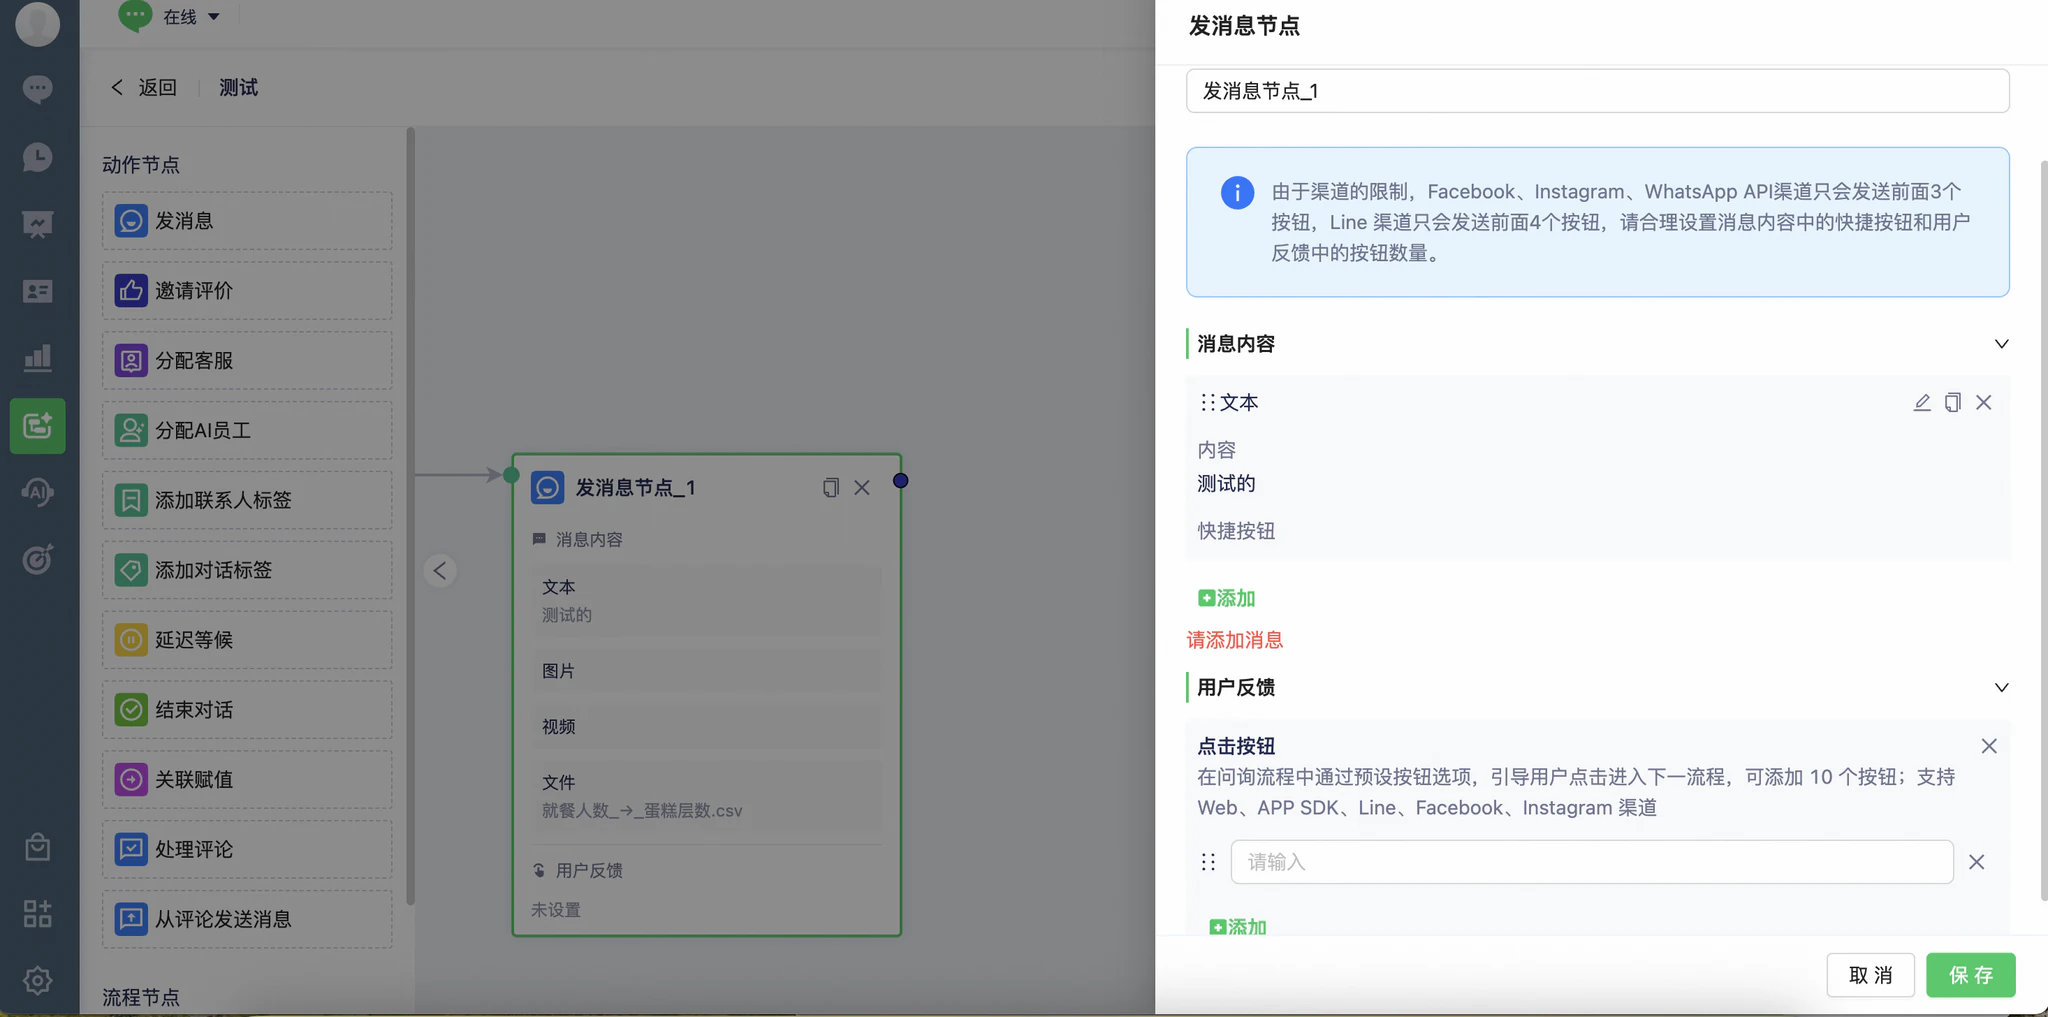
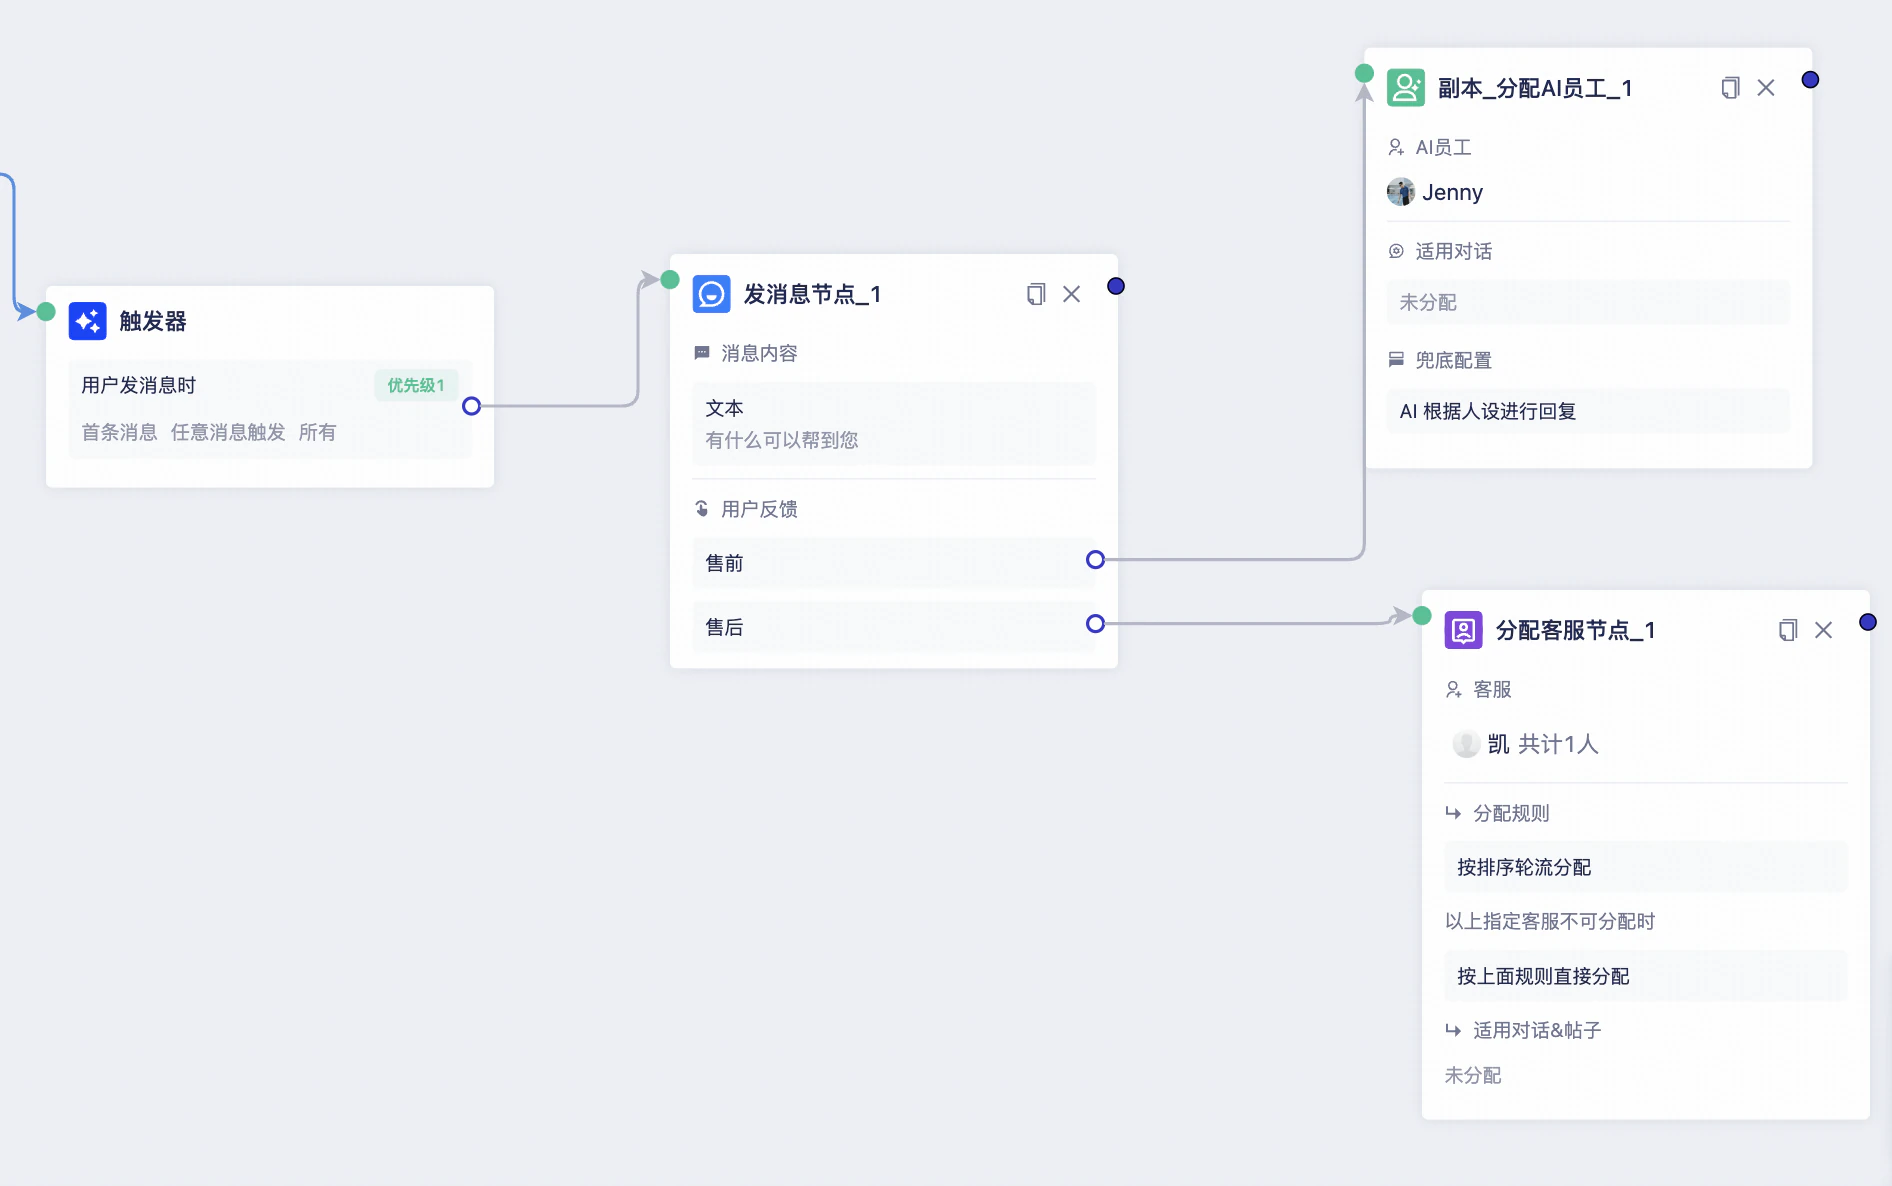
User-feedback buttons support Web, App SDK, LINE, Facebook, and Instagram. Selecting a button can start the next action.
Example: Route presales and after-sales selections to different team members.
2. Request Rating: Usually connected to the manual conversation-end trigger. Configure ratings under Settings > Ratings. SDK channels require rating configuration first.
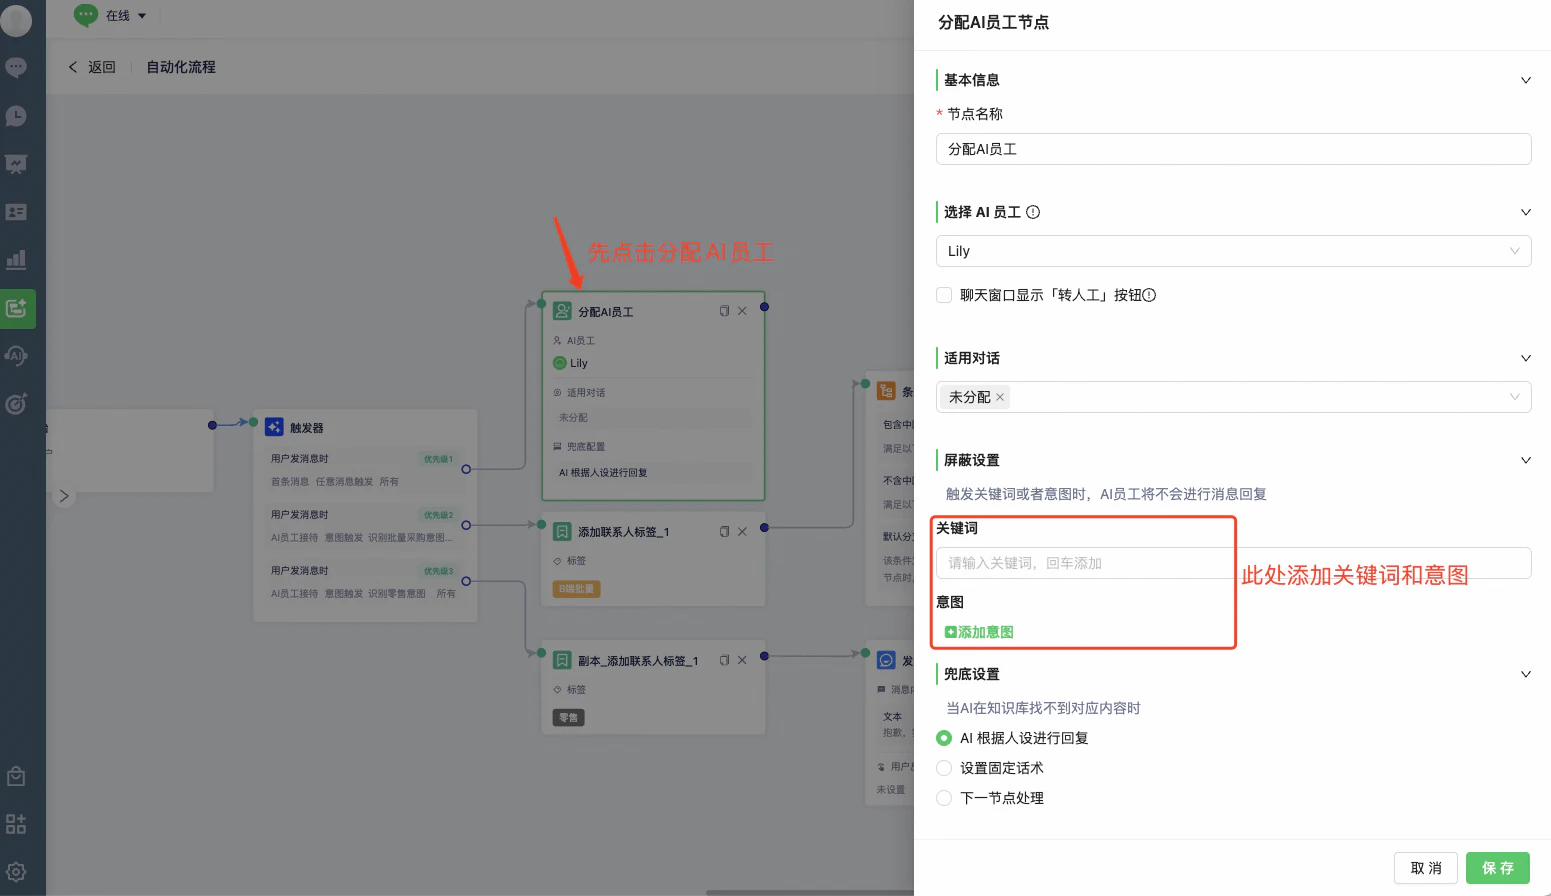
3. Assign Team Member / Assign AI Agent: Select the applicable conversation state. Use Unassigned for new inquiries, Assigned to AI for human handoff, and Assigned to Human for transfers to another person or back to AI.
Block AI replies: Configure blocked keywords or intents when an assigned AI Agent should not respond to certain messages.
Returning visitors: Prioritize the previous team member. If unavailable, choose direct assignment or the basic assignment rules.
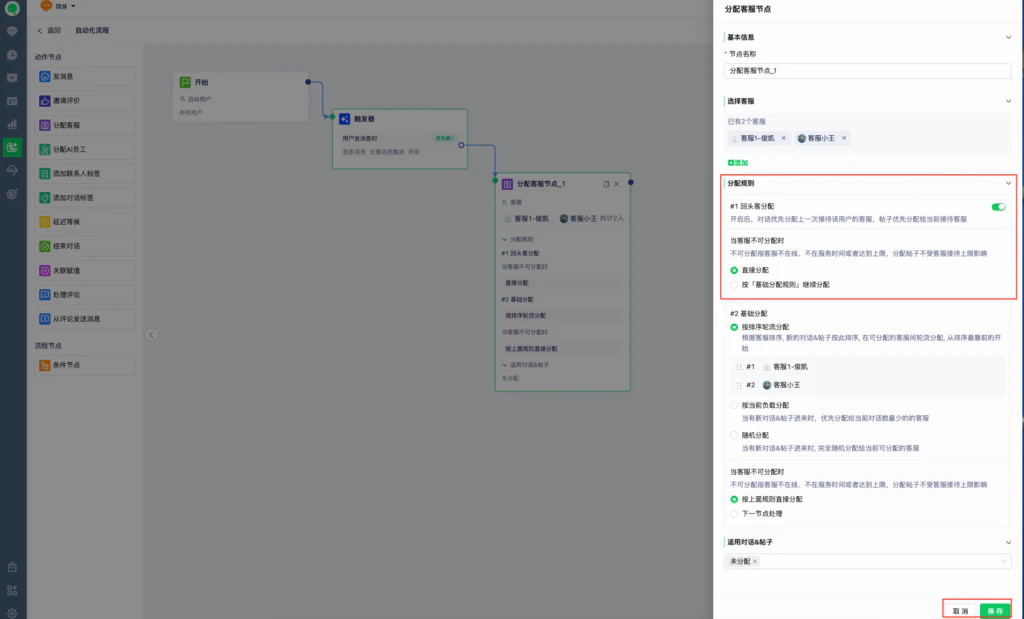
4. Add Contact Tag / Conversation Tag: Create tags in Settings first. Connect tagging actions to intent-based user-message triggers.
Example
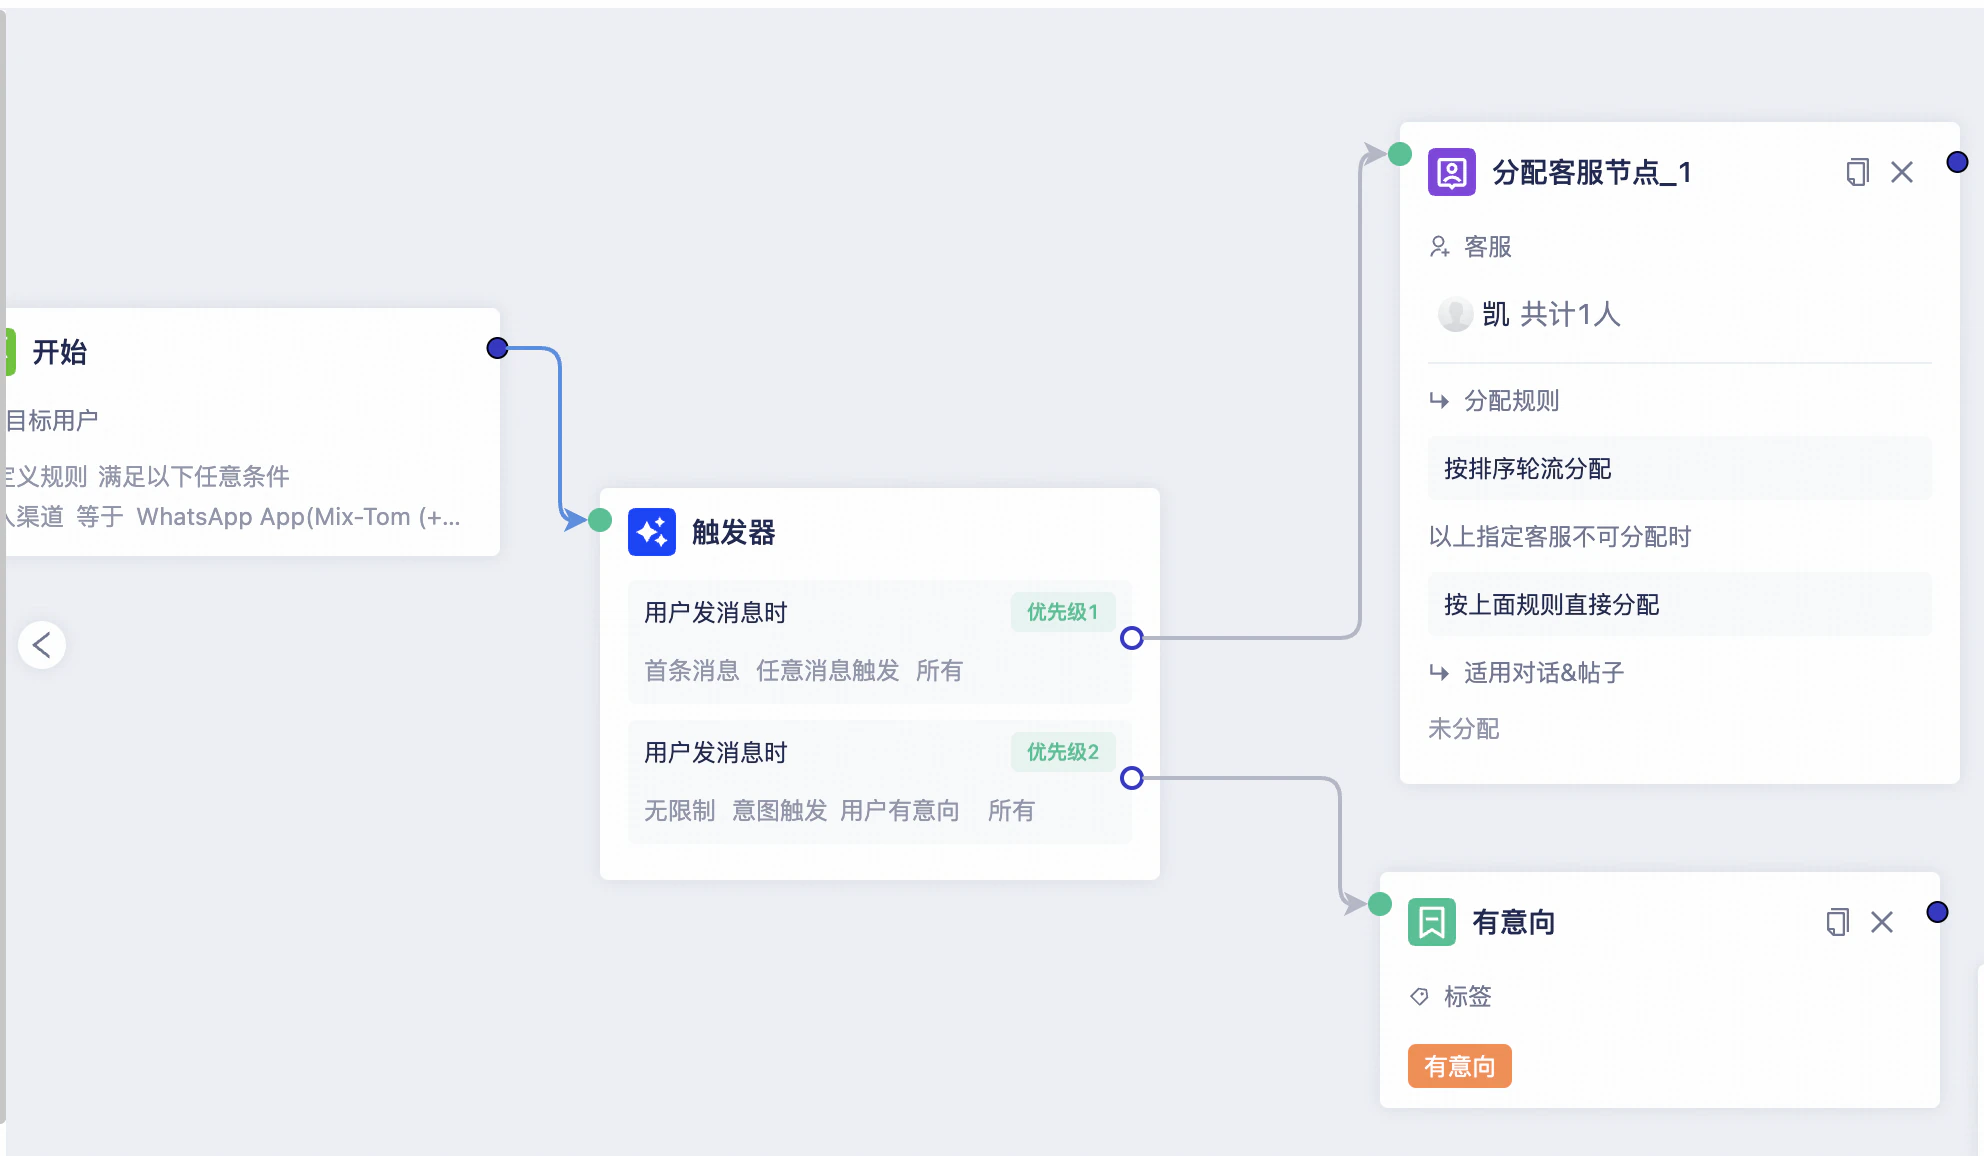
5. Delay: Wait for a duration or a specified time later the same day. Scheduling the next action for the following day is not supported.
For a specified-time delay, a missed time means, for example, the target is 4 p.m. but the visitor arrives at 5 p.m.
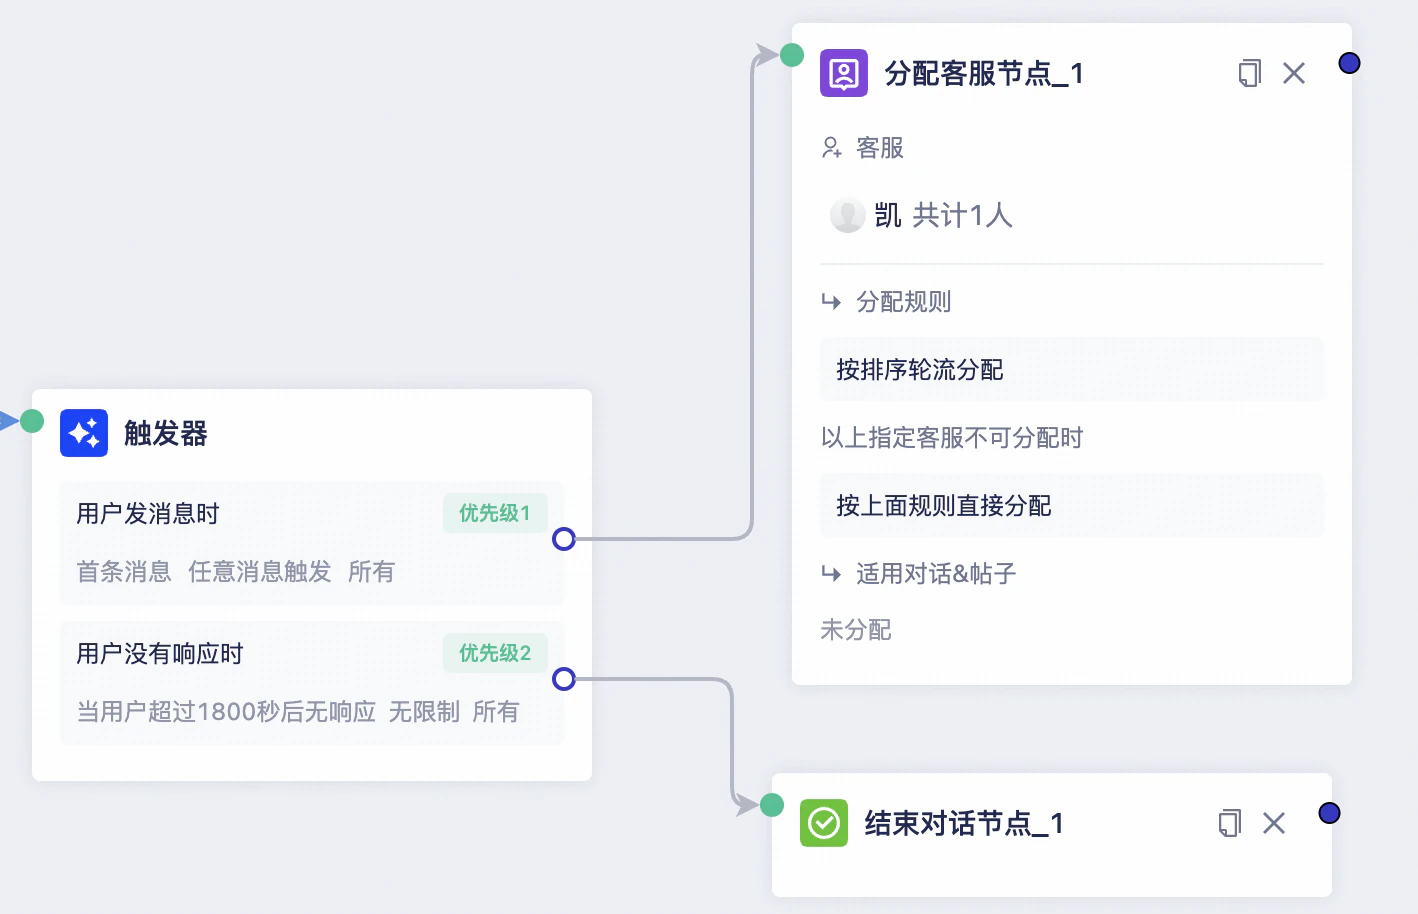
6. End Conversation: End the current conversation through a workflow or Settings > Conversation Rules > Automatically End Conversations. Automatic closure supports up to 15 days without a message from either party.
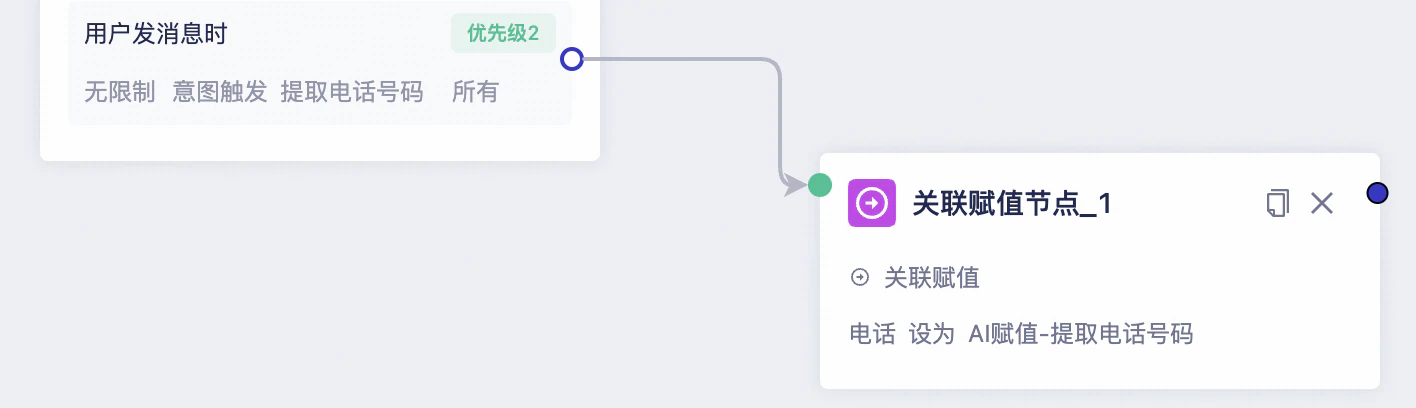
7. Assign Field Value: Use intent recognition to set contact fields, with fixed or AI-generated values. AI assignment is available only on the Expert plan.
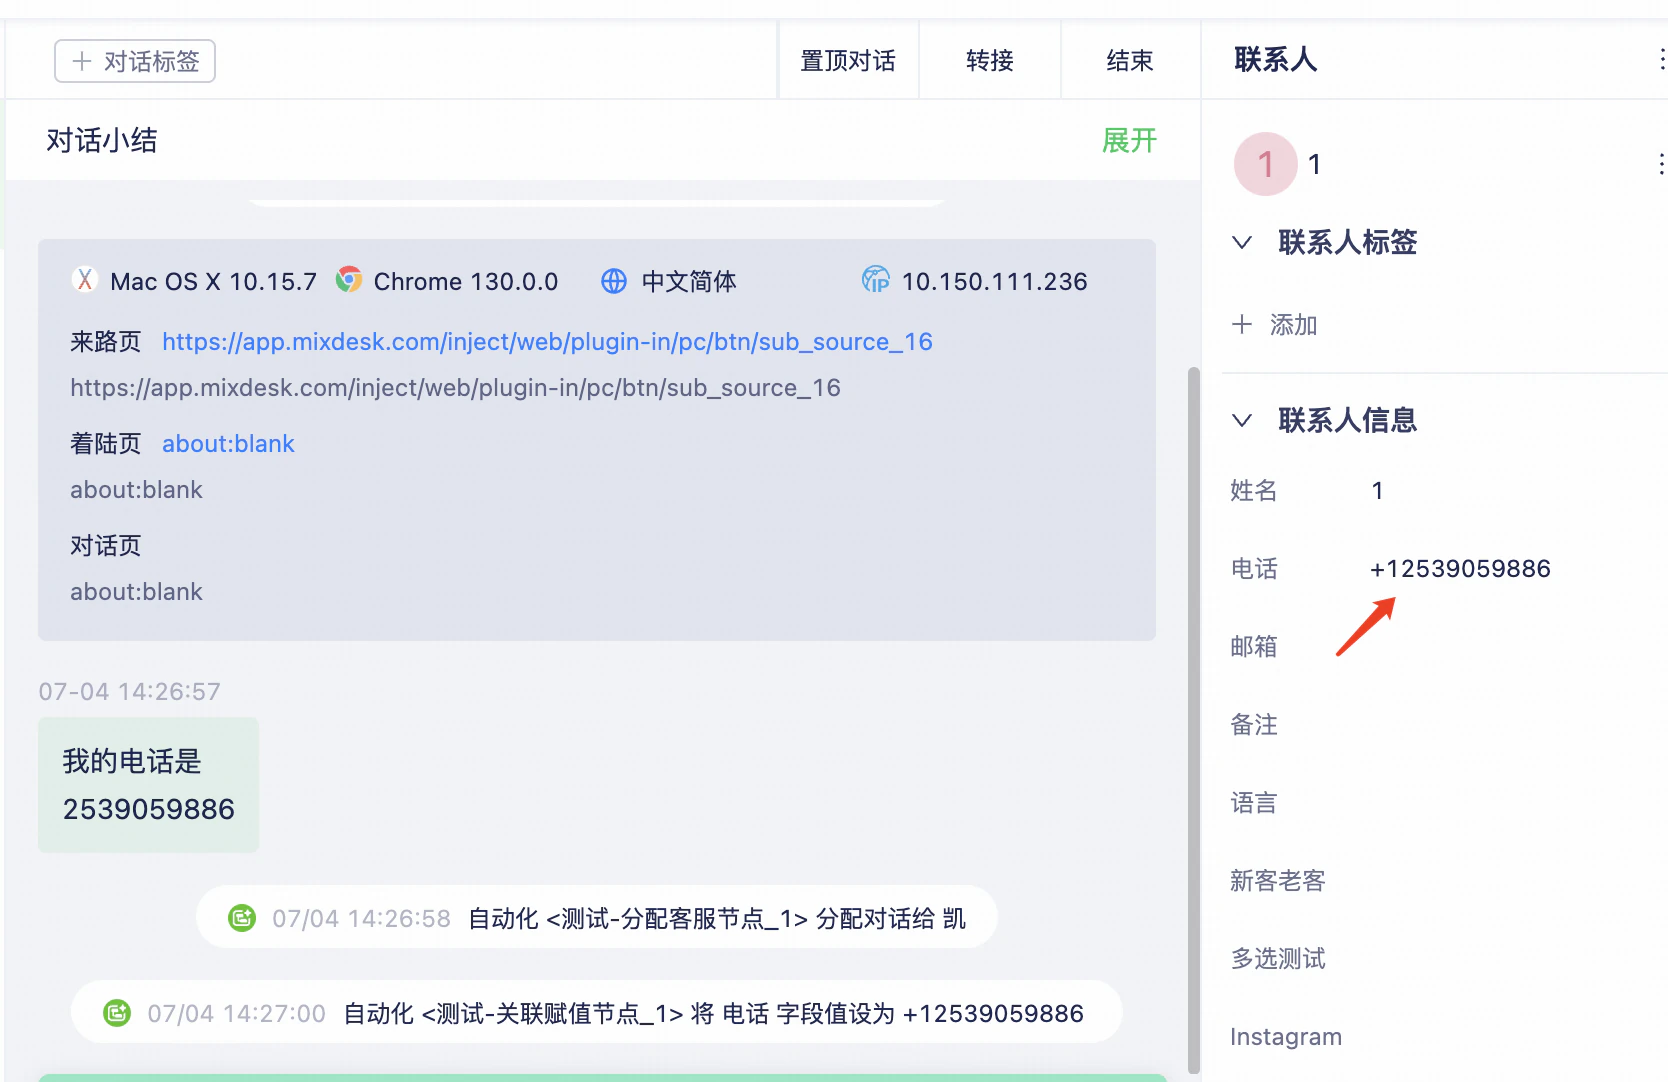
8. Handle Comment / Send Message from Comment: Use with the user-comment trigger. Handle Comment acts on the comment itself; Send Message from Comment sends the user a conversation message.
Step 6: Add condition nodes
Use condition nodes to create branches within a workflow. Each branch can handle different conditions by assigning team members, adding tags, or sending different messages.
Example
1. Set the target audience to All Users.
2. Add a condition node and create channel-specific branches. In this example, one branch matches a Facebook Page and another matches a Telegram bot.
The default branch handles users who do not match any configured condition branch.
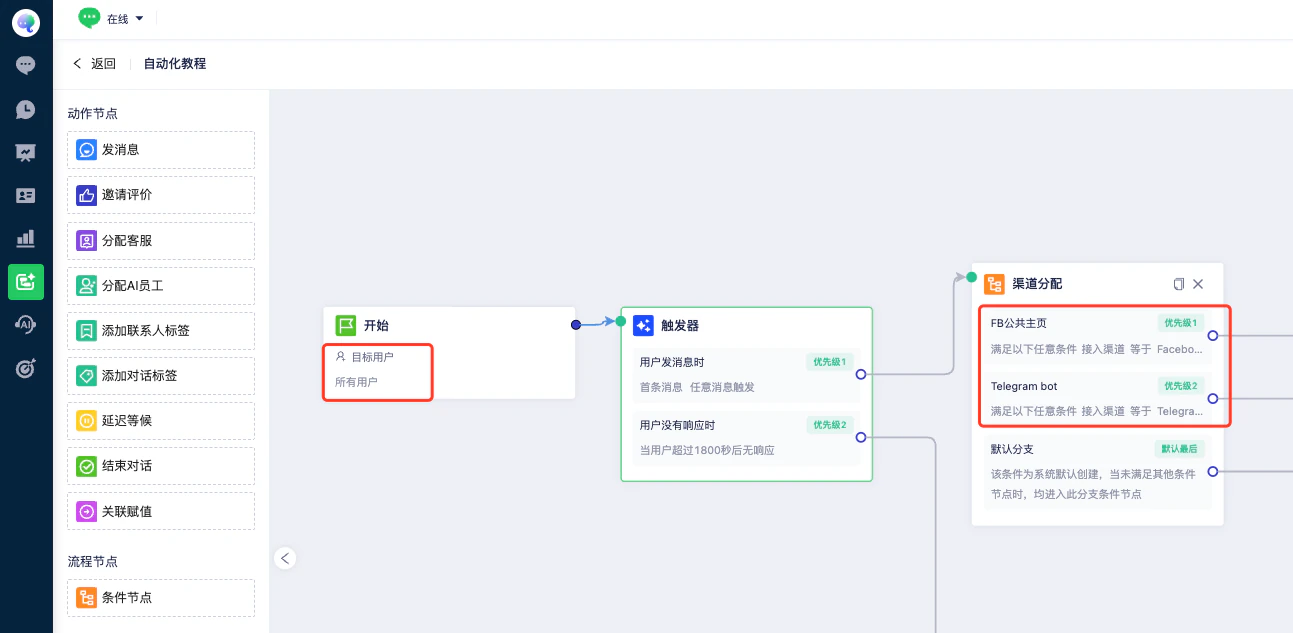
3. Assign the appropriate team members to each condition branch and the default branch.
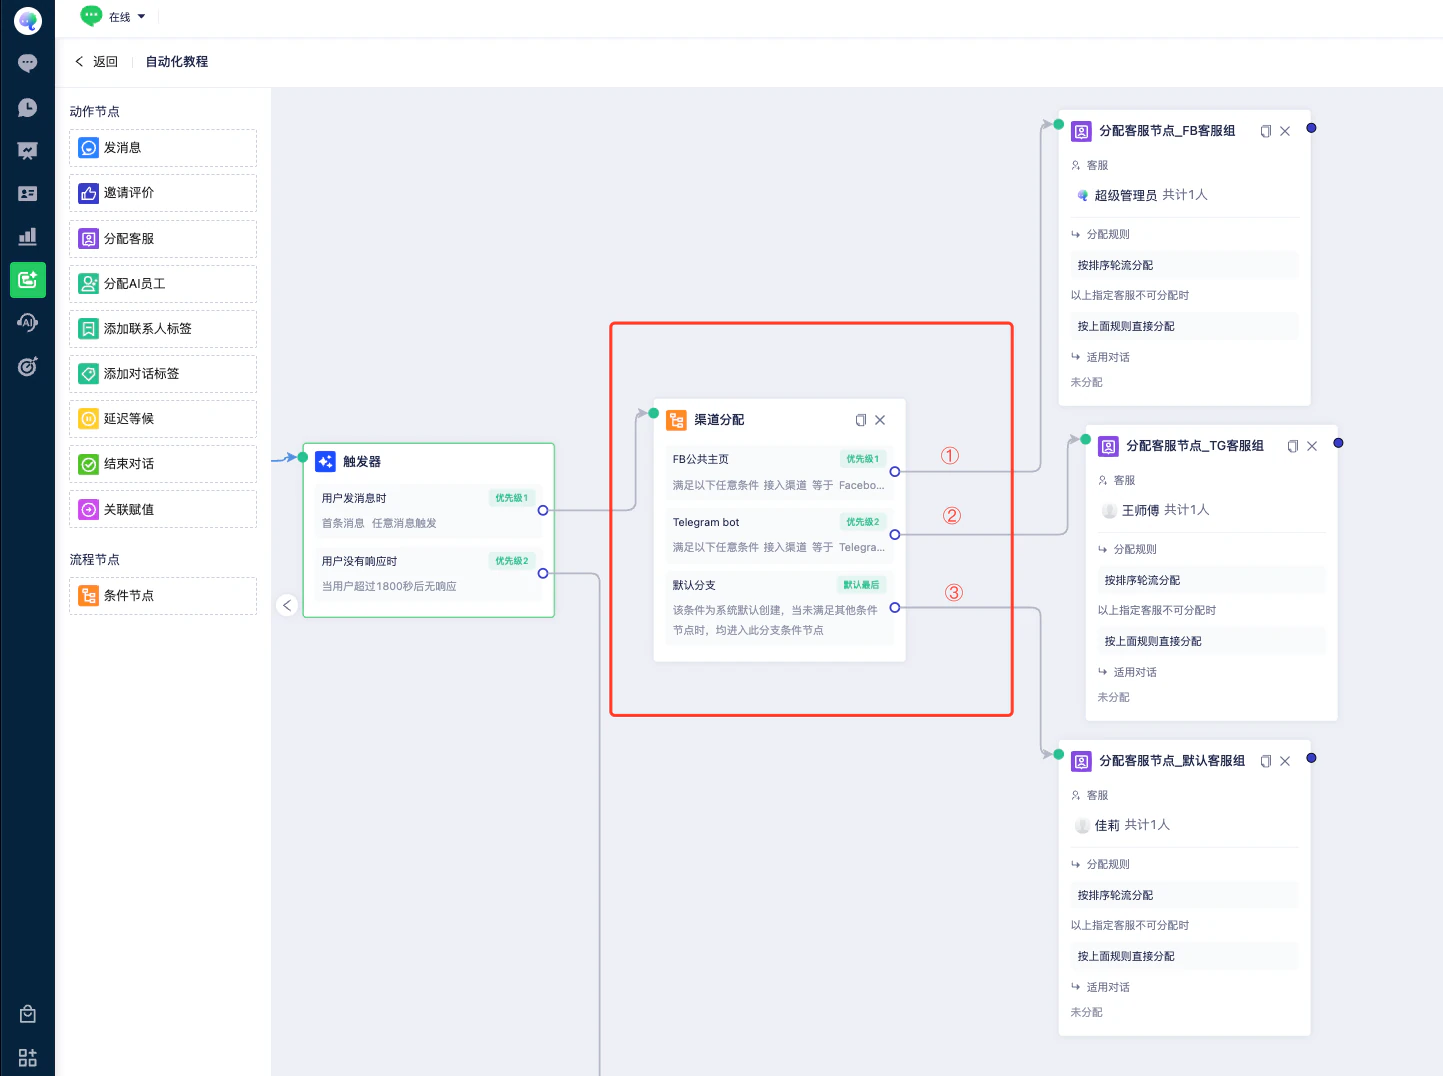
4. Conditions support contact details, connected channel, referrer page, landing page, conversation page, region, and browser language, among other options. Configure them for your business.
Step 7: Test the workflow
Create and enable the workflow, then start a test conversation on a connected channel to check its behavior.
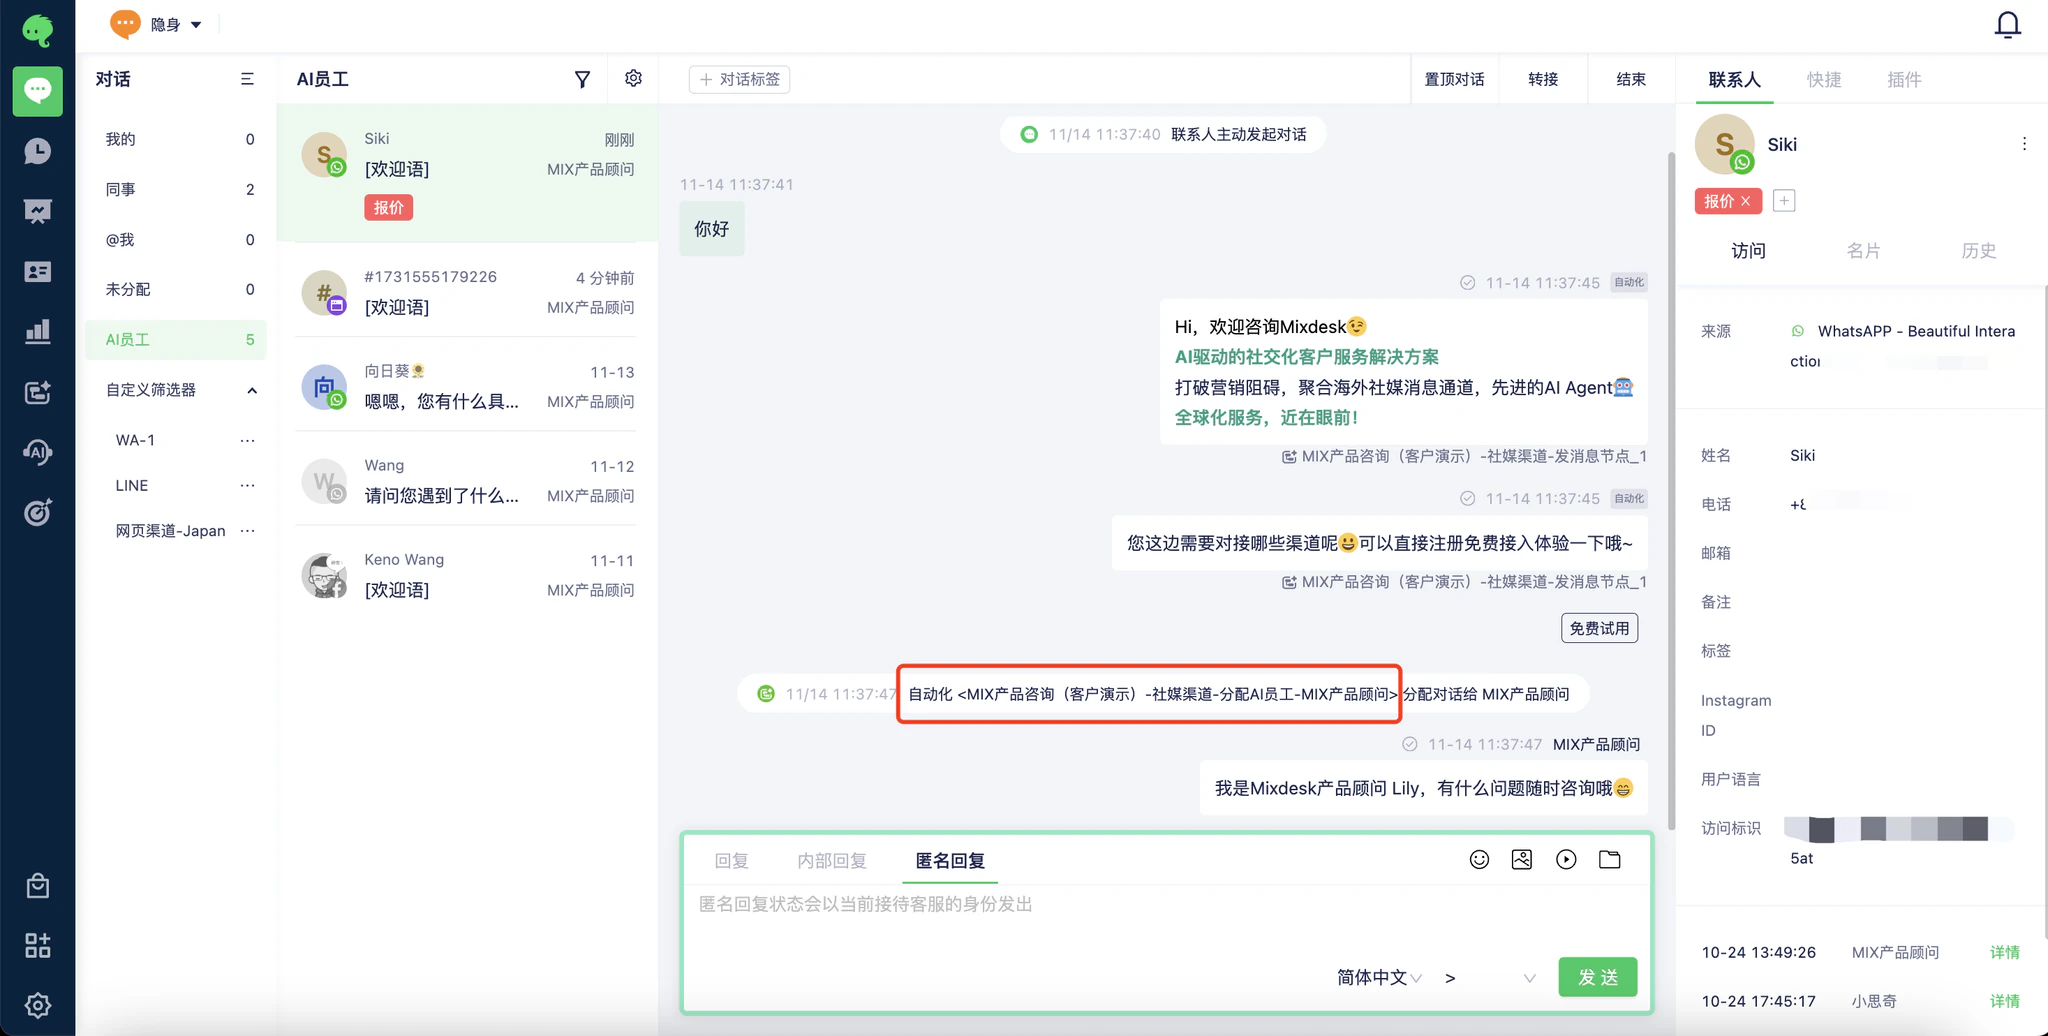
Initial setup may take time. Once configured, the workflow runs your support process automatically.
Contact us if you need help configuring a workflow.