Overview
Customize the Inbox to manage customer messages across channels and support your team’s workflow.
Step 1: Explore the Inbox
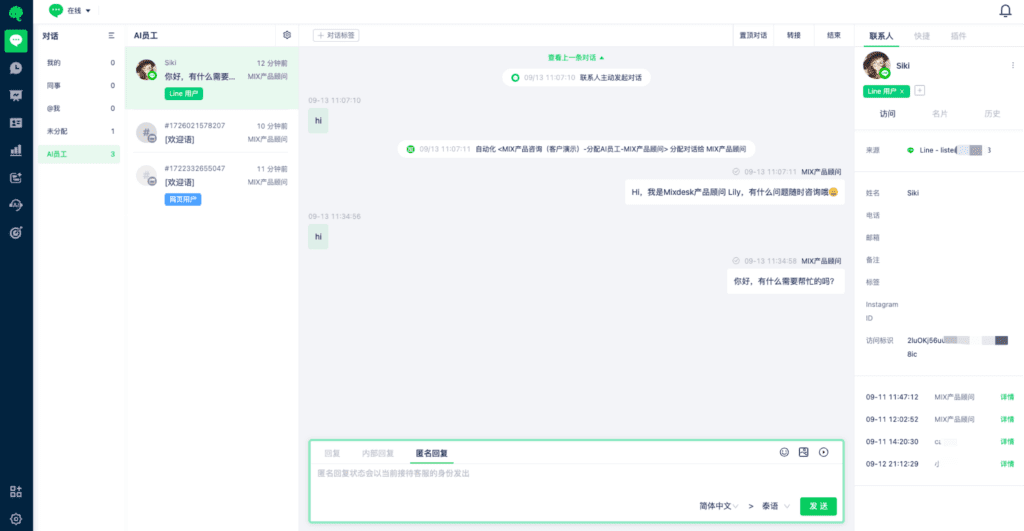
The Inbox has three areas:
- The left pane lists conversations under Mine, Colleagues, Mentions, Unassigned, and AI Agents.
- The center shows messages and replies, along with collaboration, transfers, and conversation tags.
- The right sidebar contains contact information, quick replies, and iframe integrations. Review and edit customer details or find a saved reply here.
Step 2: Configure the conversation page
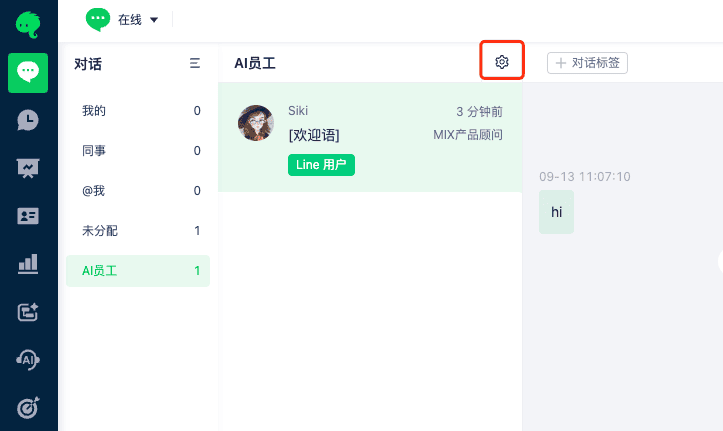
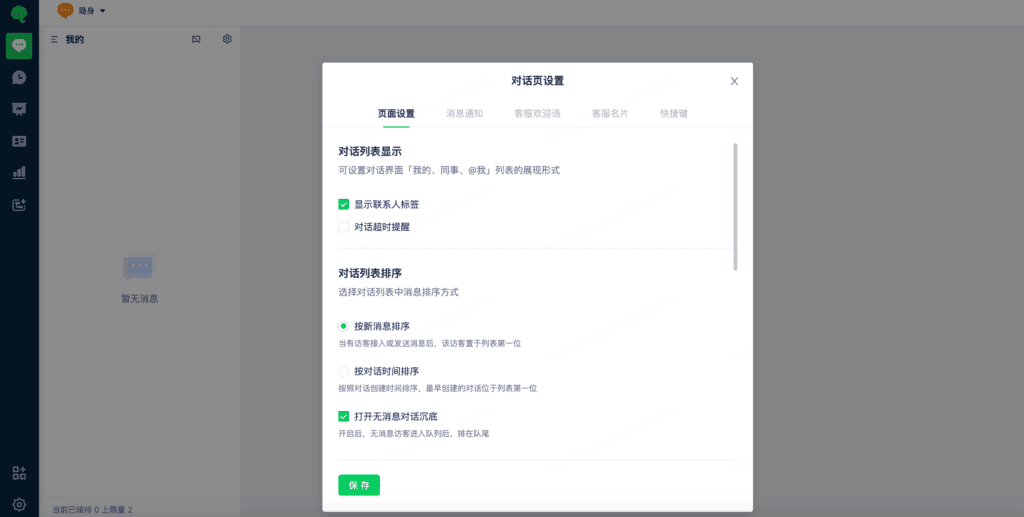
Select Inbox in the left navigation, then the settings button in the conversation list.
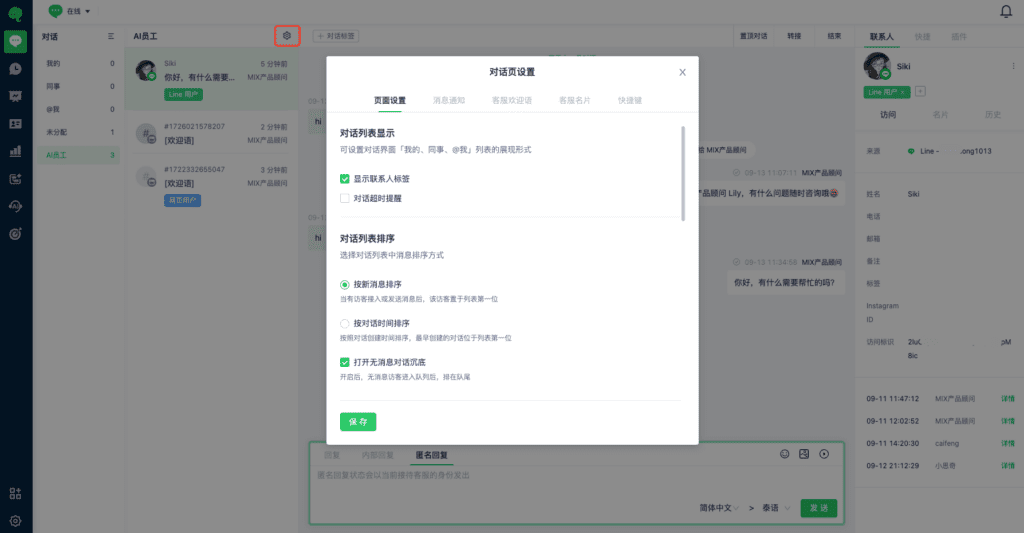
Conversation Page Settings includes page layout, notifications, welcome messages, support profiles, and keyboard shortcuts.
1. Conversation list display
Configure the display for Mine, Colleagues, and Mentions. Choose whether to show contact tags and response-timeout reminders in the list.
2. Conversation list order
Choose a sorting method, including newest message, conversation time, or moving conversations with no messages to the bottom.
How it works: When this option is enabled, visitors who have not sent a message are placed at the end of the queue.
3. Right sidebar settings
Customize the right sidebar’s layout.
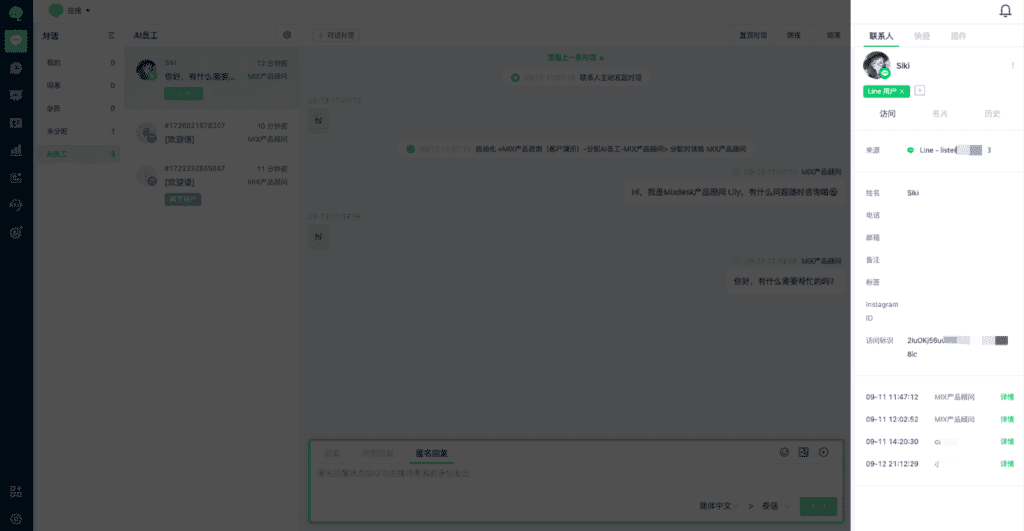
1. Tab display
Choose whether to keep quick replies visible or show an iframe, or switch between them using tabs.
2. Default tab
Choose one default tab from Contacts, Quick Replies, or External Plugins to show the information you need first.
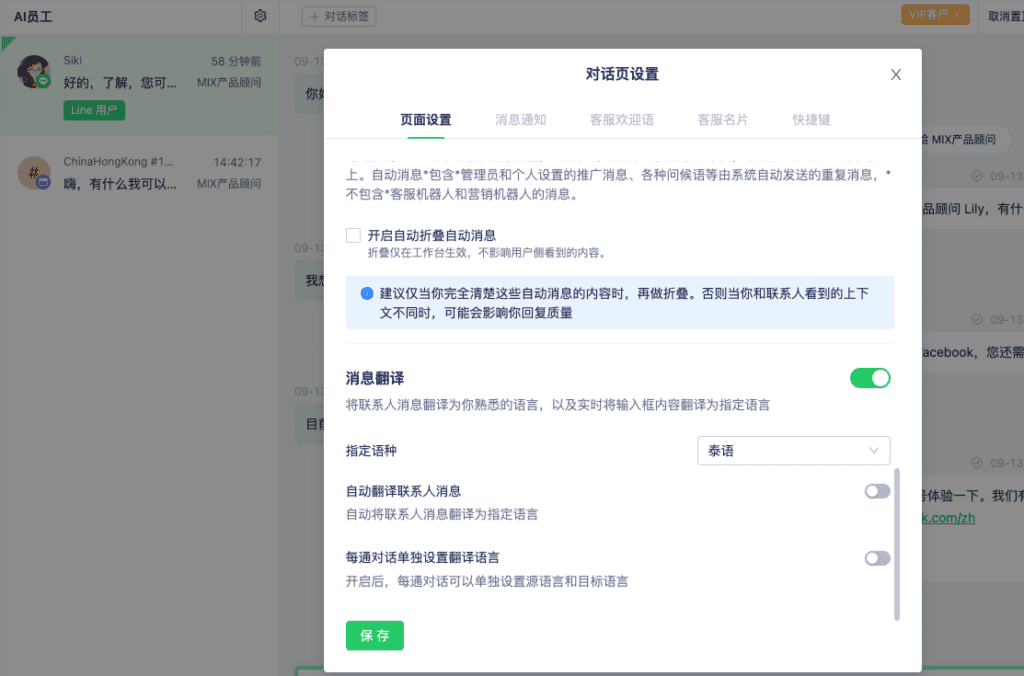
3. Message translation settings
Enable Message Translation to translate incoming messages automatically into a language you understand and translate your draft into a selected language in real time.
- Automatically translate contact messages: Translate incoming messages into your selected language in the Inbox.
- Set translation per conversation: Choose separate source and target languages for each conversation.
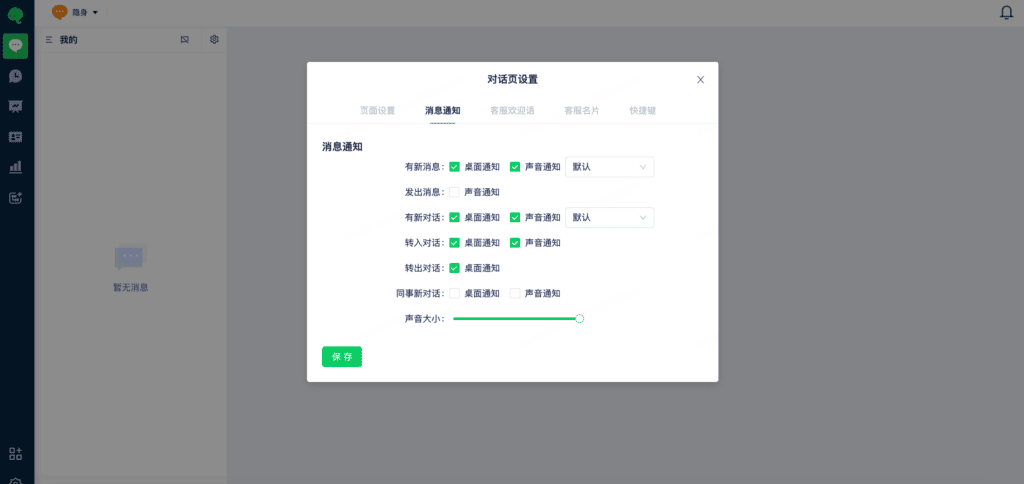
4. Message notifications
Customize notification conditions, sounds, and volume.
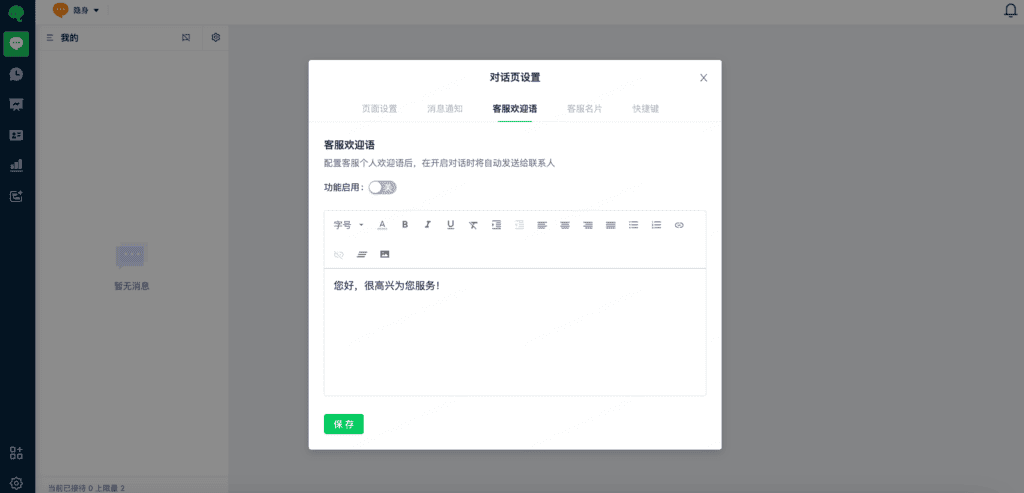
5. Personal welcome message
Configure a personal welcome message to send automatically when a conversation starts.
6. Support profile
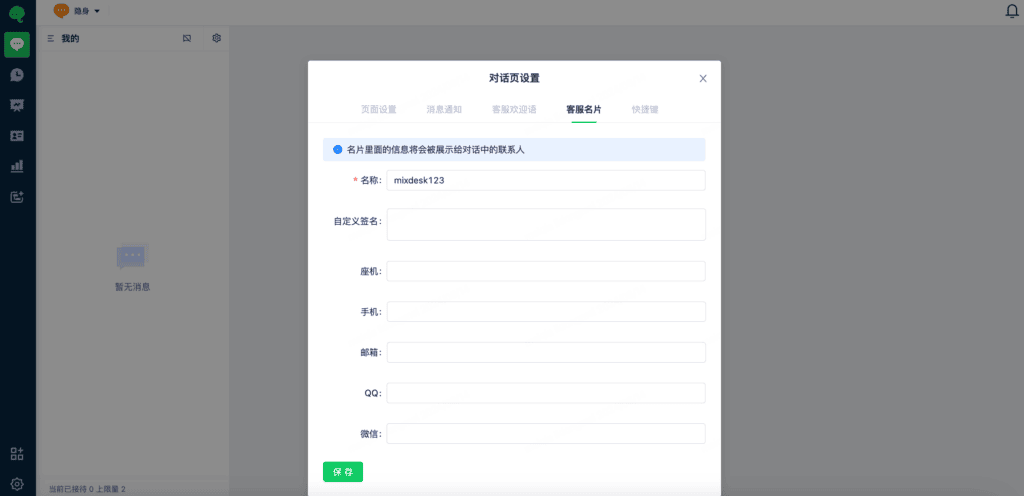
Configure the details shown in the chat window, including name, phone number, email, and QQ. Visitors can see these details in their chat window.
Only the name is required.
7. Keyboard shortcuts
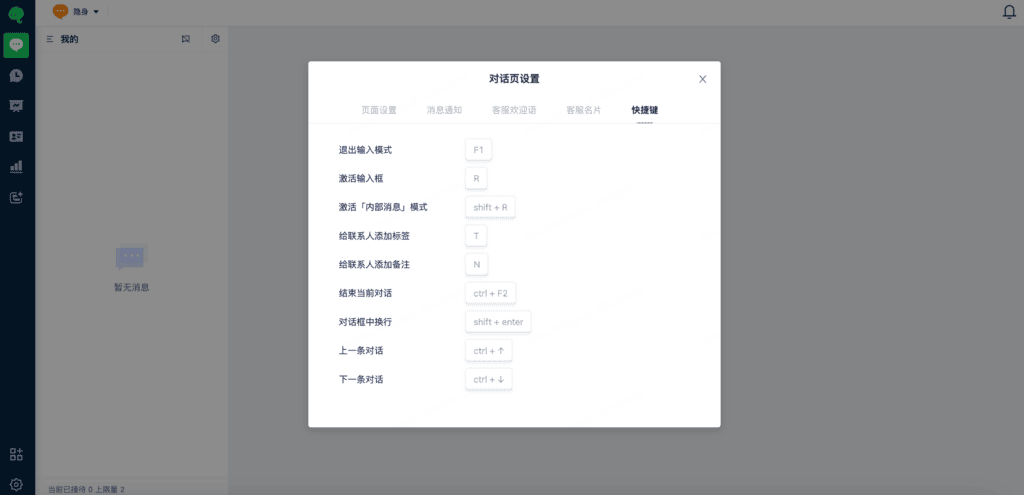
Default shortcuts are available for common actions. They cannot currently be changed.
Step 3: Work with conversations
View and reply to messages in the center of the Inbox.
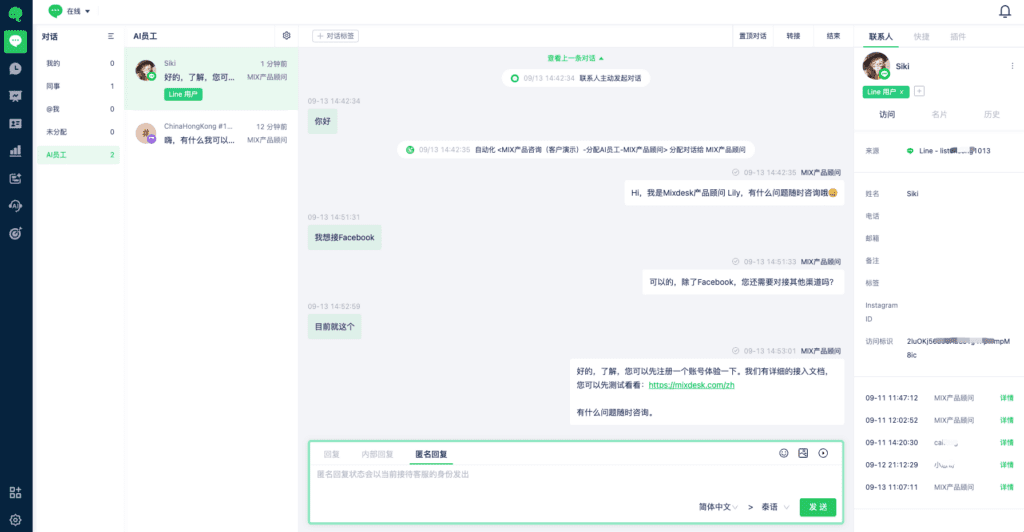
Use the available actions to manage conversations and collaborate with colleagues.
1. Transfer a conversation
If you are busy or another colleague should handle the issue, select Transfer in the upper-right corner and choose a group or team member.
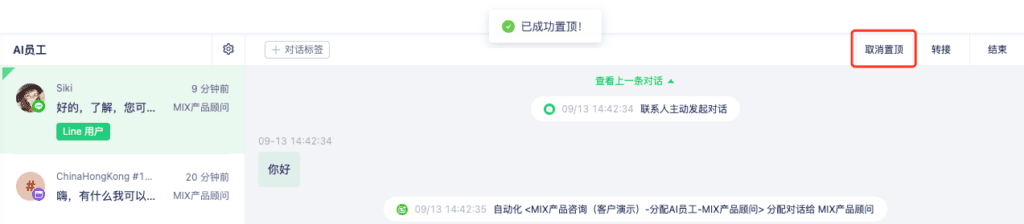
2. Pin a conversation
Pin important conversations so they are easier to find and respond to.
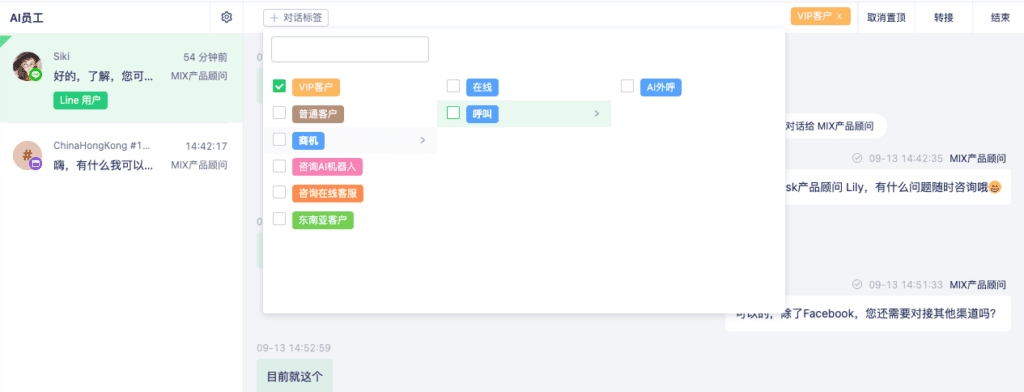
3. Add conversation tags
Tag the current conversation to record key information. Tags support up to three levels and help with reporting and filtering.
To configure conversation tags, see:
4. Translate messages
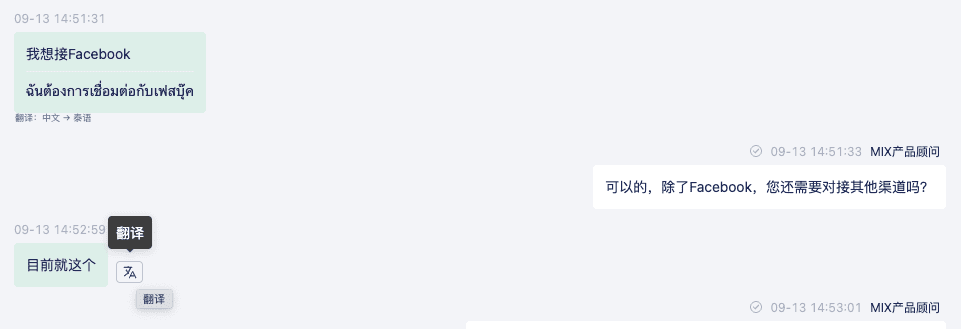
The Inbox supports message translation in addition to workspace language settings.
1. Select Translate on a message. To translate all incoming messages automatically, enable Automatically Translate Contact Messages in Conversation Page Settings.
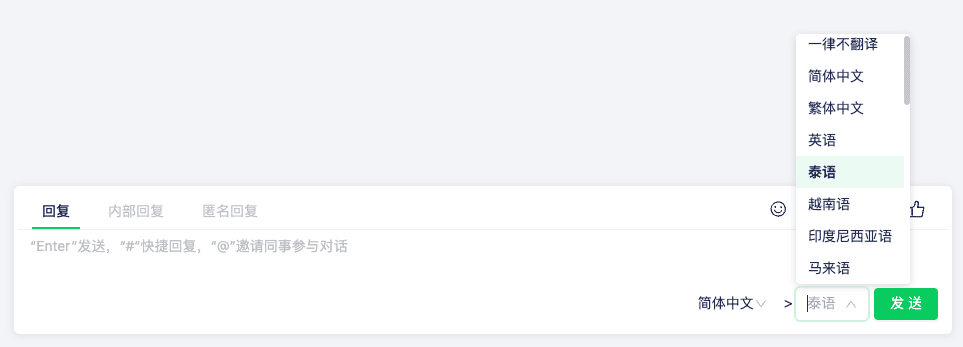
2. Choose a translation language in the message composer to translate your outgoing messages when sending.
5. Collaborate on a conversation
Work with colleagues to resolve customer questions.
1. Internal replies
Choose Internal Reply to communicate with colleagues without showing the message to the customer. Mention a colleague to request follow-up or assistance.
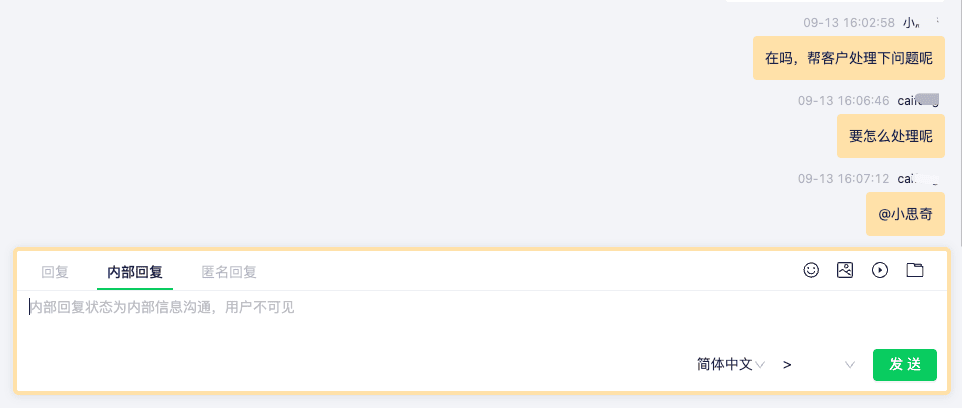
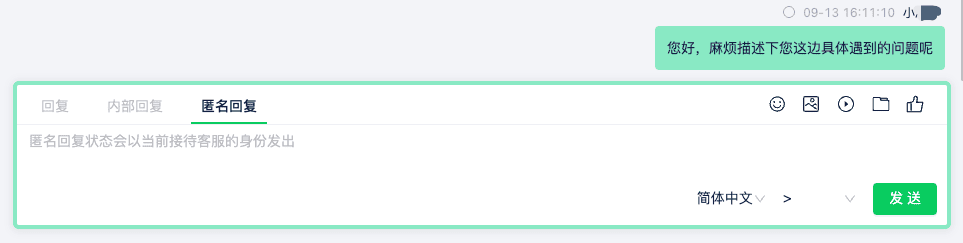
2. Anonymous replies
Choose Anonymous Reply to collaborate while displaying the message to the customer as if it came from the currently assigned team member.