
Overview
WordPress plugins let you add functionality to your website. This guide explains how to install the Mixdesk chat widget and use its AI support features on a WordPress site.
Setup steps
1. Sign in to WordPress
Open your WordPress dashboard. In the left sidebar, select Plugins > Add New Plugin.
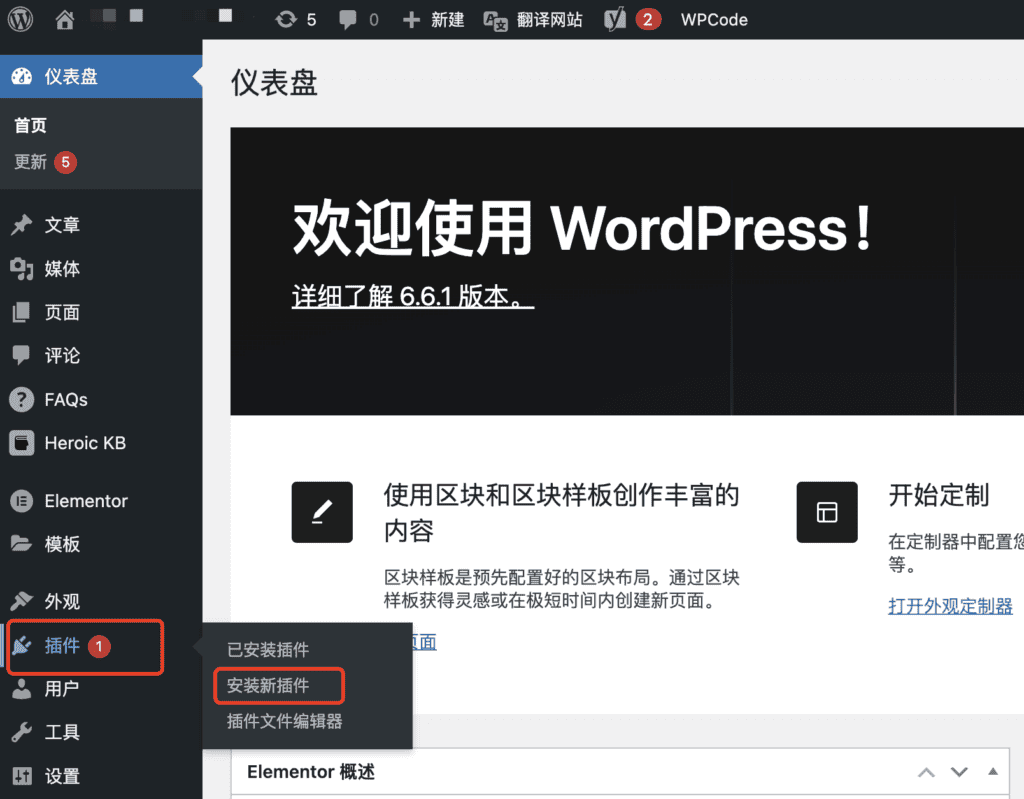
2. Install and activate WPCode
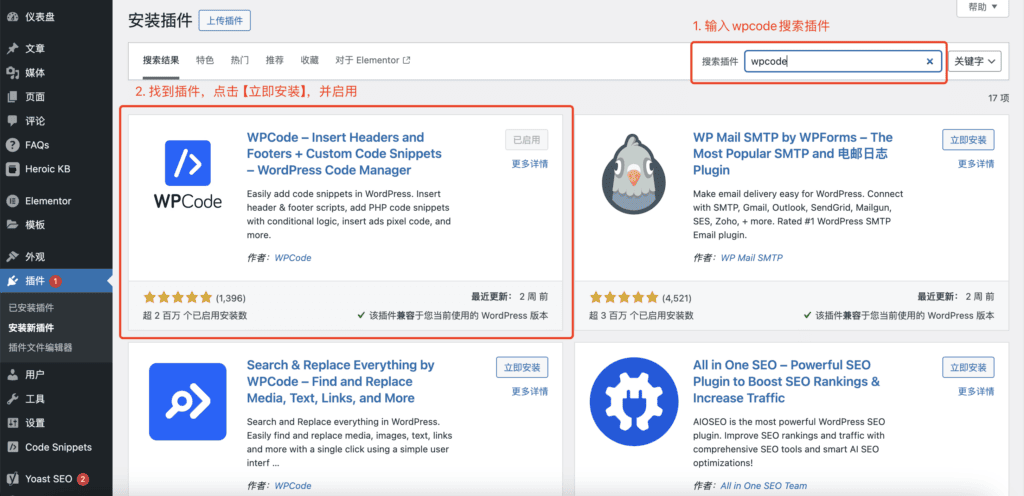
1. On the Add Plugins page, search for “wpcode” or “code”. Find WPCode, select Install Now, and then select Activate.
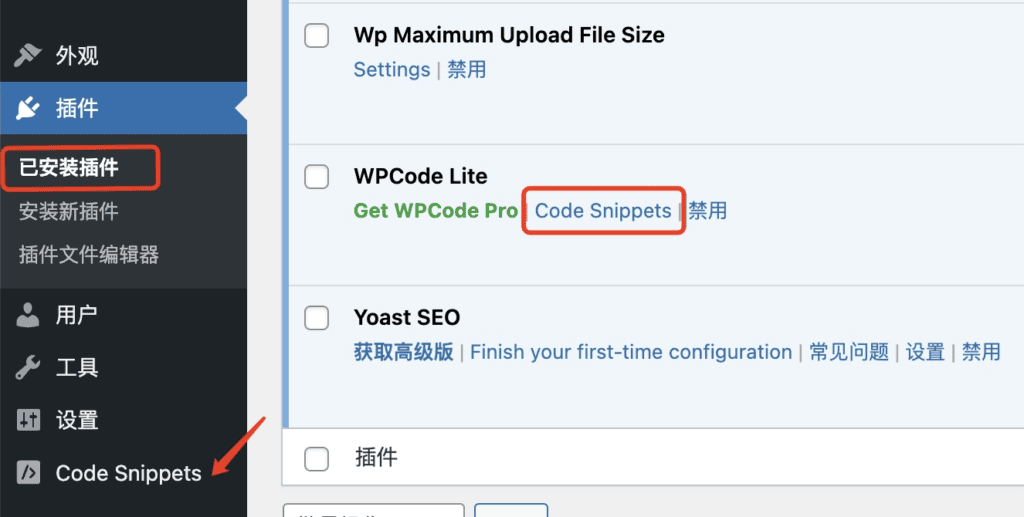
2. After activation, find WPCode under Installed Plugins and select Code Snippets. You can also open Code Snippets directly from the left sidebar.
3. Add the chat widget code
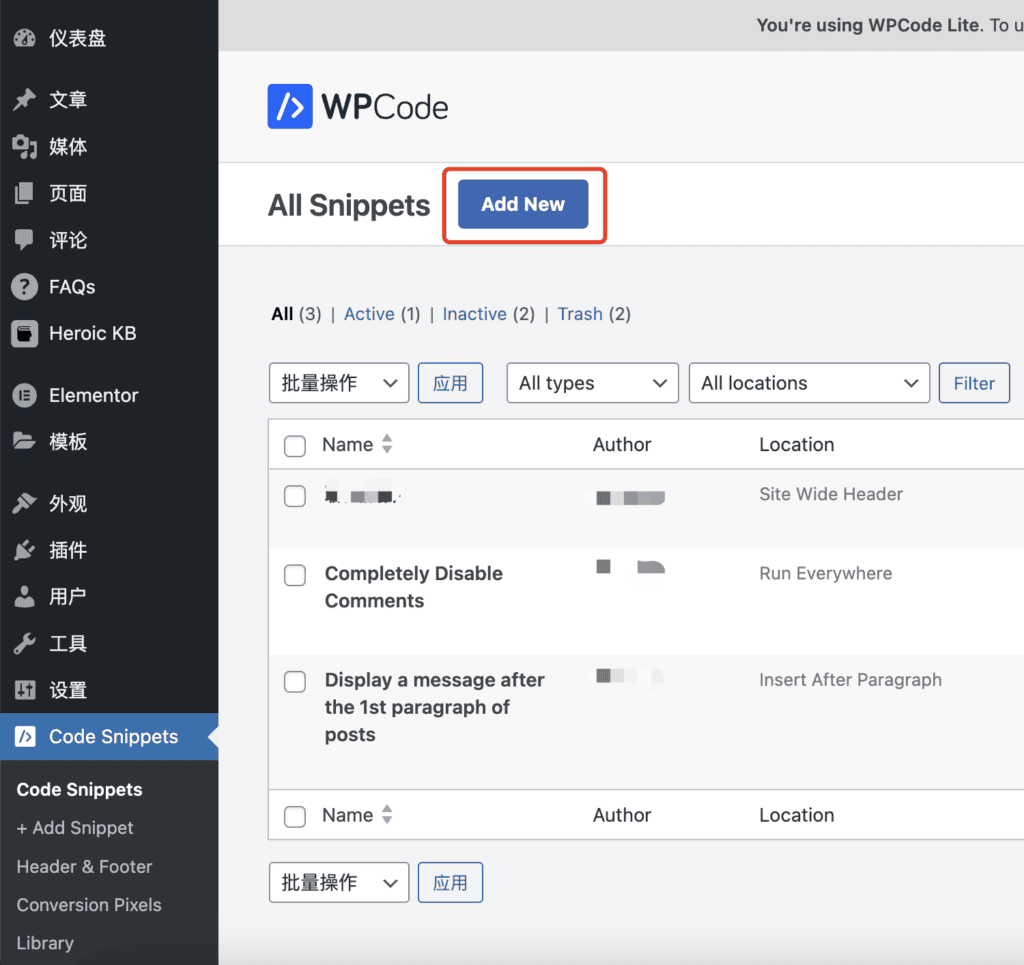
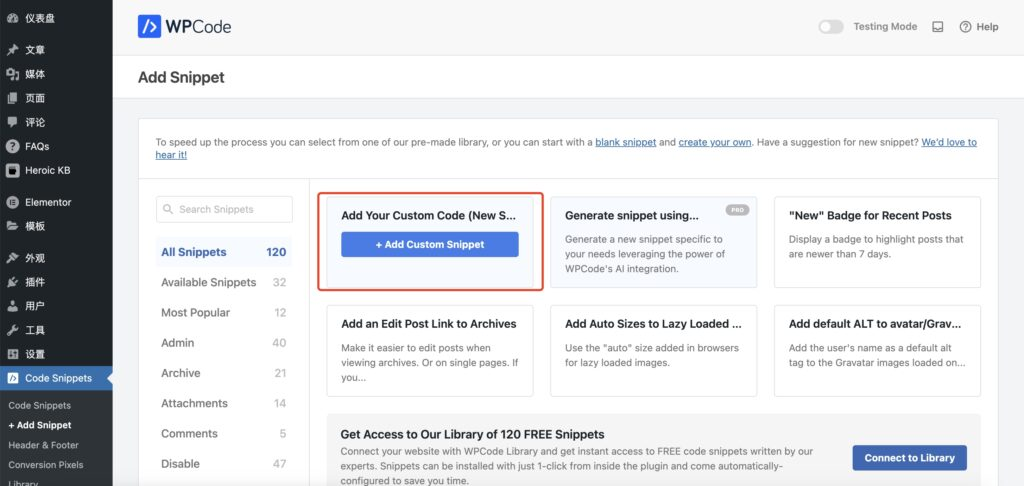
1. In WPCode, select Add New.
2. Choose Custom Code, then select + Add Custom Snippet.
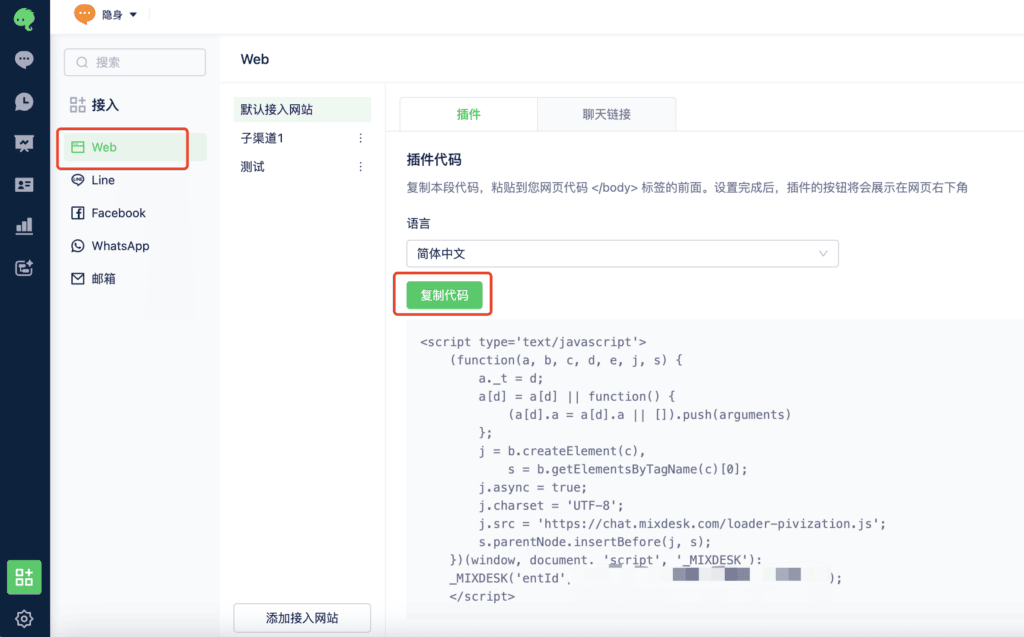
3. In Mixdesk, go to Settings > Channels > Web, choose the Web channel, and select Copy Code.
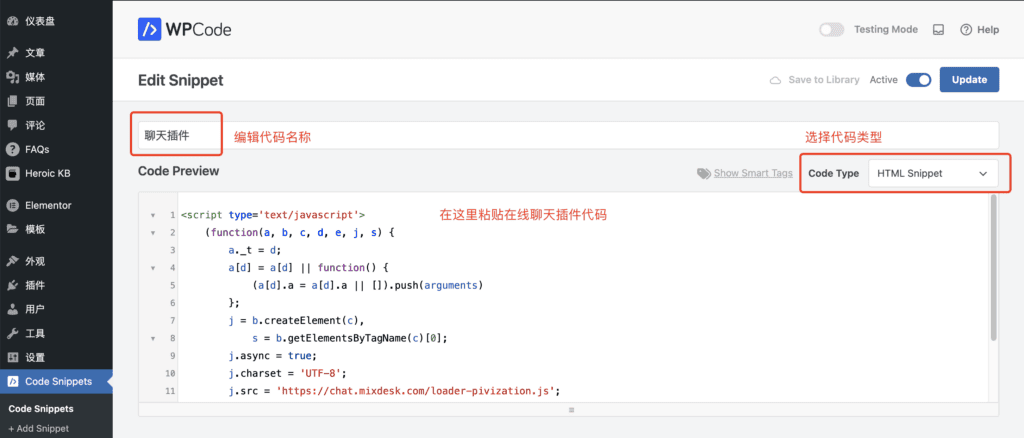
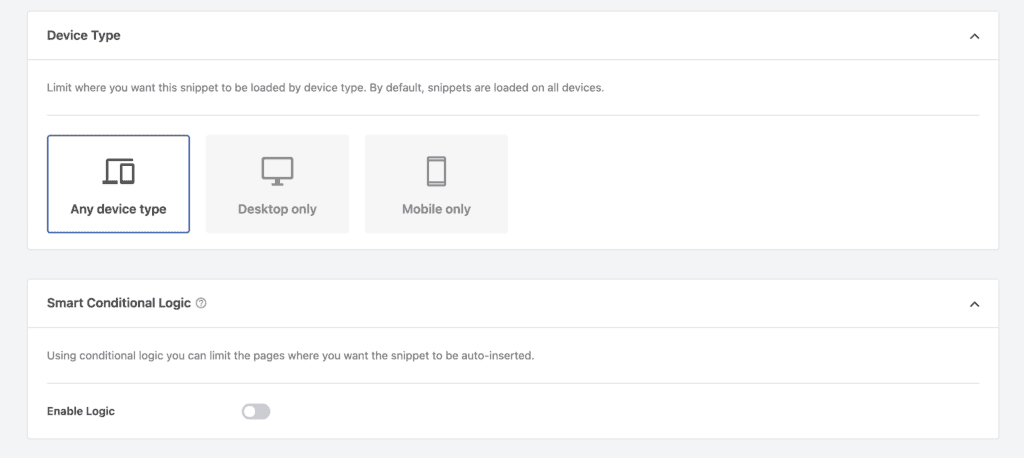
4. Paste the code into the snippet editor. Keep HTML Snippet as the code type. Give the snippet a name you can recognize later.
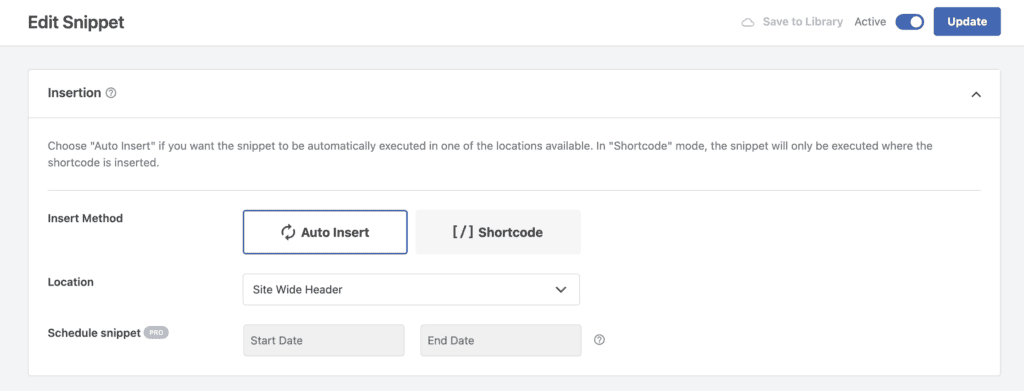
5. Keep the remaining default settings. Use the screenshots below for reference.
4. Save and activate the code
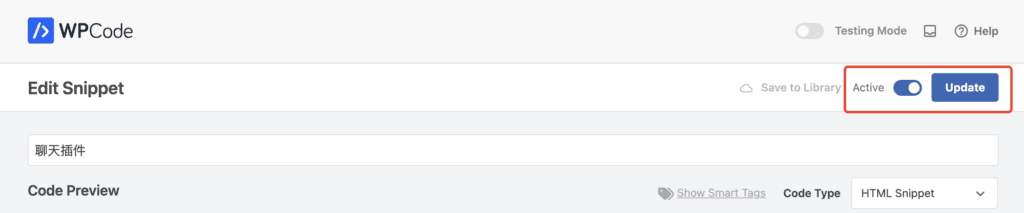
1. Select Update in the upper-right corner to save the snippet. Set the adjacent toggle to Active.
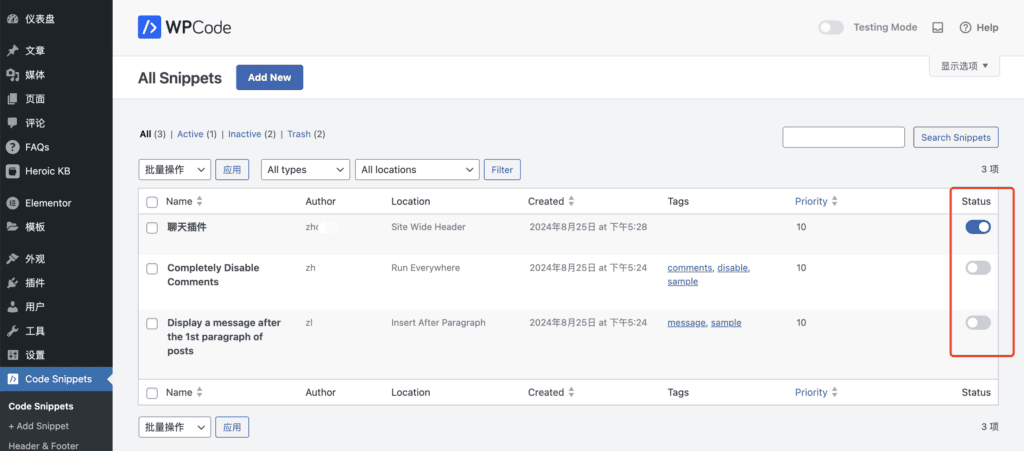
2. Return to the snippets list to review the snippet and confirm that it is active.
5. Test the widget
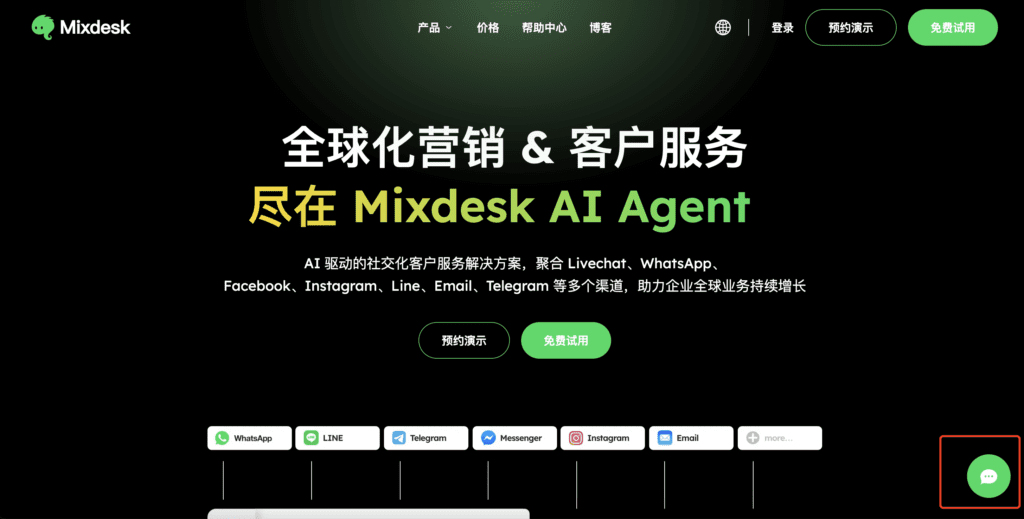
The chat button appears on your website once the code is active. Select it to start a conversation.
Customize the chat button and window in Mixdesk to match your brand. See:
If the widget still does not work after these steps, contact us for help.