
Overview
Connect personal WhatsApp or WhatsApp Business App accounts to receive and reply to messages in Mixdesk. Configure automation for assignment, personalized replies, tags, and AI Agent support.
Step 1: Connect a WhatsApp account
1. Open Channels in Mixdesk
In the left sidebar, select Channels, then WhatsApp App.
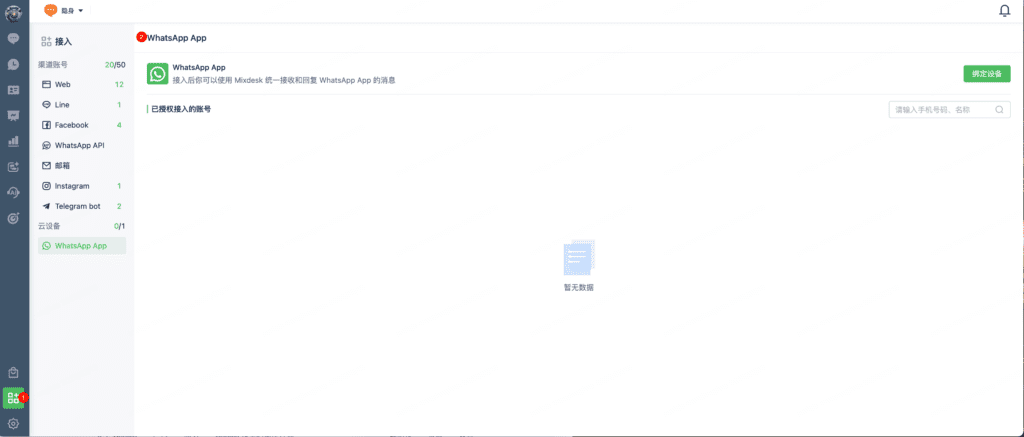
2. Connect a device
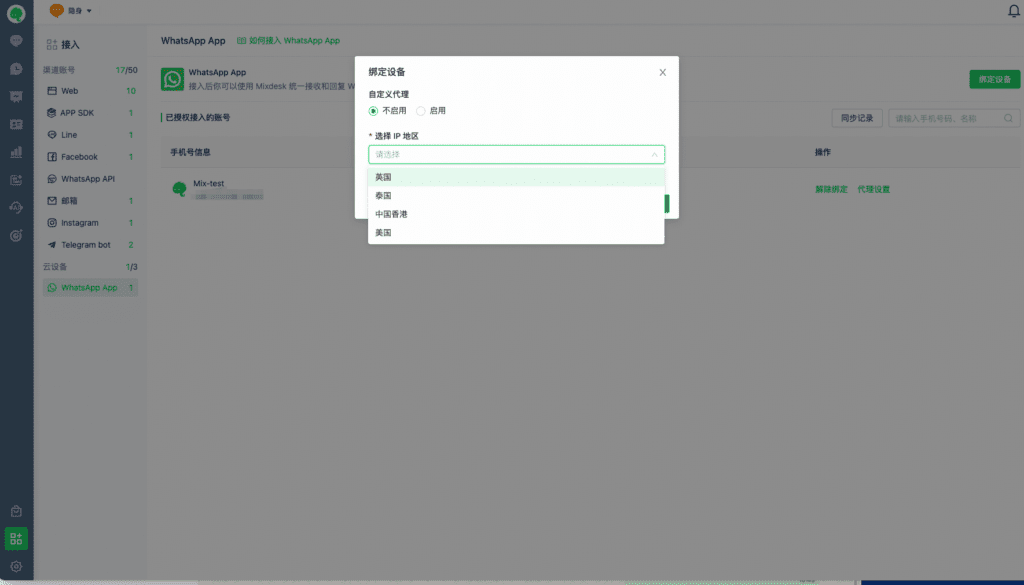
2.1 Choose an IP address
Use a Mixdesk-provided IP or your own IP.
1. For a Mixdesk-provided IP, choose the region where you normally sign in to WhatsApp, or a nearby region.
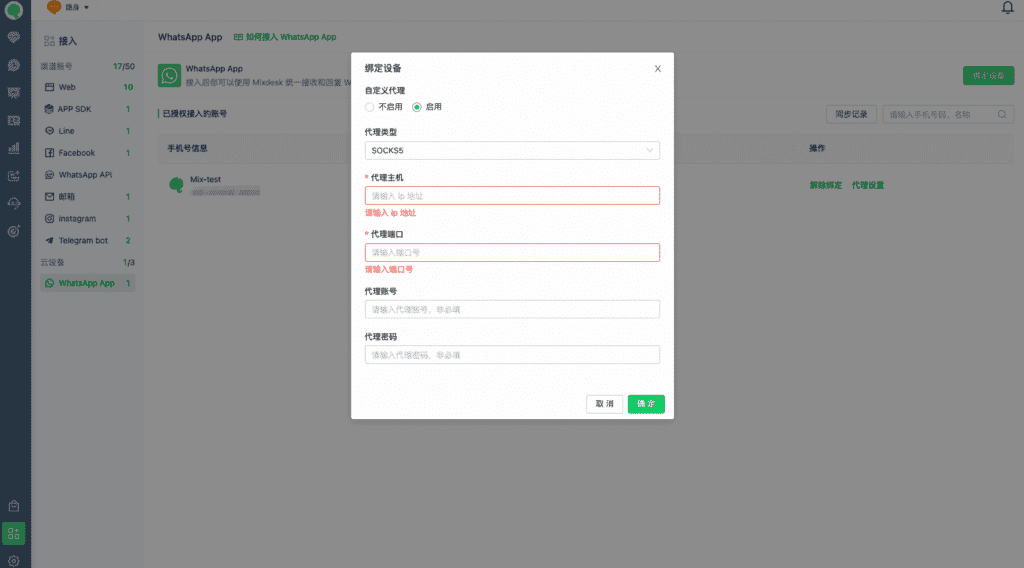
2. To use your own IP, select its proxy type (SOCKS5/HTTP/HTTPS) and enter the proxy host and port. Enter a proxy username and password if required; otherwise, leave them blank.
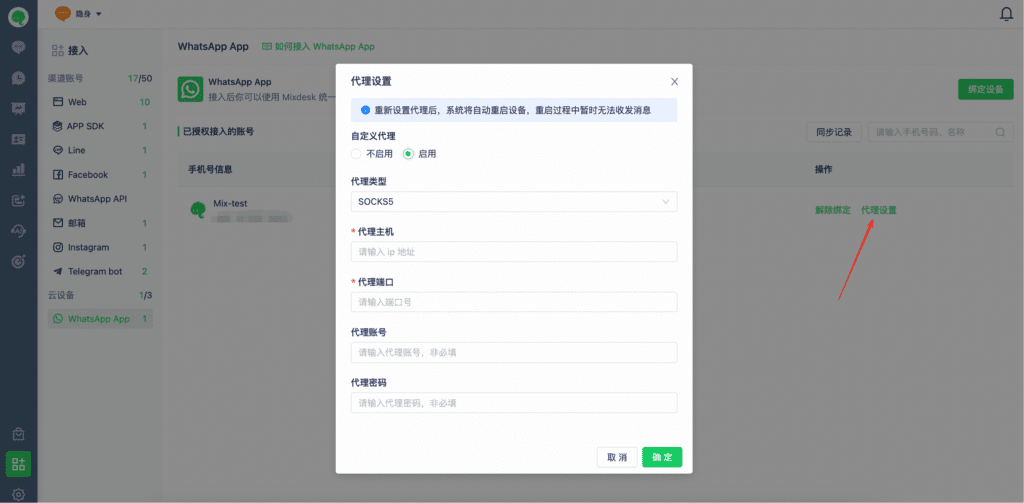
3. To change an existing connection from a Mixdesk IP to your own, open Proxy Settings.
- The device displays Restarting while it restarts. Its status updates automatically when complete.
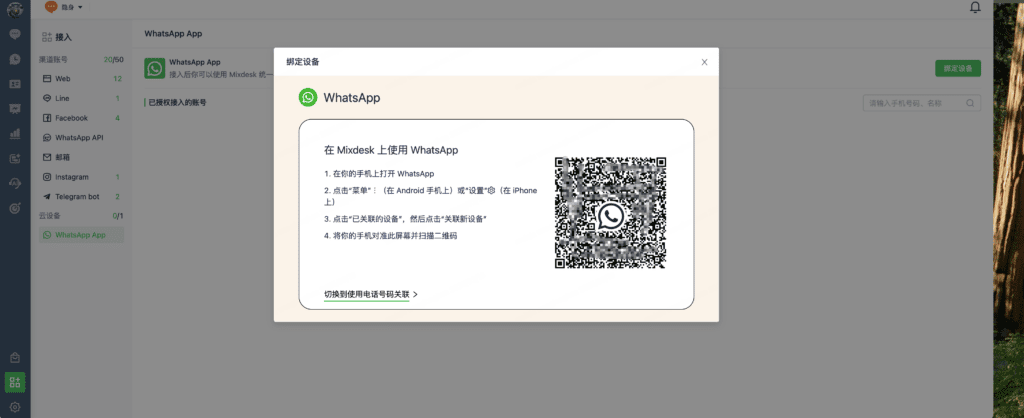
2.2 Scan the QR code
Wait for the QR code to load.
Scan the displayed connection QR code using WhatsApp on your phone to connect the account.
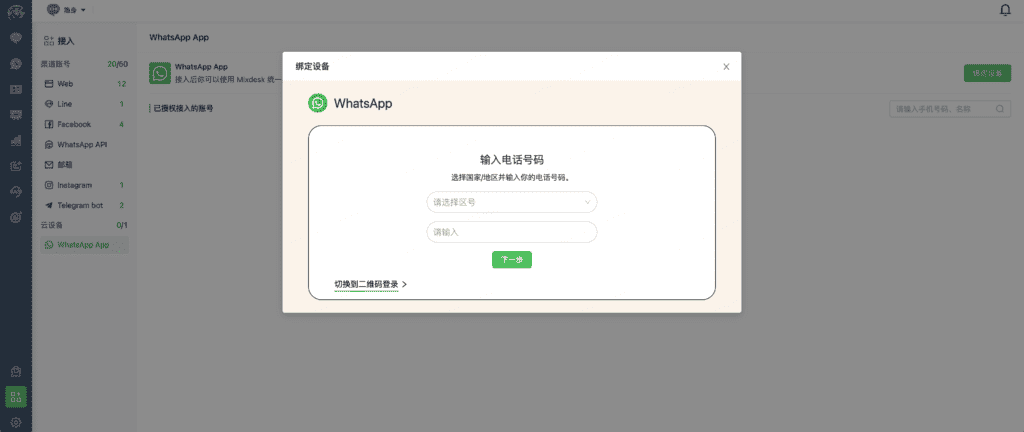
2.3 Link using a phone number
Alternatively, select the phone-number linking option and follow the on-screen instructions.
3. Synchronize conversation history and contacts
3.1 Confirm the connection
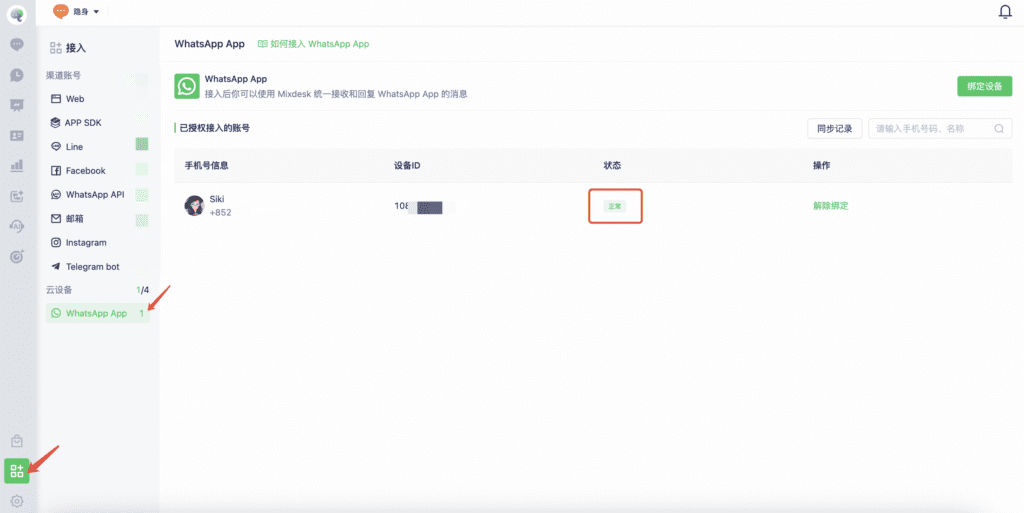
The connected account appears in the list. A Normal status indicates a successful connection.
On the first connection, Mixdesk automatically synchronizes the account’s conversation history and contacts. Synchronizing large amounts of data may take some time. Select Sync History after completion to see how many conversations were added in each sync.
Mixdesk also synchronizes replies sent from this WhatsApp account outside Mixdesk.
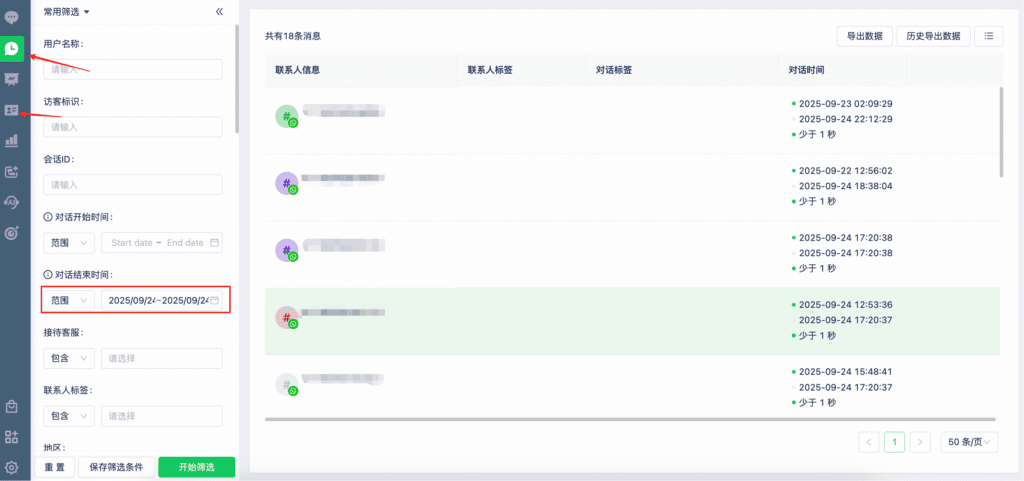
3.2 Review synchronized data
View imported conversations in Conversation History and imported contacts in Contacts.
For guidance on account use, bulk messaging, and restrictions, see:
Step 2: Assign WhatsApp conversations
1. Add team members
Create separate team-member accounts for people who need to support customers in Mixdesk.
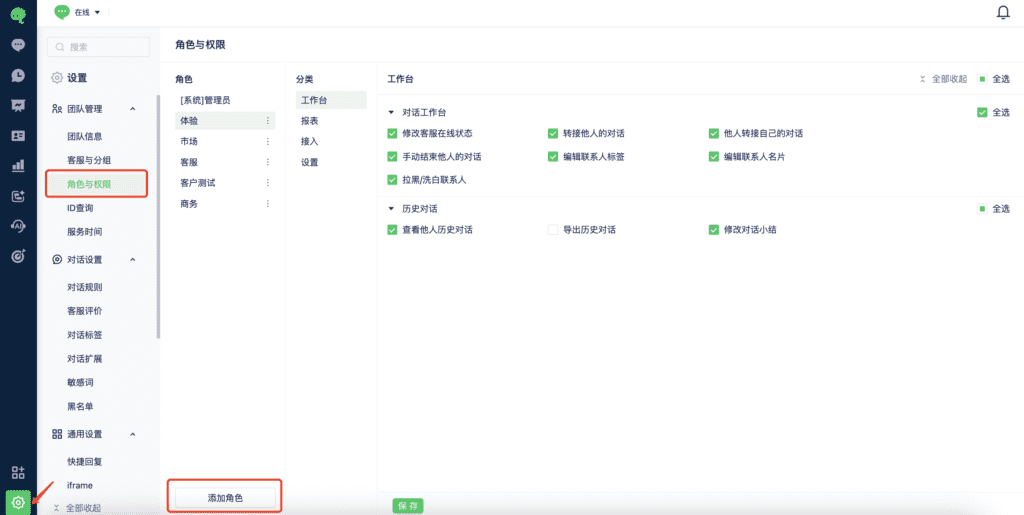
1. Decide which permissions each person needs. The default System Administrator role has all permissions. Go to Settings > Roles & Permissions to create roles for different responsibilities.
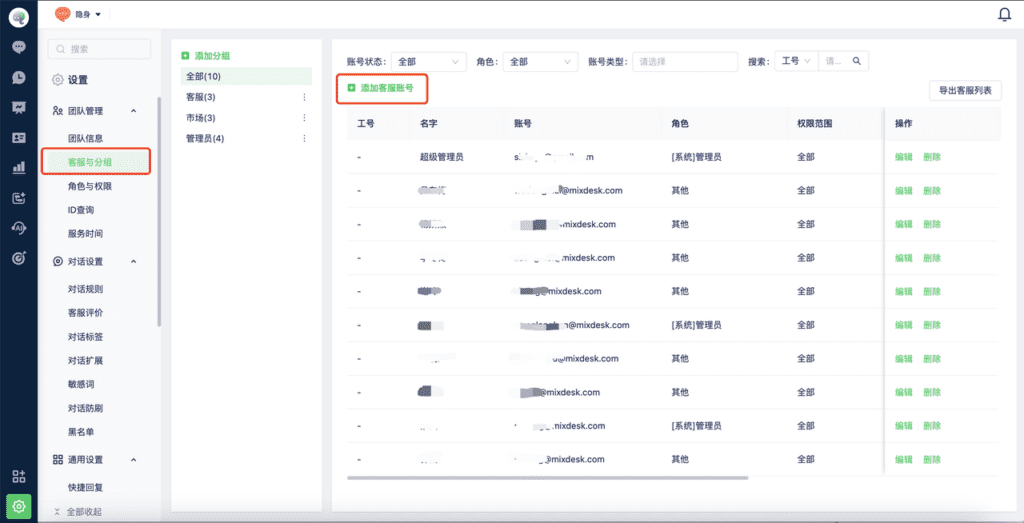
2. Go to Settings > Team Members and Groups. Add groups on the left for team management, assignment, and reporting, then select Add Team Member.
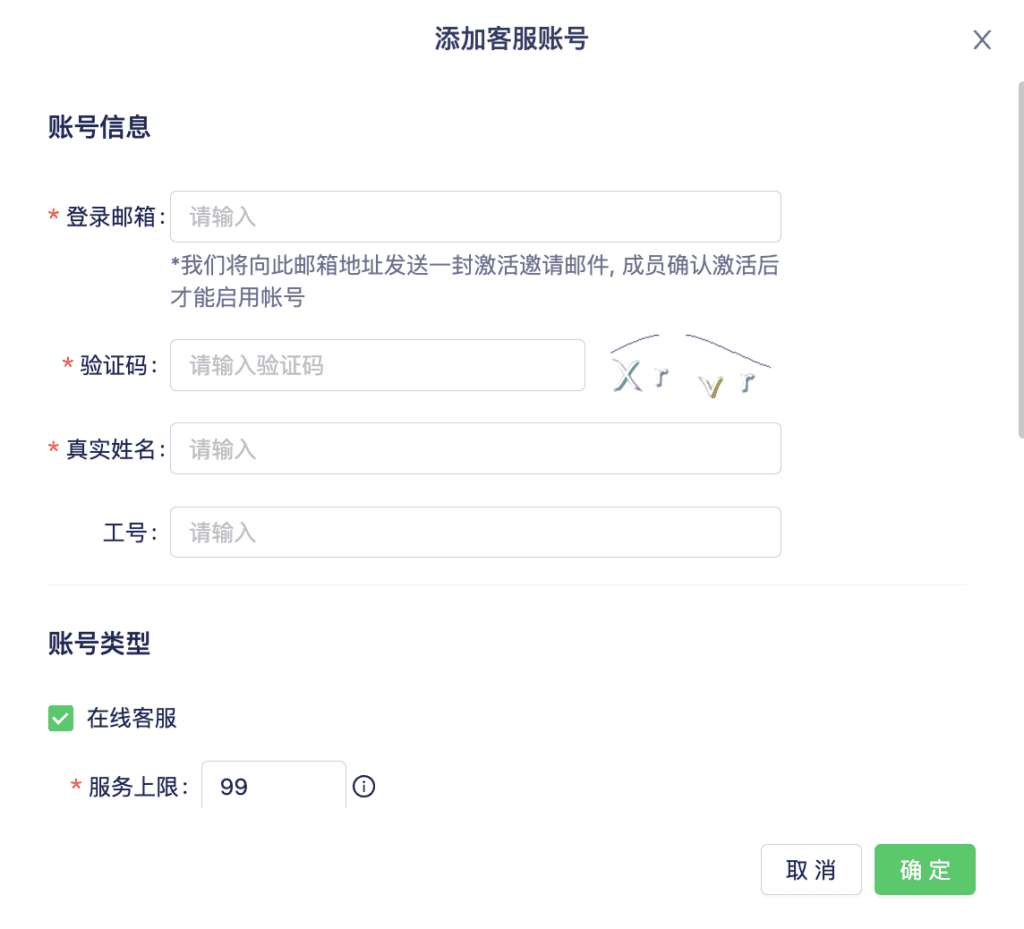
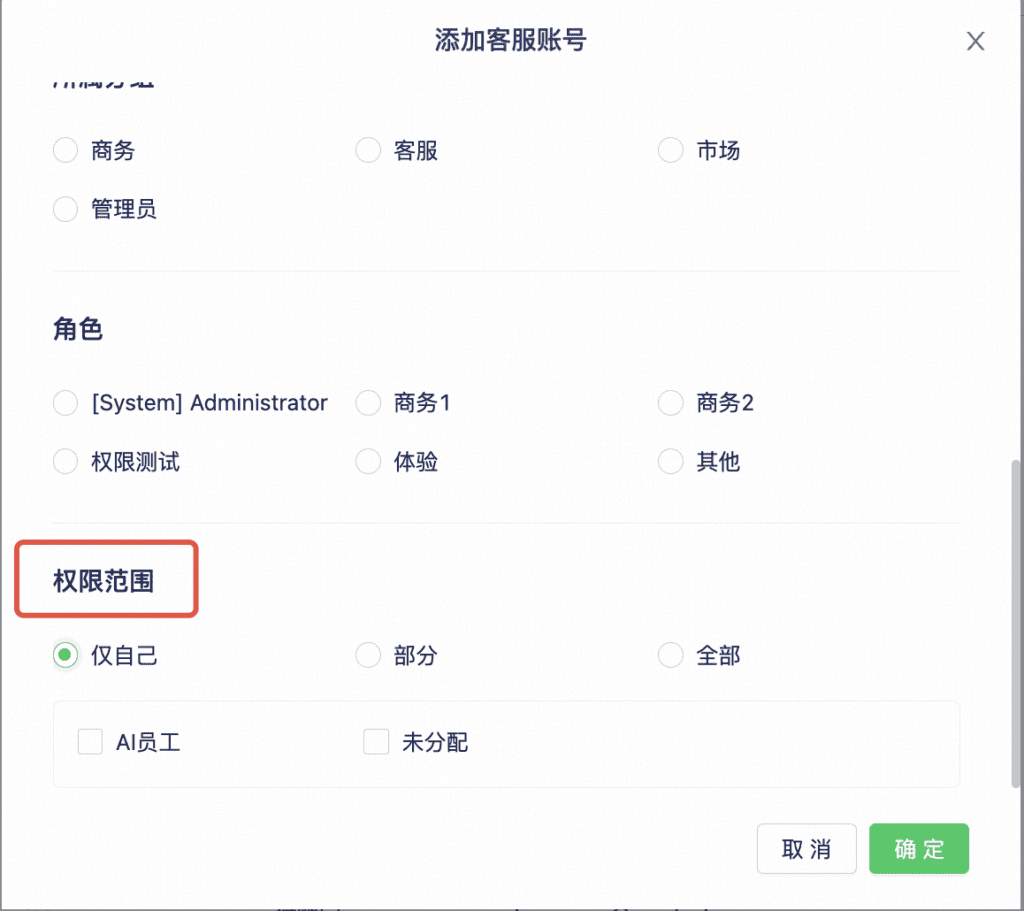
3. Enter the login email, real name, conversation capacity, group, role, and permission scope. Confirm to send an activation email automatically. Ask the team member to check their spam folder if the email does not arrive. Activate the account through the email, then use Log In on the Mixdesk website to access the workspace.
2. Configure conversation assignment
After adding team members, create assignment rules in Automation. Use the following examples as a starting point.
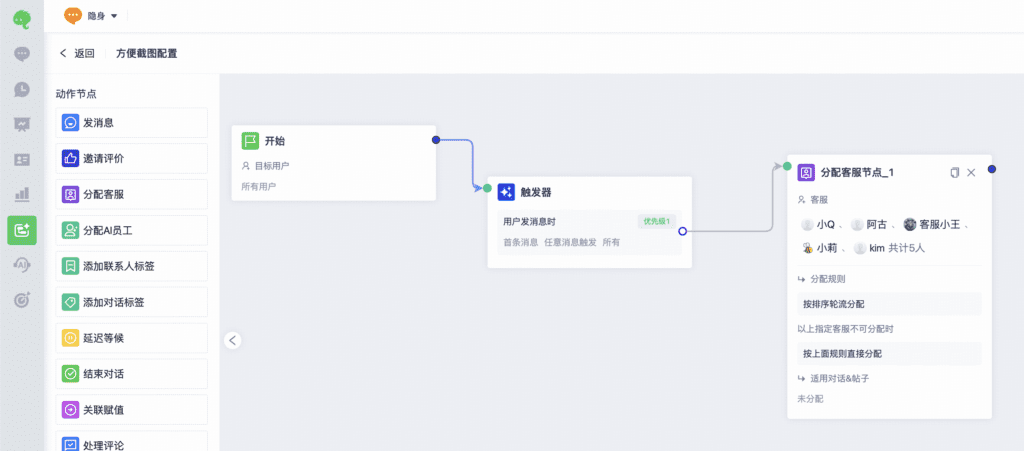
Example 1
Assign incoming conversations from all connected WhatsApp accounts to several team members in rotation.
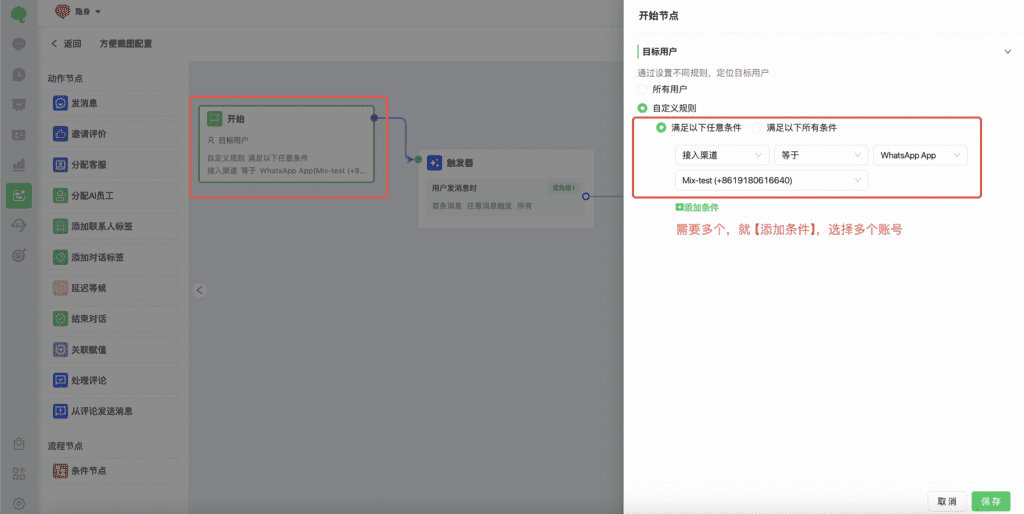
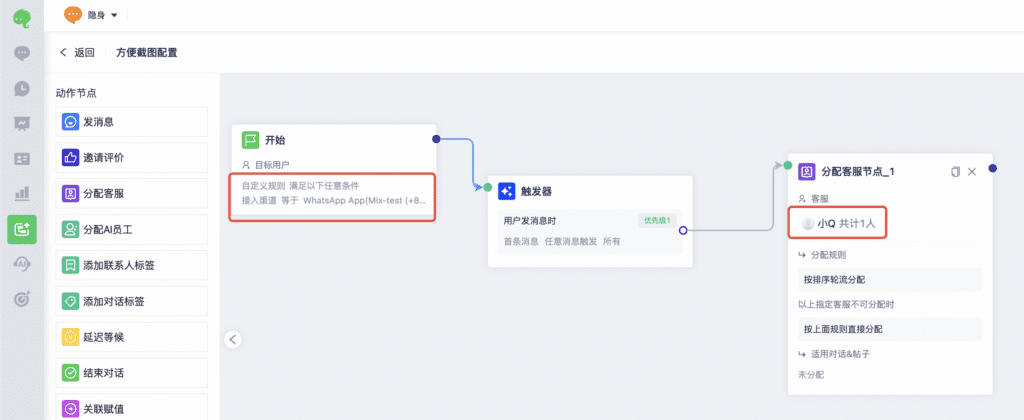
Example 2
Assign conversations from a specific WhatsApp account to a specific team member.
Automation supports more complex workflows. See the detailed guide or contact us for help.