
Follow this guide to get started with Mixdesk. Jump to the setup steps you need, and contact us if you need help.
Step 1: Register a workspace
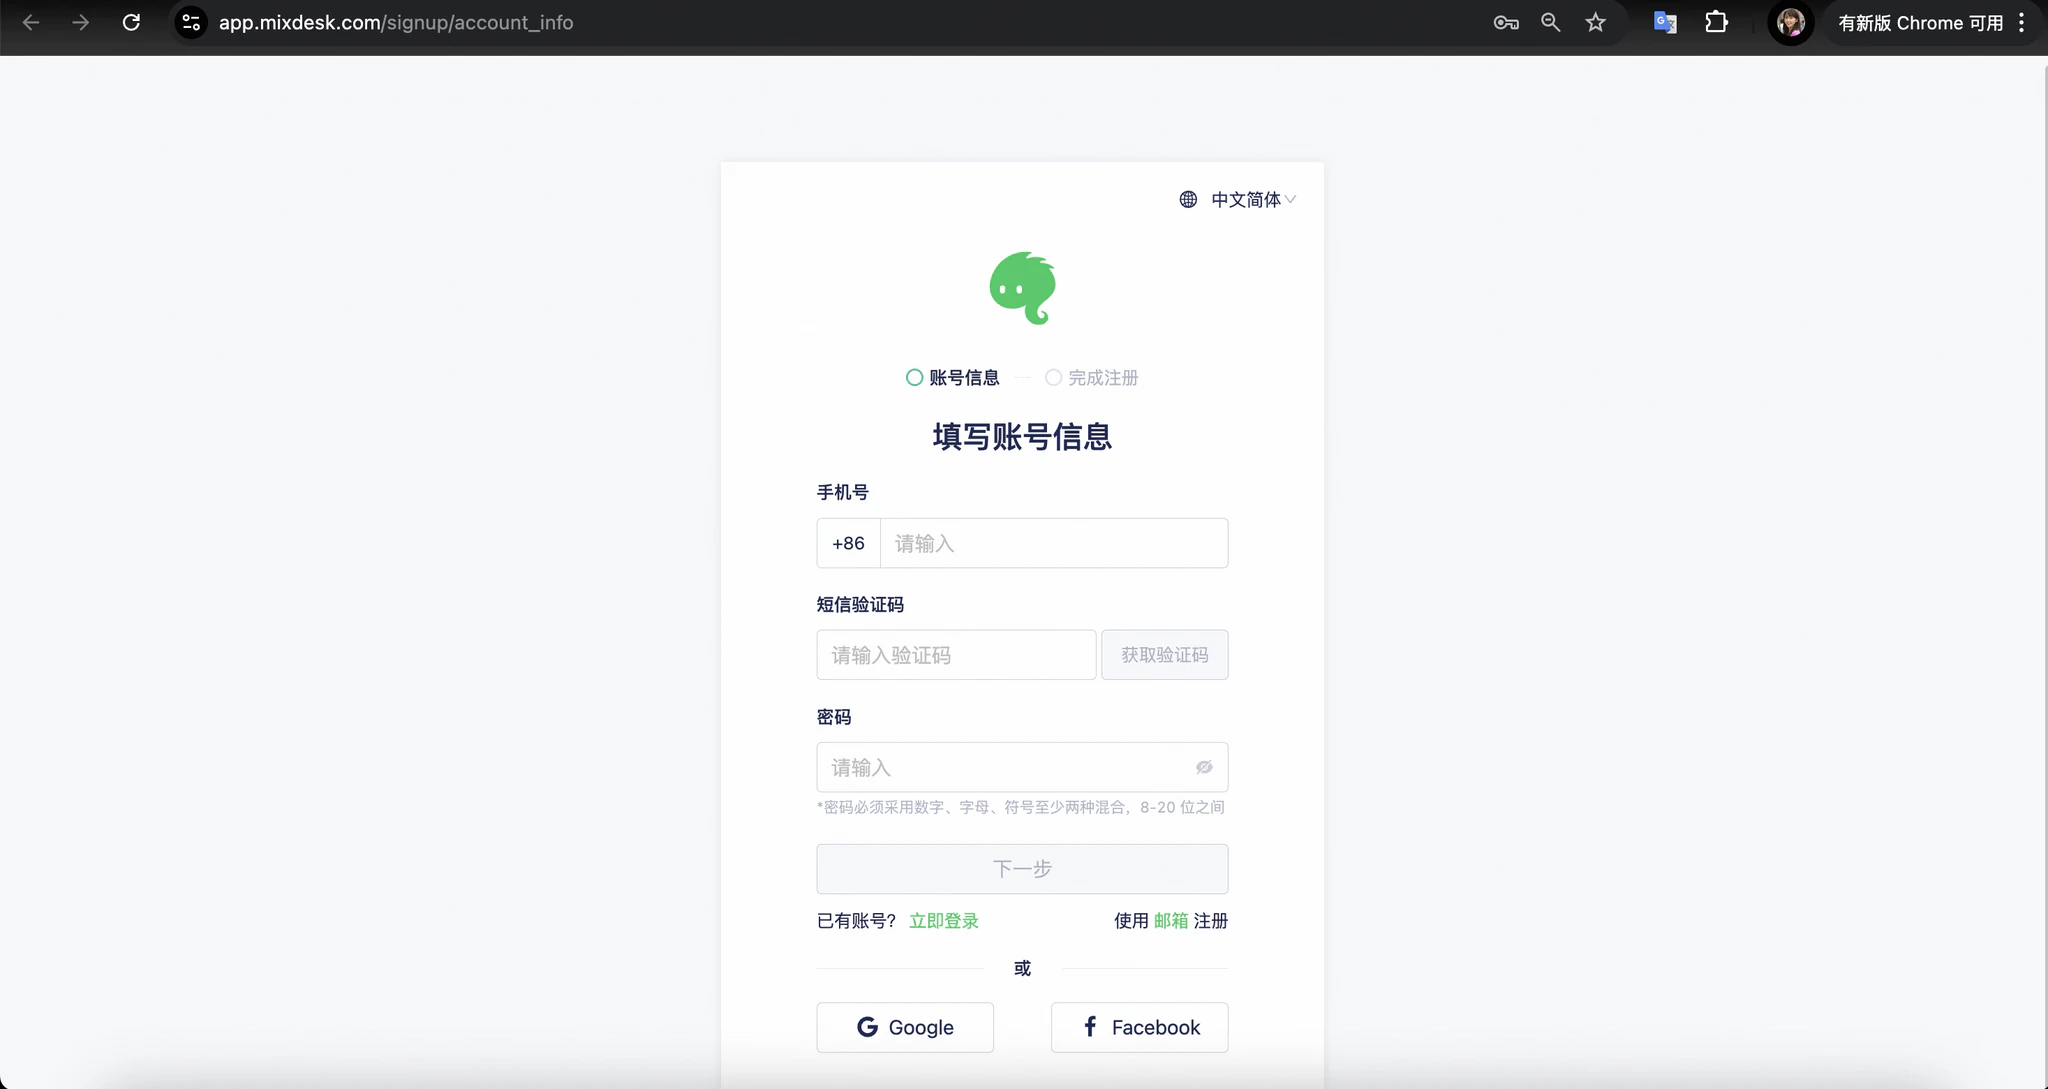
1. On a computer, visit mixdesk.com and select Free Trial to open registration.

2. Register a super administrator account using your phone number, email, Google account, or Facebook account. Super administrators have the highest permissions and can manage team-member accounts. Enter your account details, password, and company name. Choose the registration page and workspace languages, then enter the verification code sent to your login email to complete registration.
Step 2: Add team members
Create separate accounts for people who need to support customers, configure the workspace, or perform other tasks.
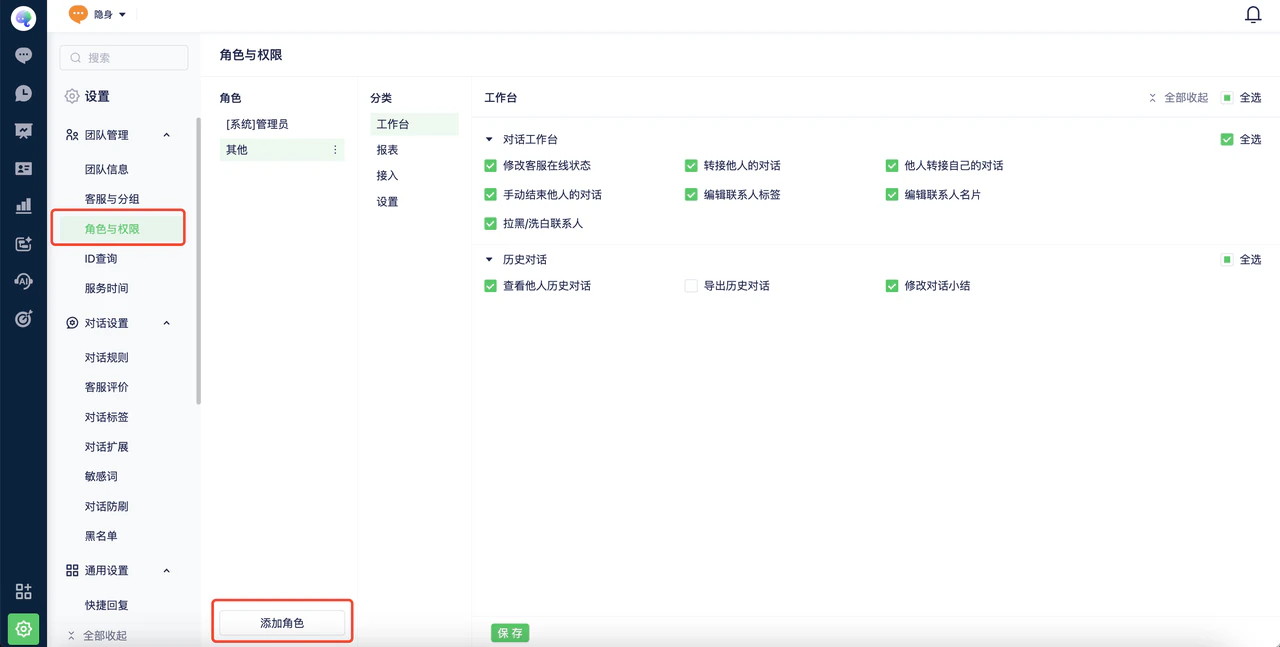
1. Decide which permissions each person needs. The default System Administrator role has all permissions. Go to Settings > Roles & Permissions to create roles for different responsibilities.
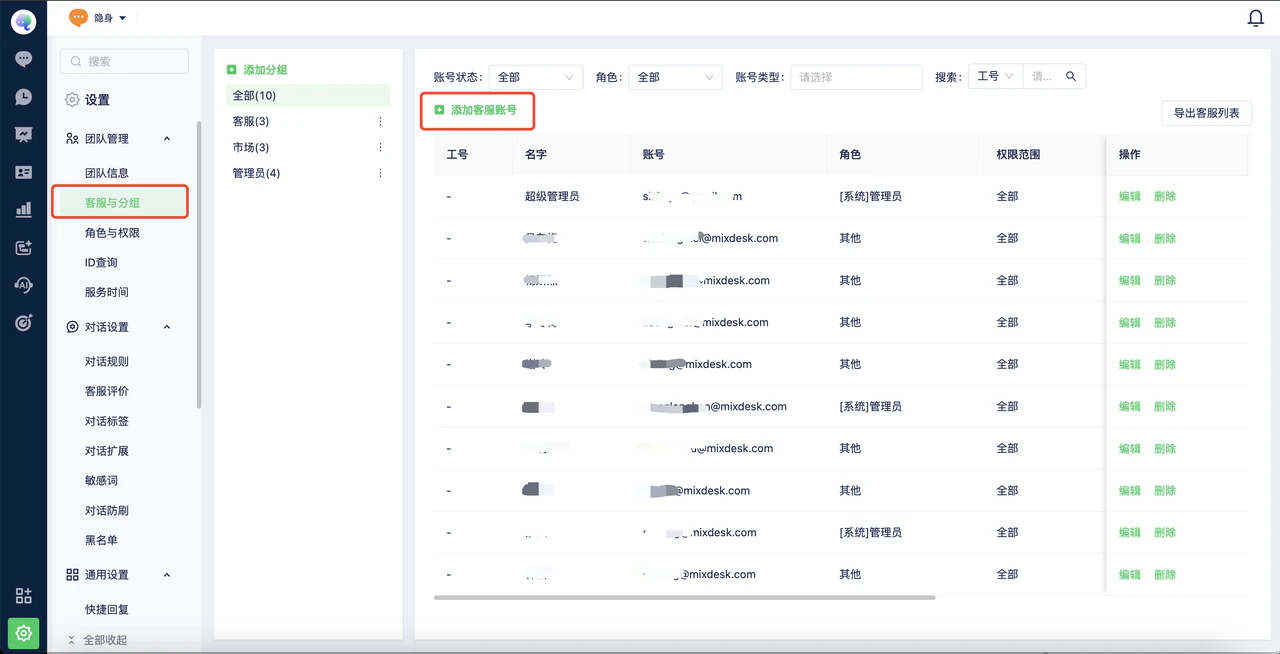
2. Go to Settings > Team Members and Groups. Add groups on the left for team management, assignment, and reporting, then select Add Team Member.
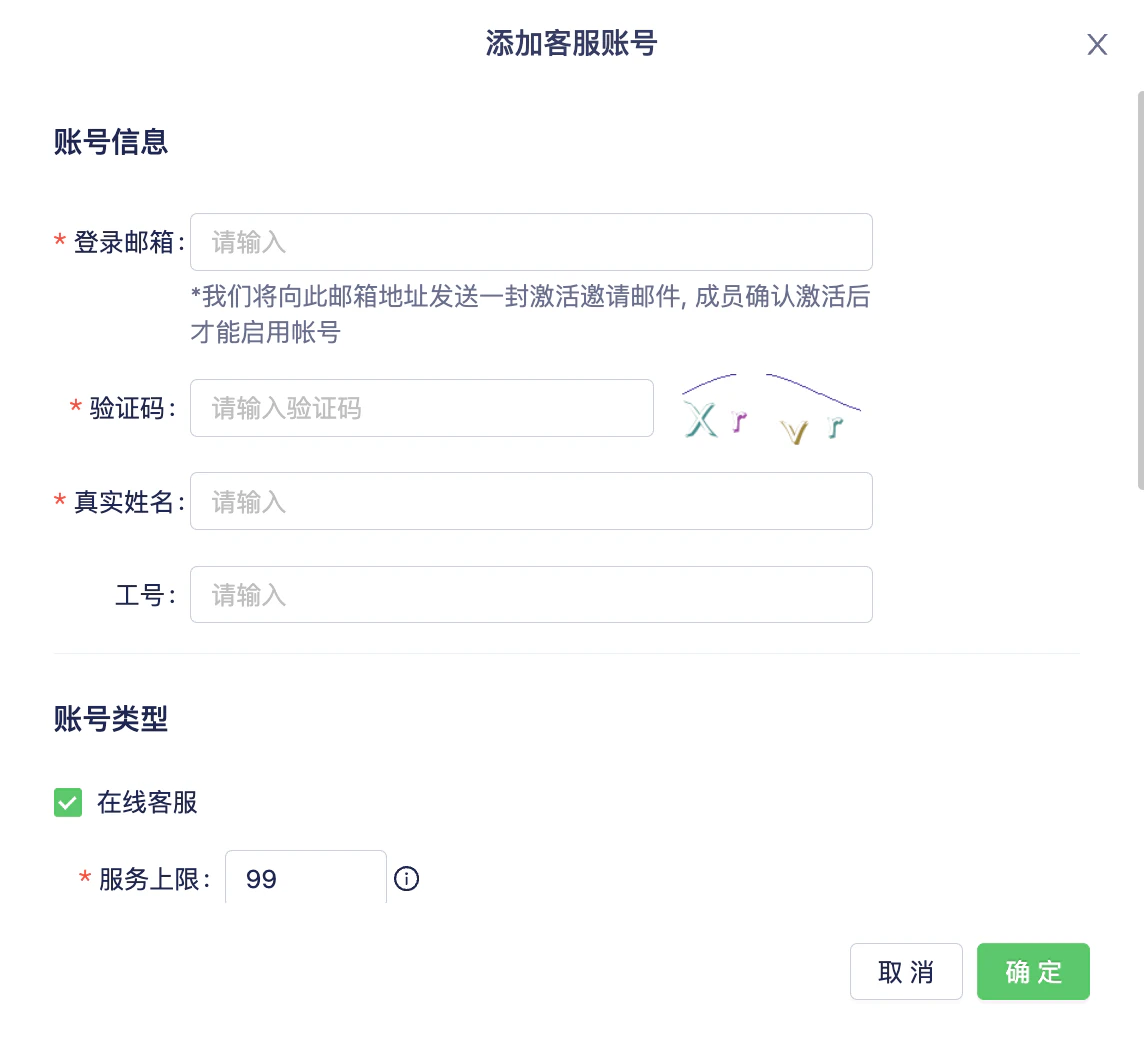
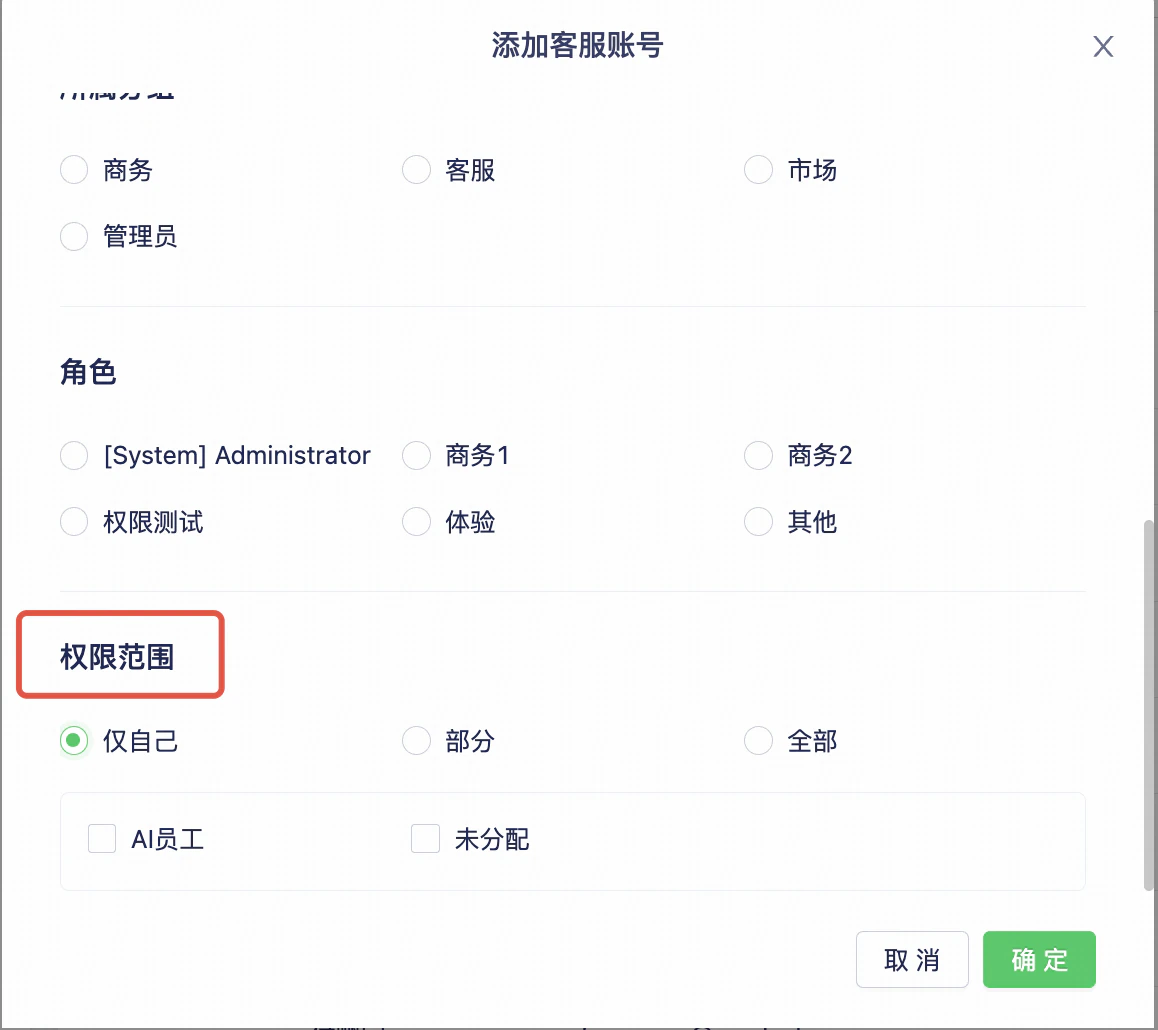
3. Enter the login email, real name, conversation capacity, group, role, and permission scope. Confirm to send an activation email automatically. Ask the team member to check their spam folder if the email does not arrive. Activate the account through the email, then use Log In on the Mixdesk website to access the workspace.
Step 3: Configure account information
Super administrators and team members can customize their workspace.
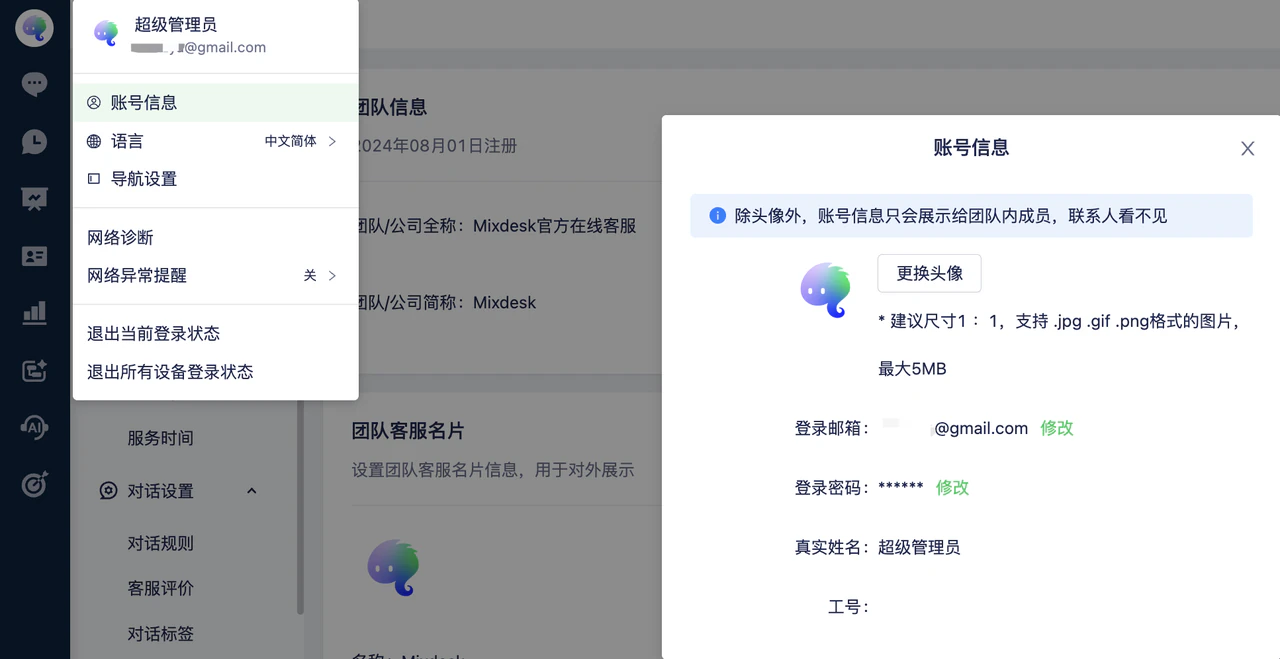
1. Select your avatar in the left sidebar to change your avatar, workspace language, and navigation settings.
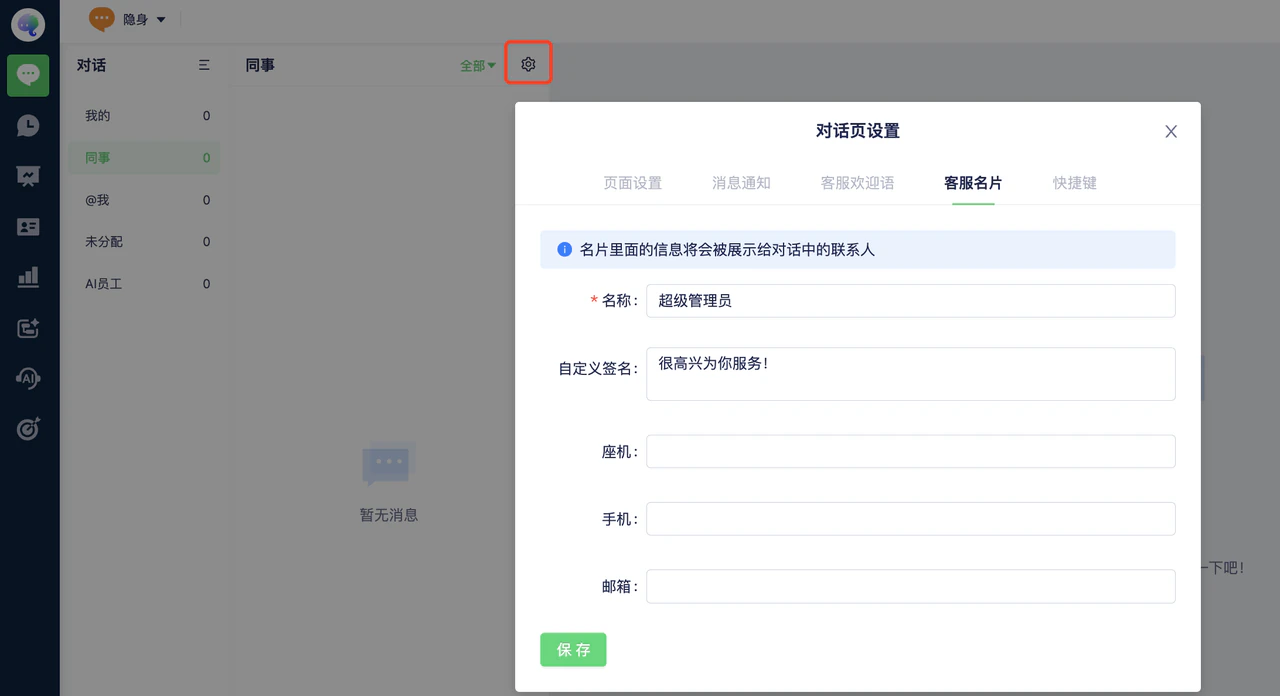
2. Open Inbox > Conversation Page Settings to configure your support profile, which is shown to customers. Third-party channels such as WhatsApp and Facebook show the connected account’s details instead.
You can keep other defaults while learning the workspace. See: Configure the Inbox
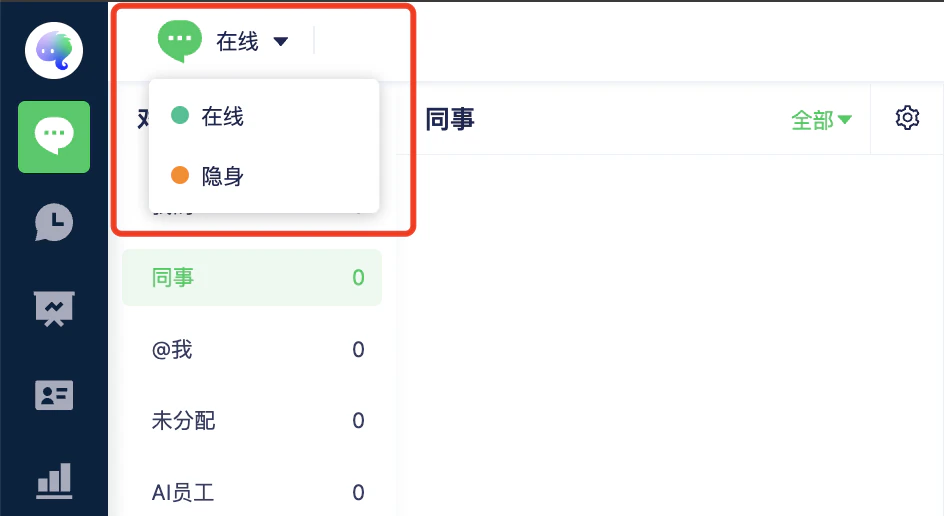
3. After signing in, team members must switch to Online to receive conversations. In the Inbox, use the upper-left status control to switch between Online and Invisible.
Step 4: Set up an AI Agent
Skip this step if you do not need AI. Otherwise, use it to explore how an AI Agent can support your business.
AI Agents use your business knowledge to respond to customers. If you have used tools such as ChatGPT, ERNIE Bot, or Kimi, the setup will be familiar.
Configure the AI Agent’s basic information and knowledge base. You can create multiple agents for different purposes, such as presales and after-sales support.
Step 5: Configure automation
New workspaces include a basic workflow you can adjust to your needs.
To add a workflow, select Automation in the left sidebar, then Add Automation.
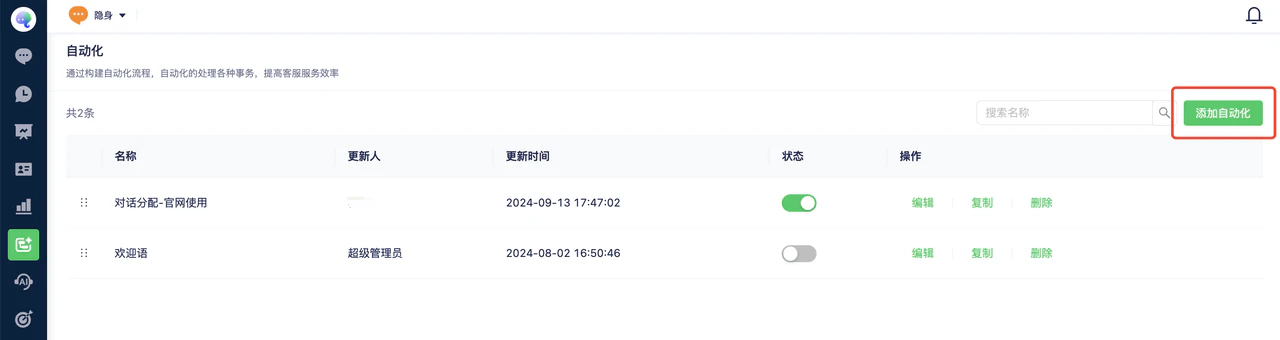
The basic setup is outlined below. For details, see: Configure Automated Workflows
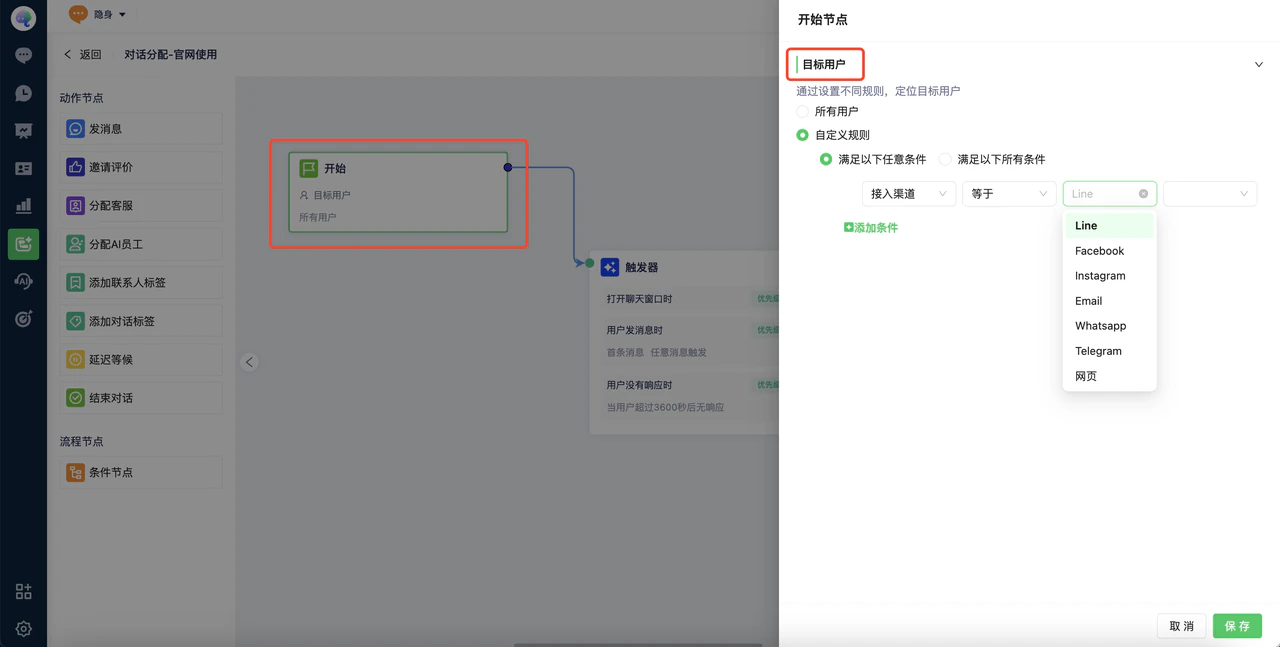
1. Select the target audience
In the start node, choose the target audience. Select All Users if assignment rules are the same for every channel. Otherwise, use Custom Rules to select an audience and configure channel-specific workflows.
2. Configure triggers
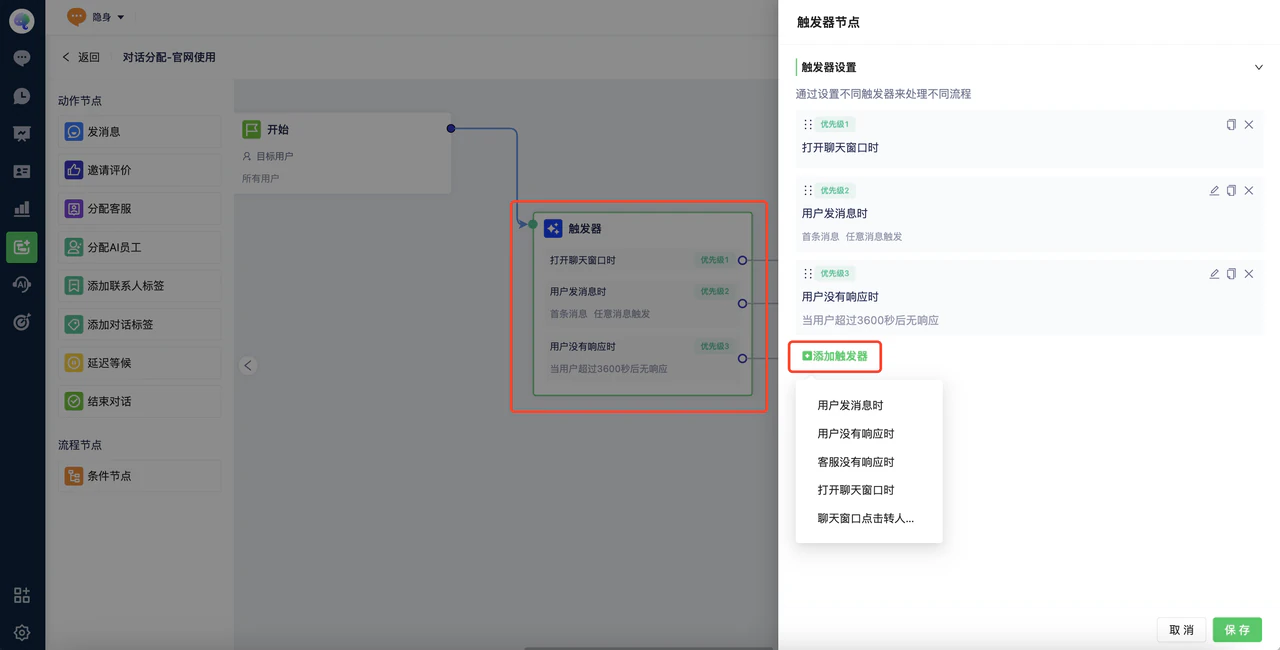
Different triggers start different workflows. Priority determines which trigger takes precedence.
1. When the chat window opens: For the Website channel, this occurs when a visitor selects the chat button to open the window.
2. When a user sends a message: Starts when a user sends a message. This applies to all connected channels.
3. When a user does not respond: After a configured number of seconds without a response, move to another action, such as ending the conversation.
4. When a team member does not respond: After a configured number of seconds without a team-member response, move to another action.
5. When a visitor requests a human: For Website channels using AI Agents, this trigger adds a human-transfer button to the chat window. Visitors can choose to speak to a person. Make sure human team members are online to receive these requests.
3. Configure actions
Connect triggers to actions such as assigning a team member or AI Agent.
Example: Assign a human team member
1. Select the group or team members to receive conversations.
2. Choose sequential, workload-based, or random assignment.
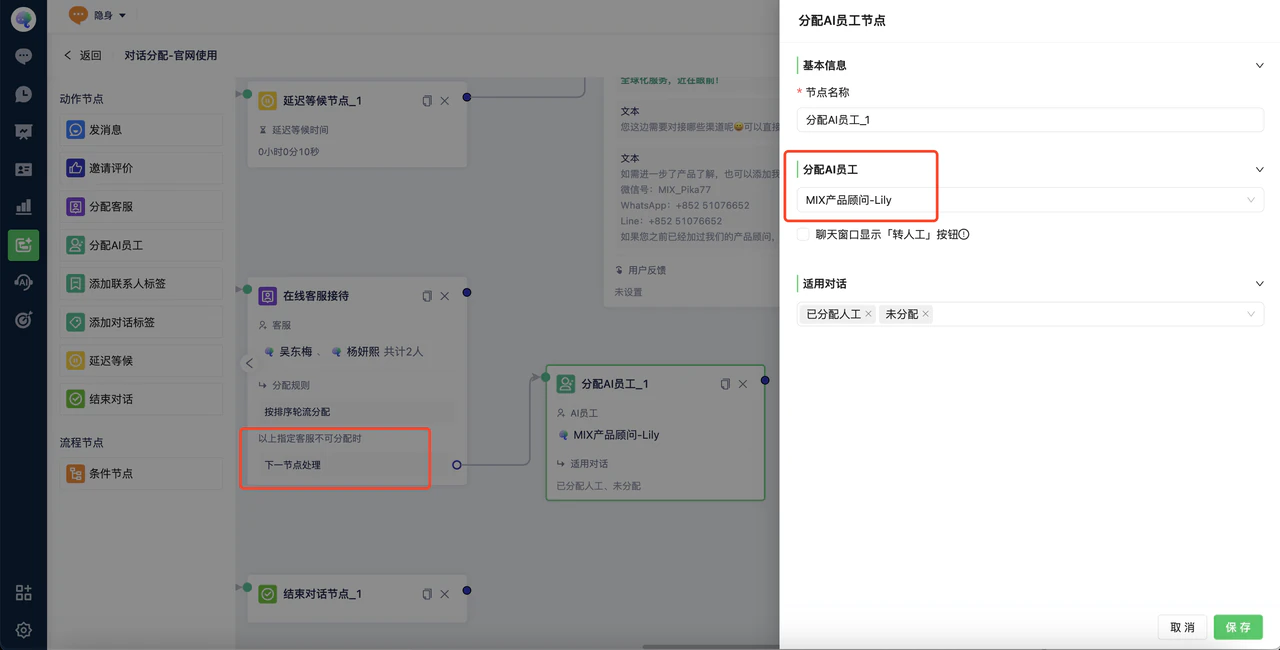
3. Decide what happens when the selected team members are unavailable, for example when offline: assign directly using the rule, or continue to the next node.
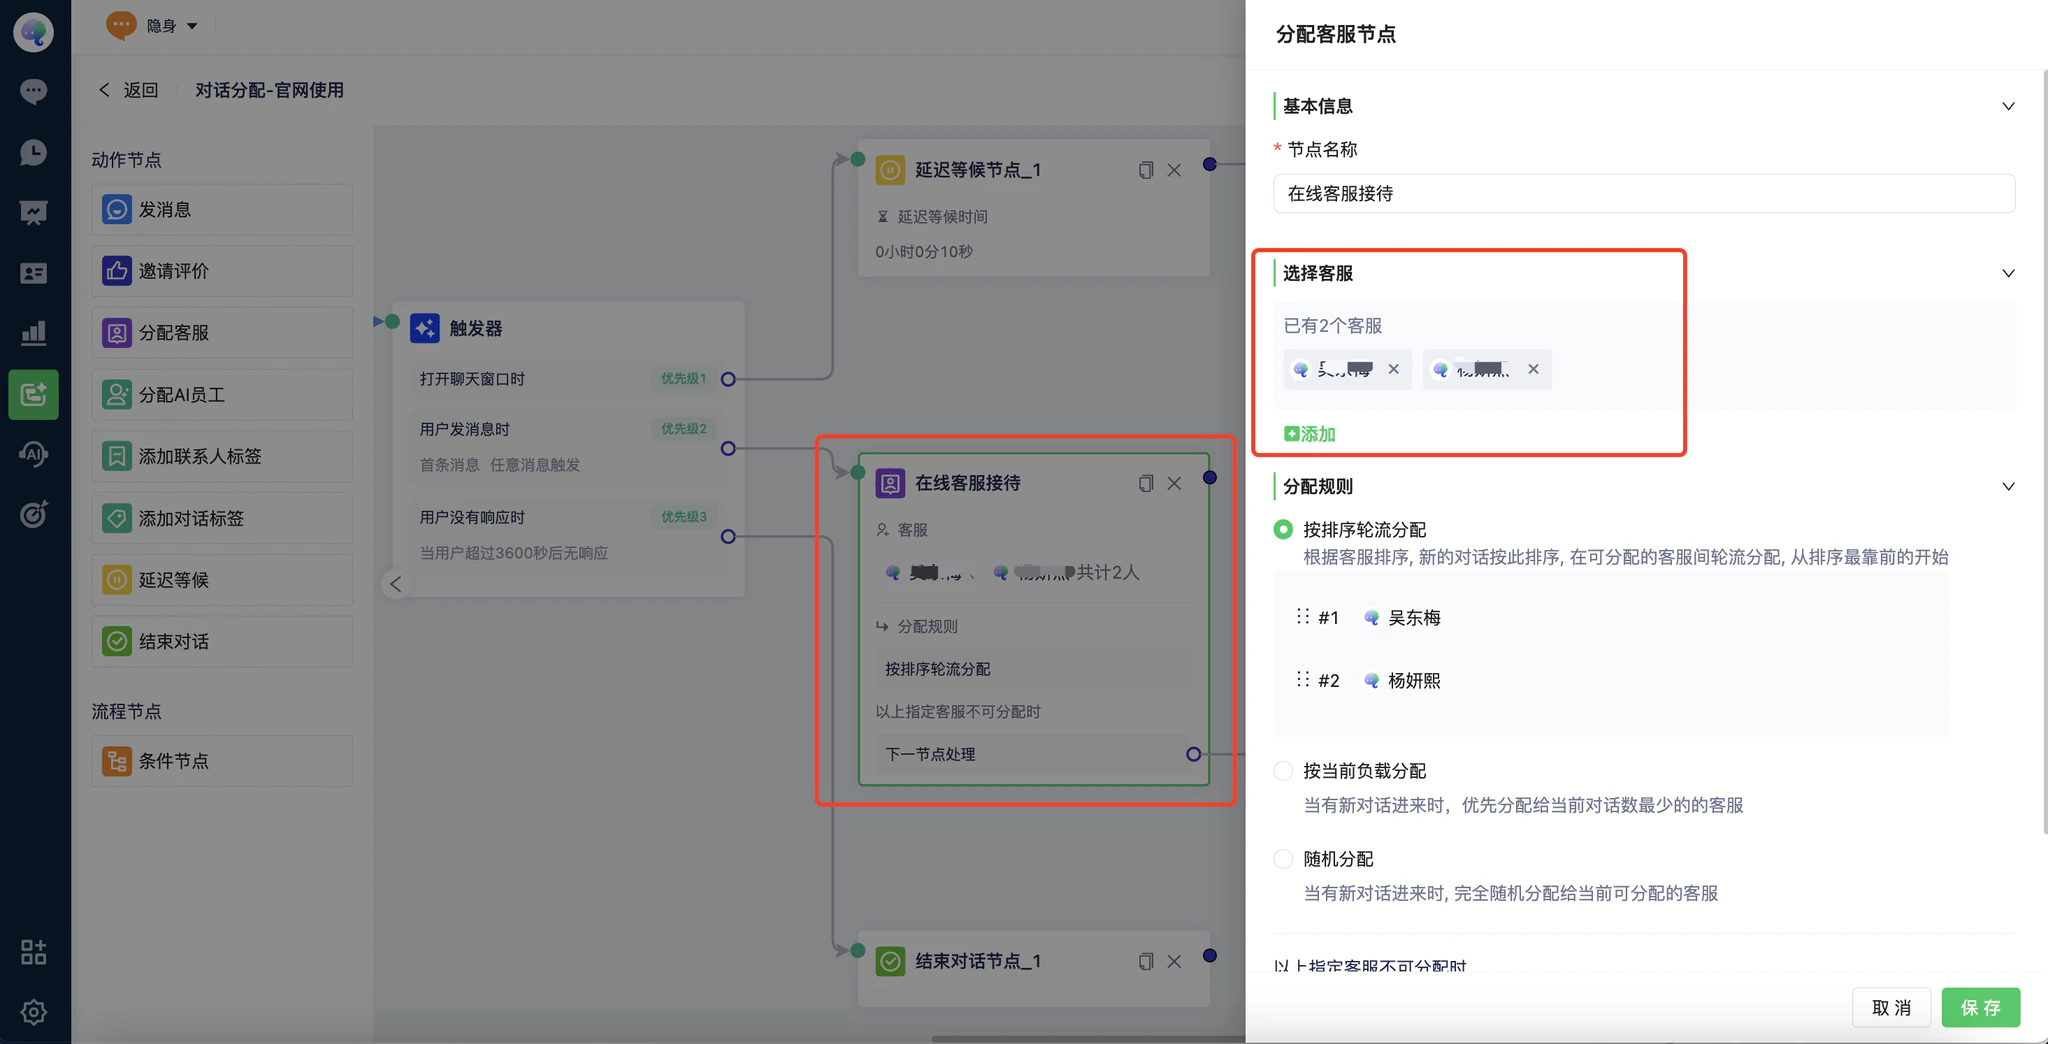
4. If you select Next Node, configure that node to end the conversation, send a message, or assign an AI Agent. Create the AI Agent before selecting it.
Contact us if you need help with your first workflow. Our product consultants can help configure it around your business process.
Step 6: Connect your channels
After configuring accounts, team members, and assignment rules, connect your channels.
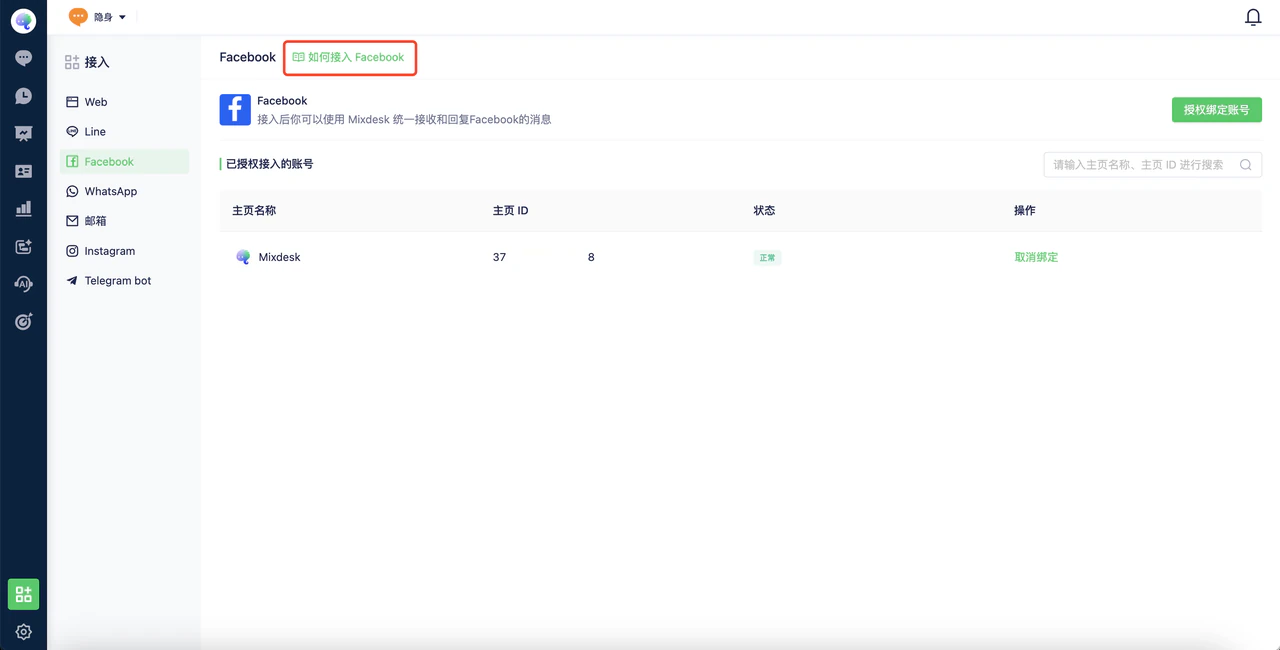
Select Channels in the left sidebar. Each channel includes a setup guide. You can also browse all channel guides here: Connect your channels
Your basic setup is complete. Contact us if you need help using Mixdesk to support your customers.