
Overview
Use routing links to distribute traffic across WhatsApp App, WhatsApp API, Telegram bot, and LINE accounts. Visitors can open the link or scan its QR code to reach an assigned account.
Open routing links
In the left sidebar, open Bulk Messaging and select Routing Links.
Step 1: Create a routing link
Select Create Routing Link, enter the routing details, and select Confirm.
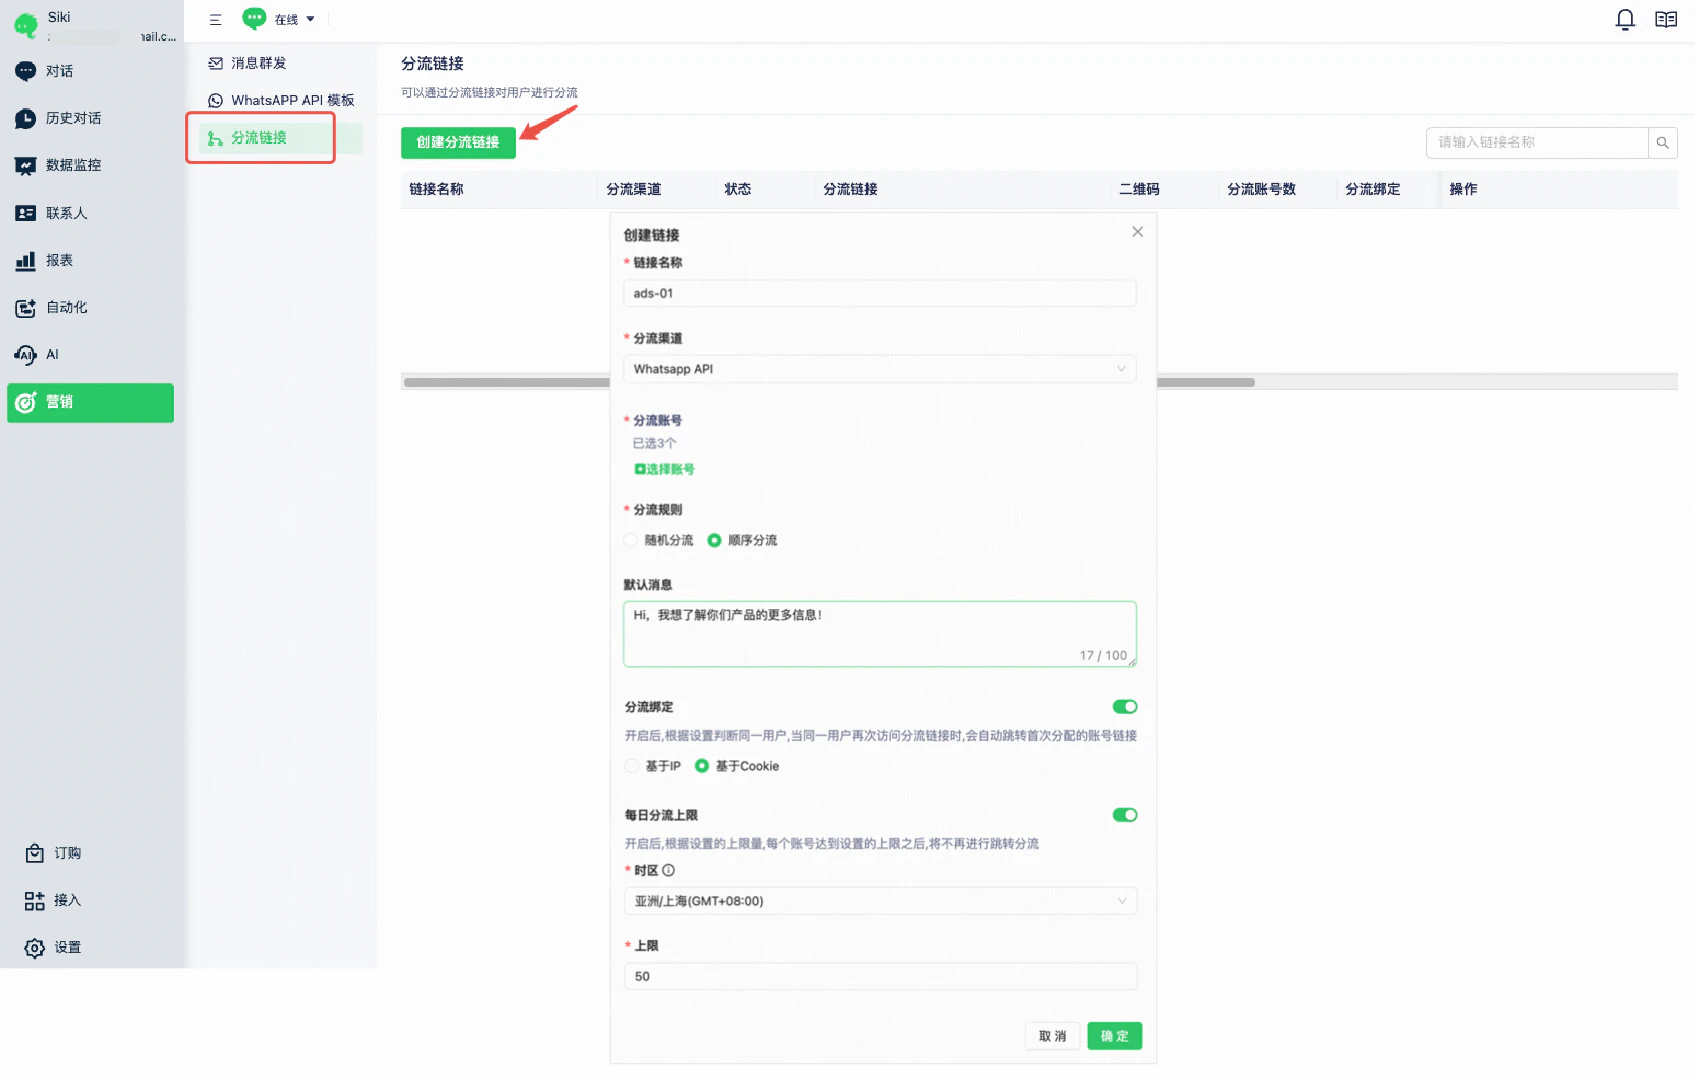
1. Link name: Enter a name you can recognize.
2. Channel: Choose WhatsApp App (personal or Business App), WhatsApp API, LINE, or Telegram bot.
3. Accounts: After choosing a channel, select the accounts to include. For WhatsApp App, select the WhatsApp numbers that should receive visitors.
4. Routing rule:
- Random: Assign each visitor to a randomly selected account.
- Sequential: Distribute visitors across the accounts in order.
5. Default message: Set the opening message suggested to customers when they open a conversation through the link. This message is sent by the customer.
6. Keep account assignment: Enable this option to recognize returning visitors by IP or cookie and send them to the account they were first assigned.
- By IP: Visitors with the same IP address are treated as the same user.
- By cookie: Visitors with the same cookie are treated as the same user.
7. Daily routing limit: Enable a daily limit to stop routing visitors to an account once it reaches its limit.
- Time zone: Defines midnight for resetting the daily limit.
- Limit: Applies separately to each selected account. For example, five WhatsApp accounts with a daily limit of 50 can each receive 50 redirects, for 250 redirects in total.
Step 2: Manage routing links
The list shows each link’s configuration. Copy its URL or download its QR code here.
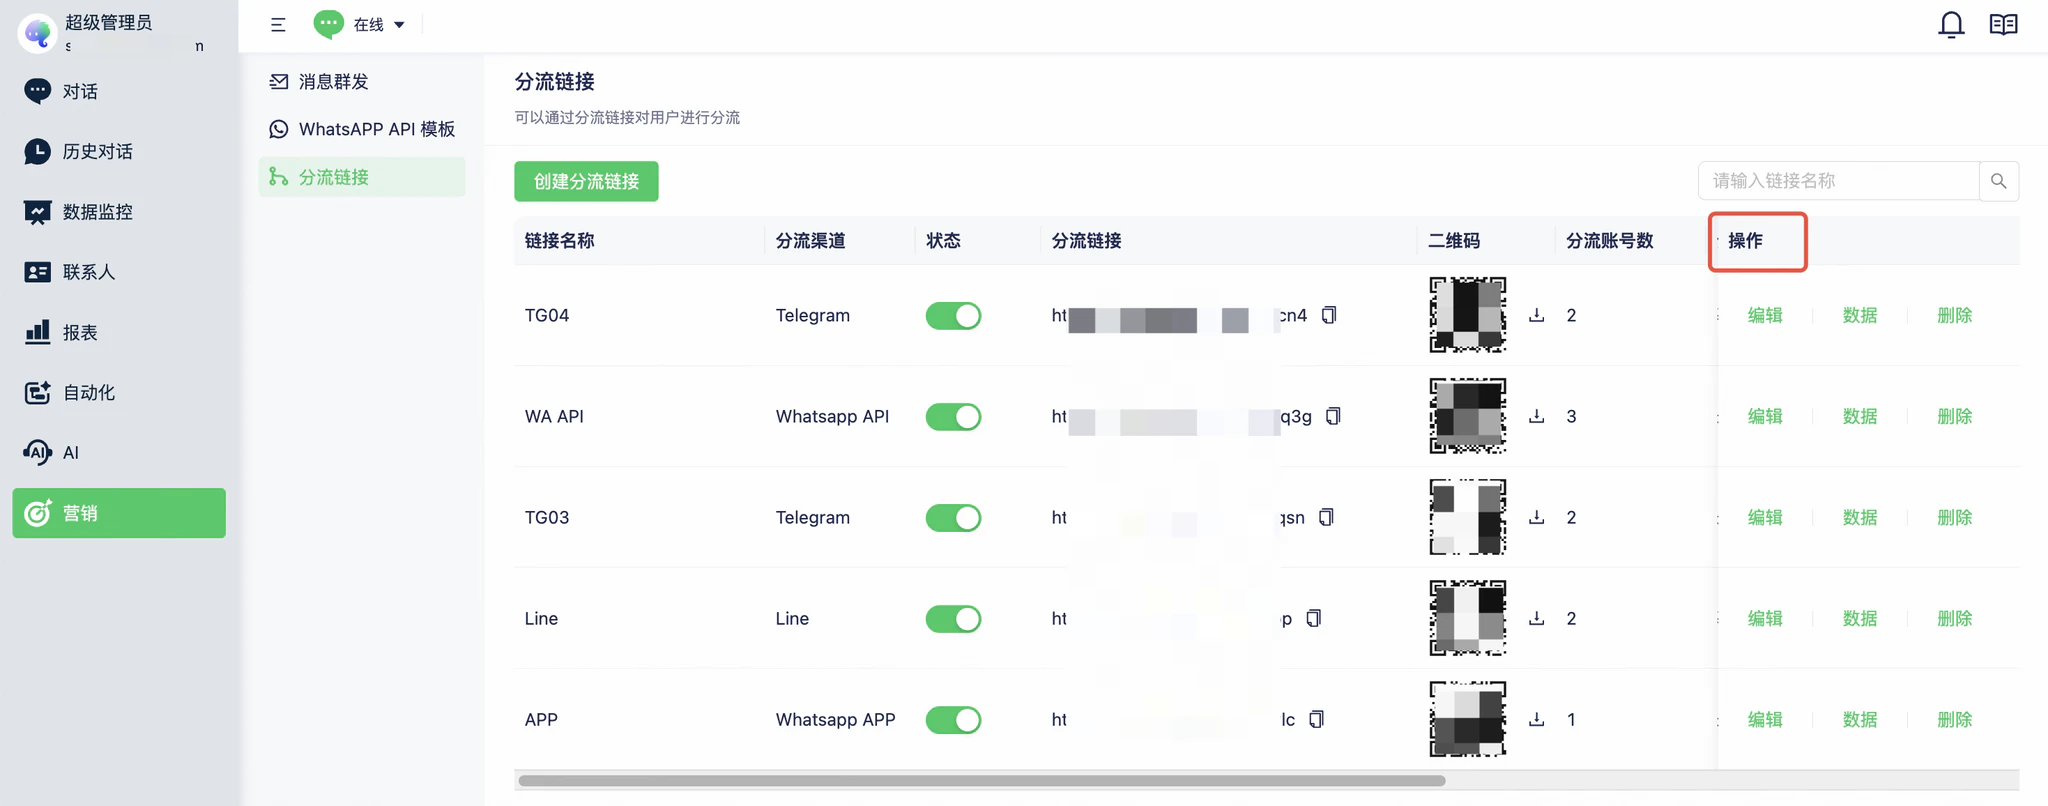
1. Status: Enable or disable the link. Disabled links stop working, so take care when changing an active campaign’s link.
2. Edit: All settings can be edited except the channel and the daily-limit time zone.
3. Data: Select Data and a time range to view clicks, redirect distribution, and detailed records.