
Use workflows to target specific users with assignment, personalized welcome messages, automatic tags, and other actions.
1. Add a workflow
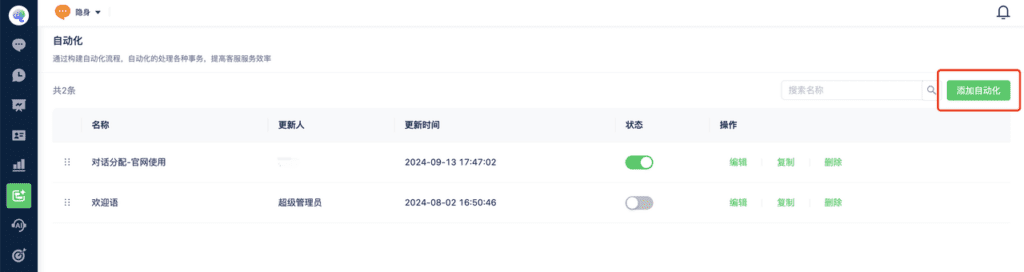
Open Automation and select Add Automation.
Enable the workflow before it can run.
2. Choose the target audience
Select All Users to apply the workflow across all channels.
Select Custom Rules to restrict the workflow to users who match your conditions.
Example
Select the Facebook channel and a connected Page, then save.
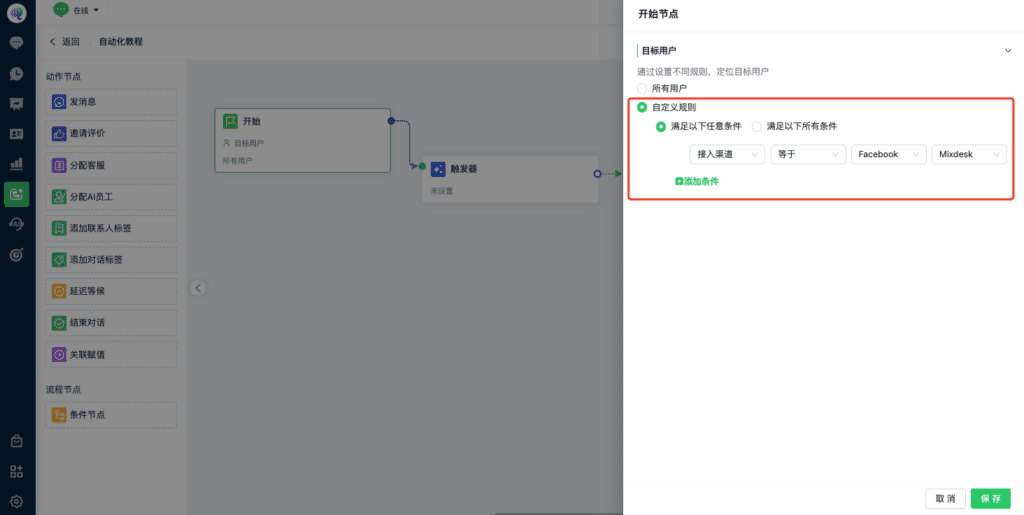
1. Match any condition: The rule applies when at least one condition matches.
2. Match all conditions: Every condition must match. Use this for a more specific audience.
3. Add a trigger template
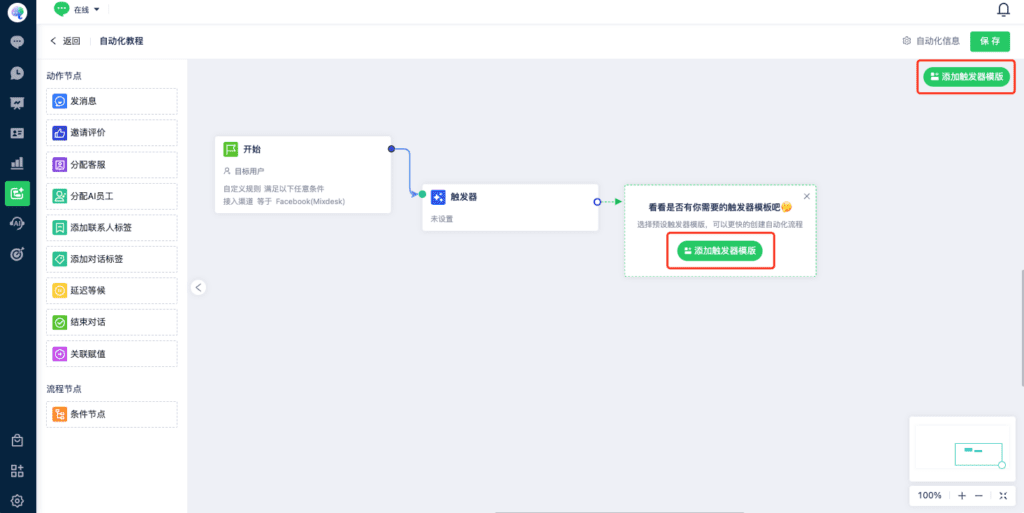
Select Add Trigger Template and choose a preset, such as assigning a team member or ending a conversation.
3.1 Assign team members automatically
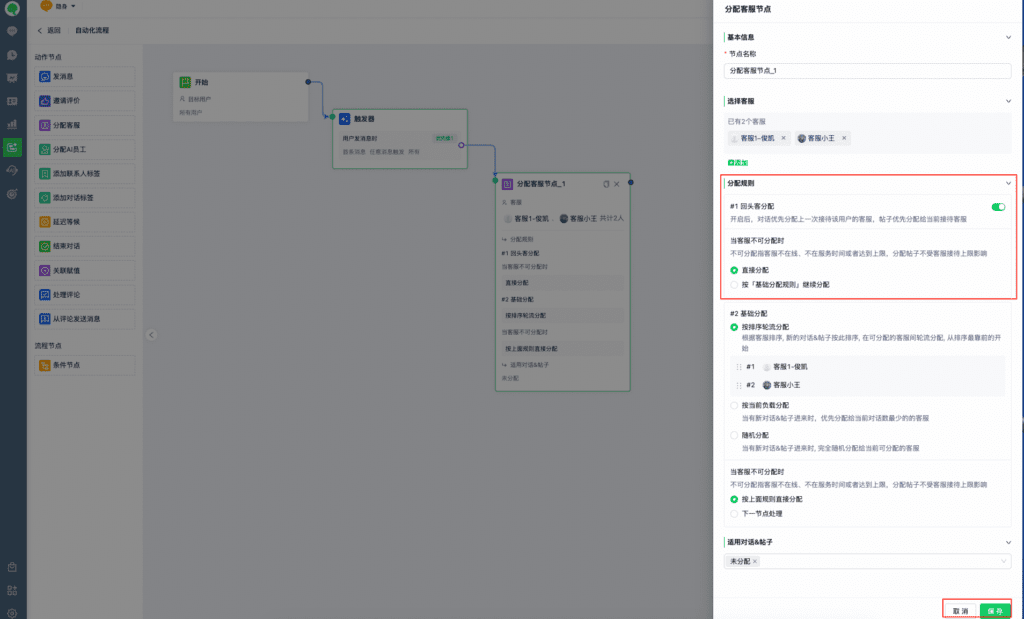
Select the Automatically Assign Team Members template.
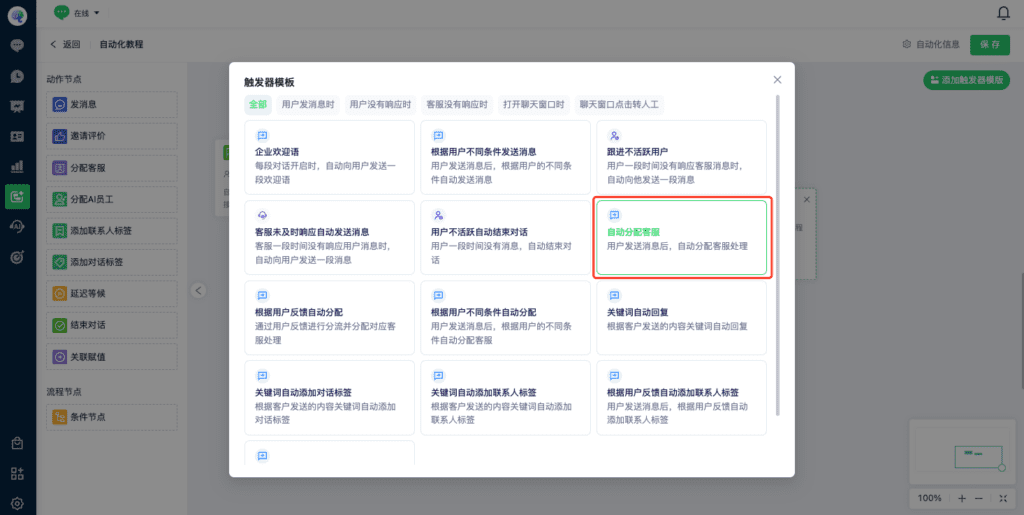
The assignment node is connected automatically. Select the team members to receive conversations.
3.2 End inactive conversations
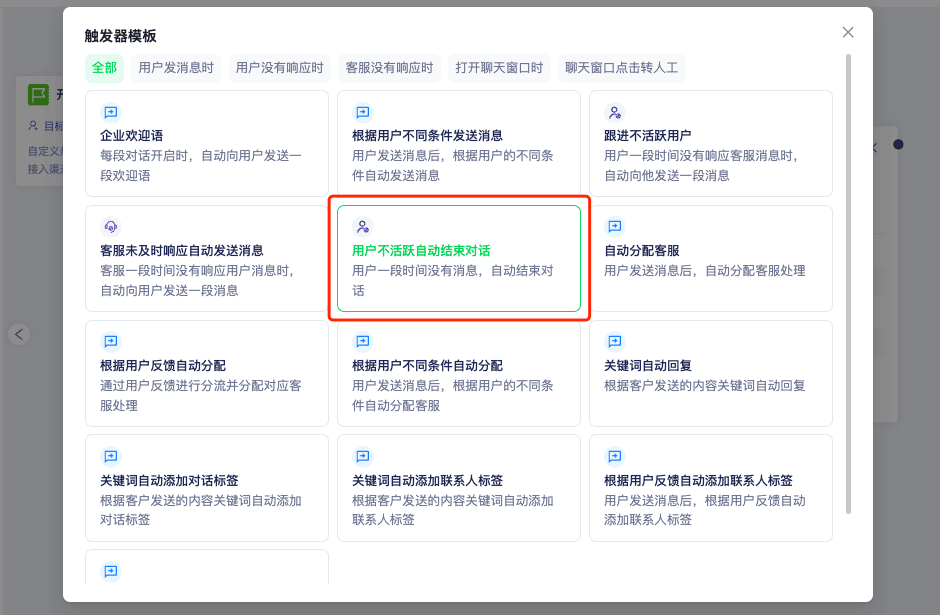
Use this when you want to end a conversation after the user stops responding.
Select the Automatically End Inactive Conversations template.
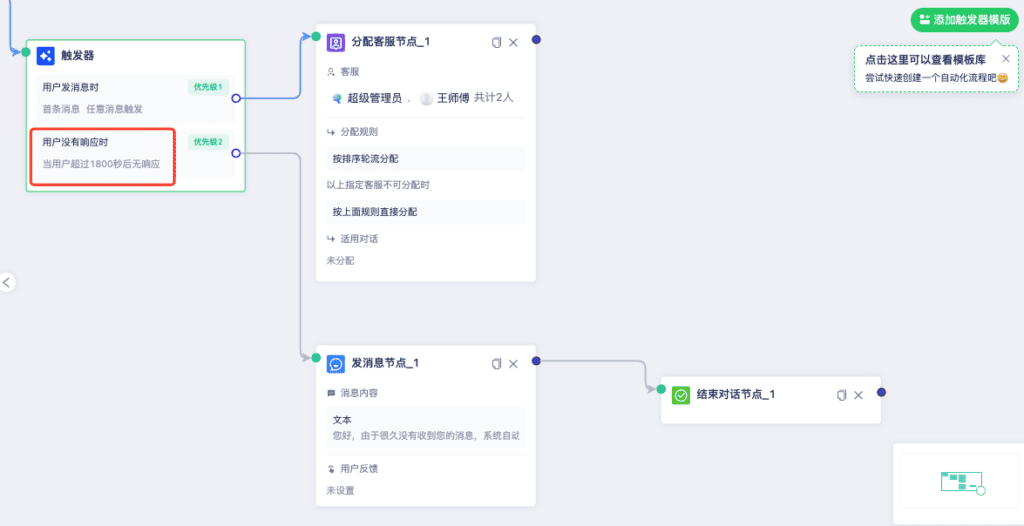
By default, after 1,800 seconds (30 minutes) without a user response, the workflow sends a message and ends the conversation.
Adjust the inactivity period as needed.
3.3 Assign high-value customers to a dedicated team member
To route selected returning customers to the person who first supported them, configure a dedicated assignment workflow.
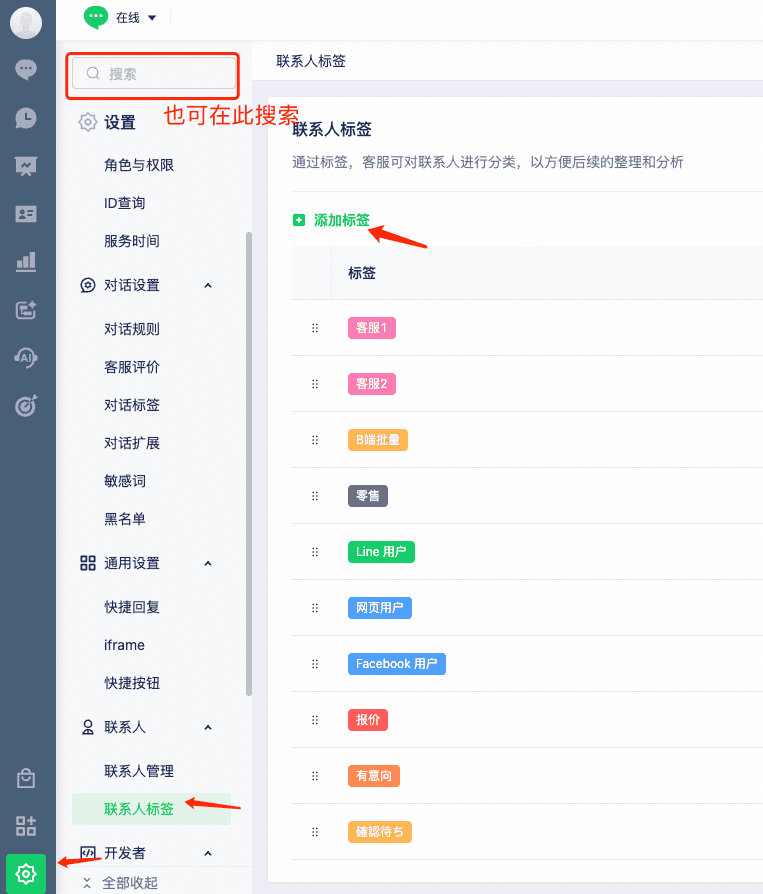
First create a contact tag for that team member, then create a workflow that matches the tag.
Step 1: Create the tag.
Step 2: Create a workflow and place it above the general assignment workflow.
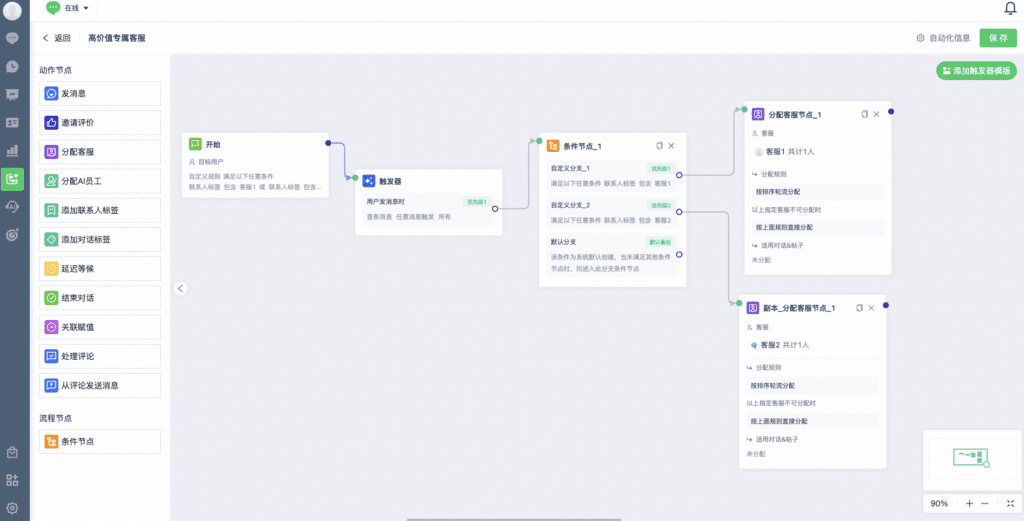
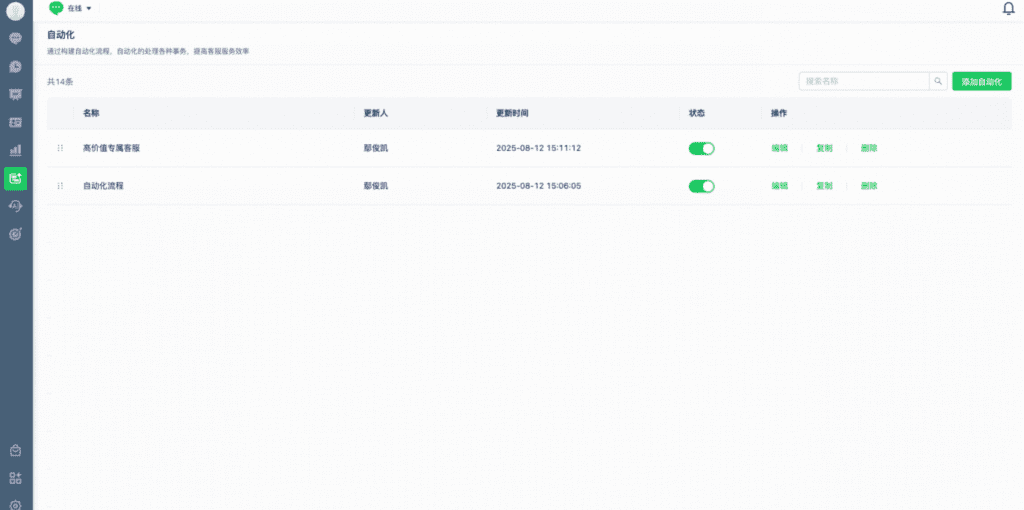
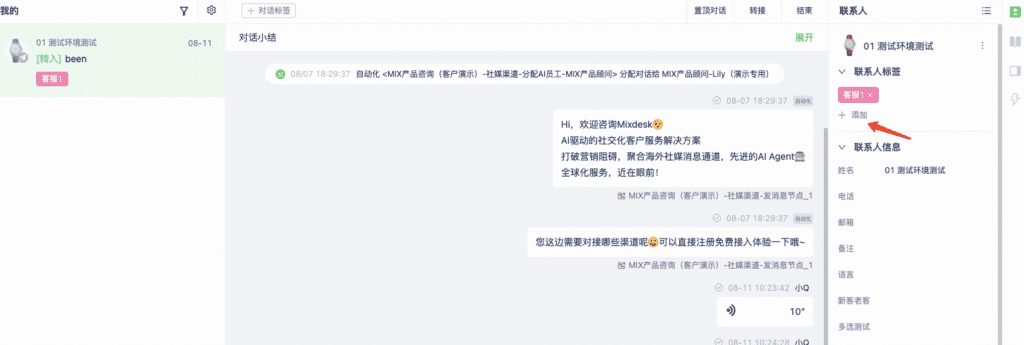
Step 3: Team members manually tag high-value contacts during conversations. On their next visit, the dedicated workflow assigns them to Team Member 1.
These steps cover audience selection, assignment, and automatic closure. Contact us if you need help.