
Define contact fields and creation rules in Mixdesk. When a visitor meets a rule, Mixdesk creates a contact you can manage, message again, or include in marketing campaigns.
Step 1: Configure contact fields
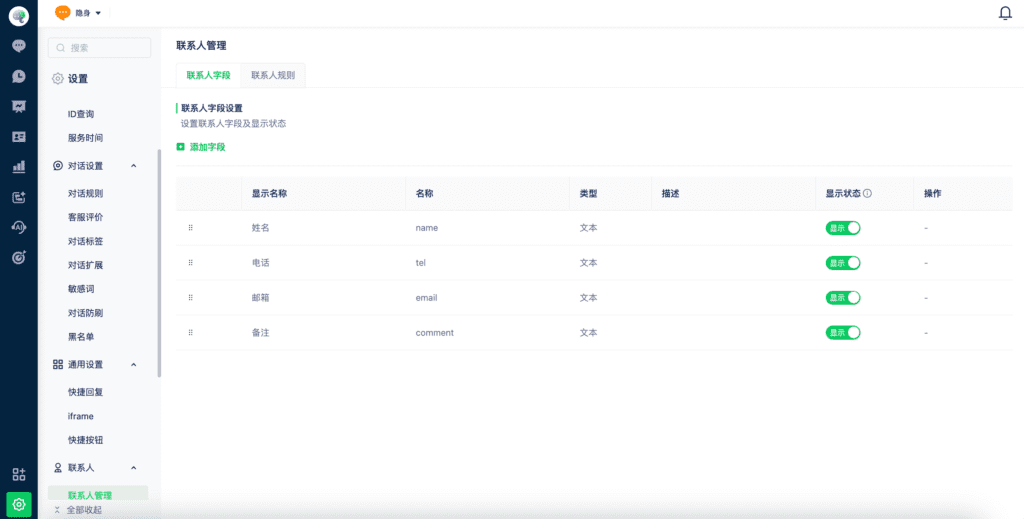
Go to Settings > Contact Management > Contact Fields. Mixdesk provides default fields, and you can add fields for your business.
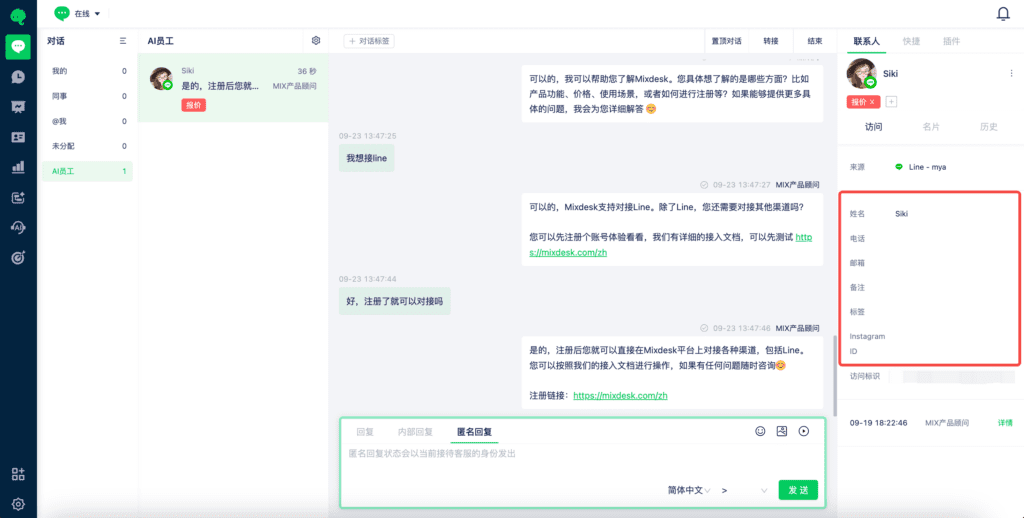
📌 Use the fieldsEdit these fields in the right sidebar of the Inbox to maintain customer information.
Step 2: Define contact-creation rules
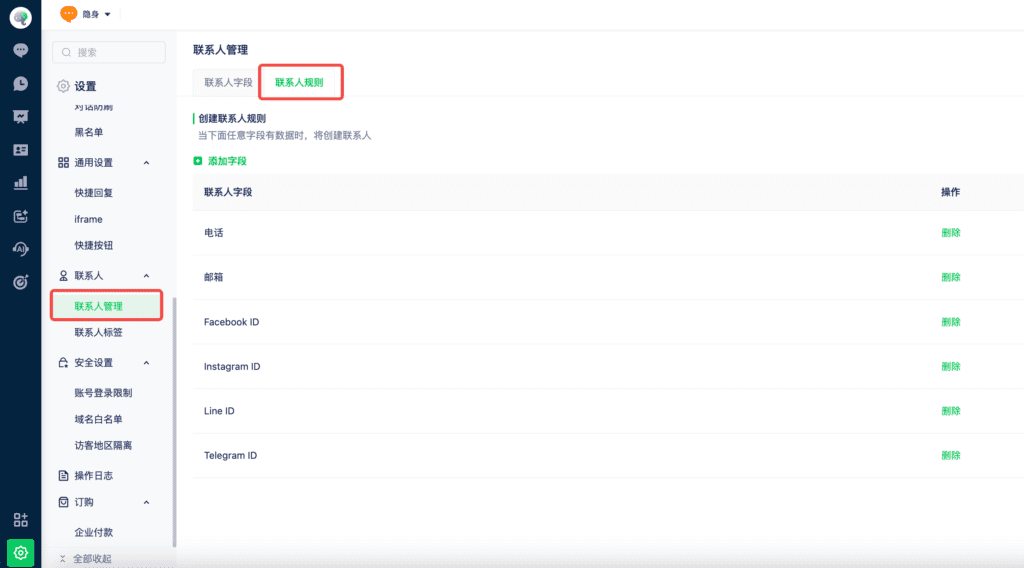
A visitor’s incoming conversation does not automatically make them a contact. In Settings, configure Contact Rules. When any configured field contains a value, Mixdesk creates a contact. Manage these records in Contacts and use them to select audiences for marketing.
Example
- Use Phone as a creation rule. When a team member enters the visitor’s number in the Phone field of their contact card, Mixdesk creates a contact.
- Use Facebook ID as a creation rule. Visitors from Facebook already have this identifier, so Mixdesk creates their contacts automatically.
Step 3: Identify the same contact
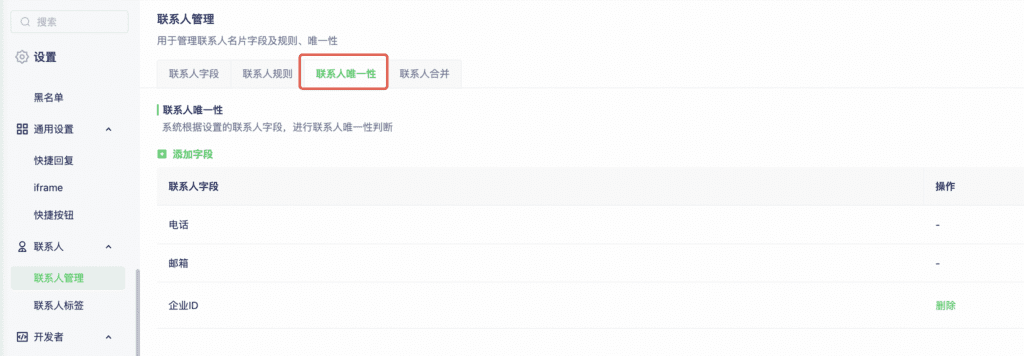
The same person may contact you through multiple channels. Mixdesk can recognize them using rules such as a matching phone number or user ID to consolidate customer information.
Step 4: Merge contacts
Enable automatic contact merging and choose whether to retain the existing contact’s information or use the latest contact information.
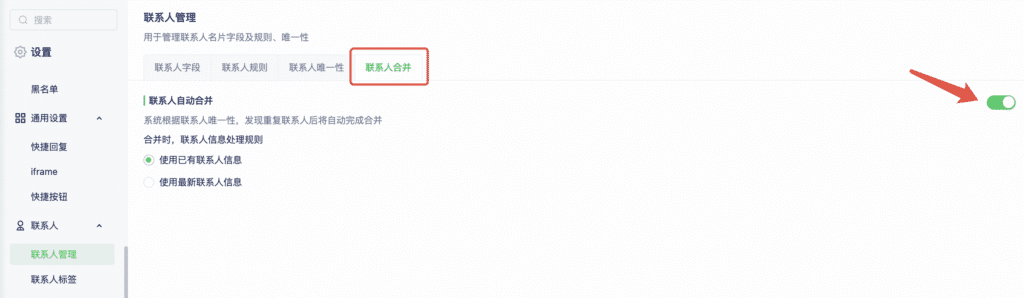
When enabled, matching the unique-identifier rules above triggers an automatic merge during a conversation. A notification appears in the conversation.
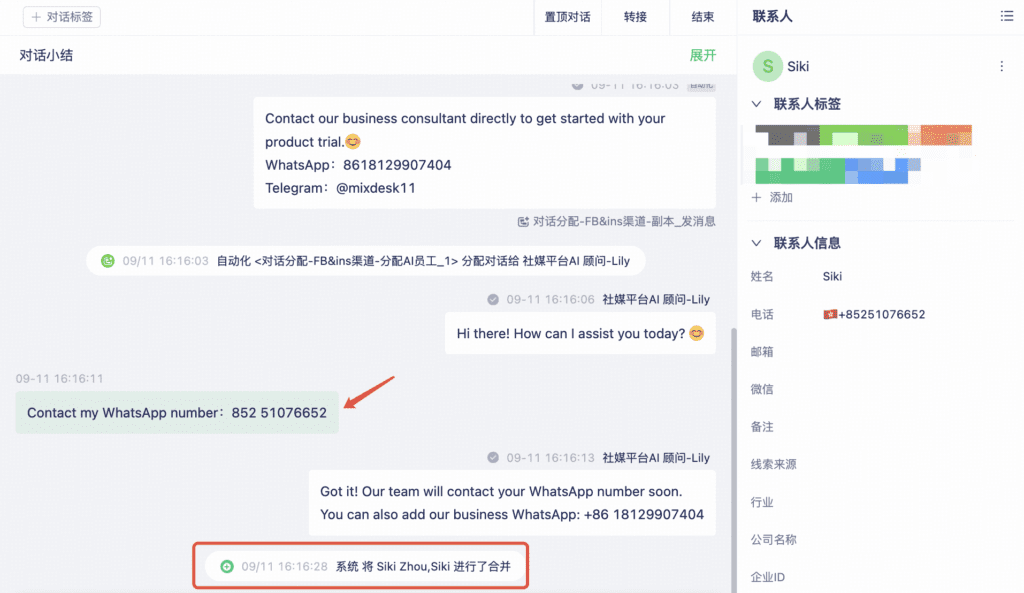
If automatic merging is disabled, Mixdesk identifies the match in the conversation and lets you merge manually.
To view and manage all stored contacts, see: