
Overview
Create bulk-messaging tasks for channels including WhatsApp, Facebook Messenger, Telegram, Instagram, LINE, and Email. Send one message or rotate between different messages.
Open bulk messaging
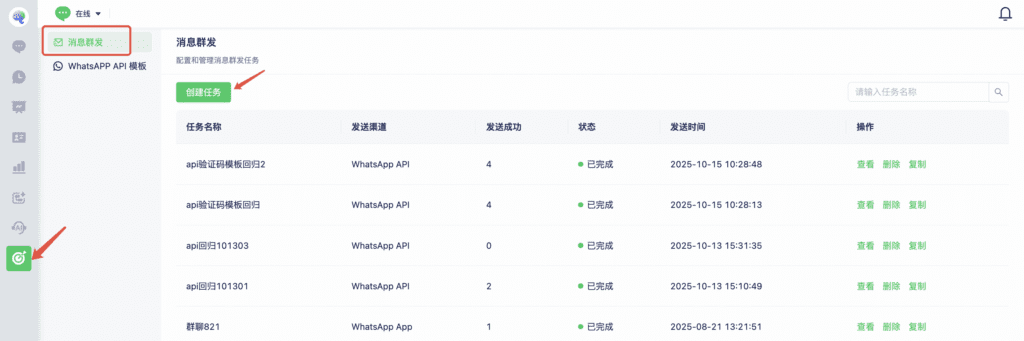
Select Bulk Messaging in the left sidebar.
Step 1: Send bulk messages
1. Create a task
Open Bulk Messages and select Create Task.
2. Configure the task
1. Task name: Enter a name for internal identification.
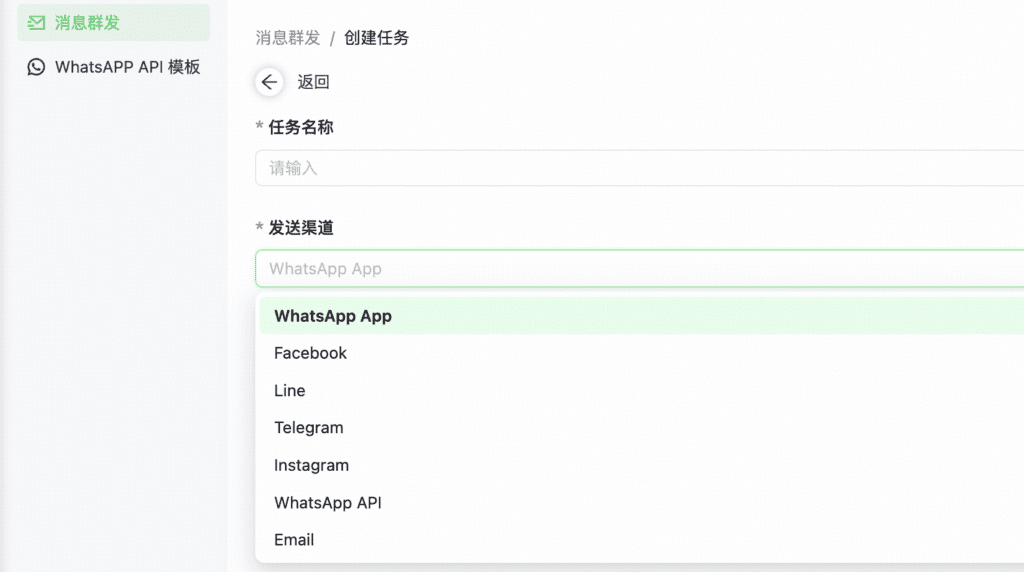
2. Sending channel: Choose one channel type per task.
3. Audience: Select the customers to message.
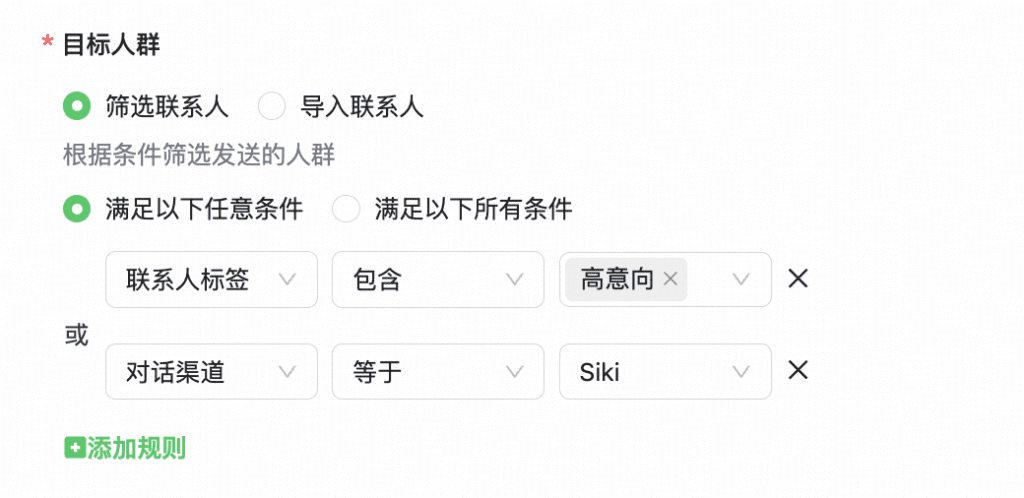
- Filter contacts
Filter by contact tags, contact fields, and conversation channel (for example, choose the relevant account if you have connected 100 WhatsApp personal accounts).
Match any condition: Contacts that match at least one condition are included. This uses OR logic.
Match all conditions: Contacts must match every condition to be included. This uses AND logic.
- Import contacts
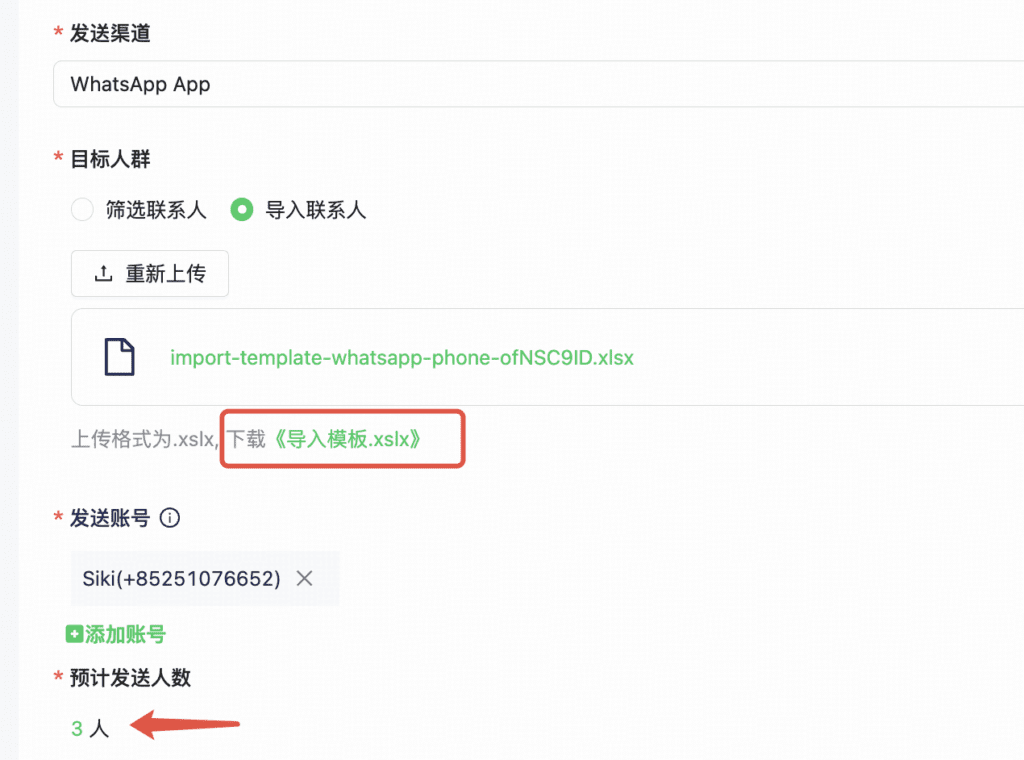
For example, on WhatsApp App, select Import Contacts.
1. Download the import template. Enter contact phone numbers and any variable values in the required format.

2. Upload the completed file. After import, the estimated recipient count appears below.
3. Sending accounts: Select the WhatsApp numbers to use. If you select several numbers, check the content delivery rule. Choose Round Robin to rotate content across accounts and recipients.
4. Message content
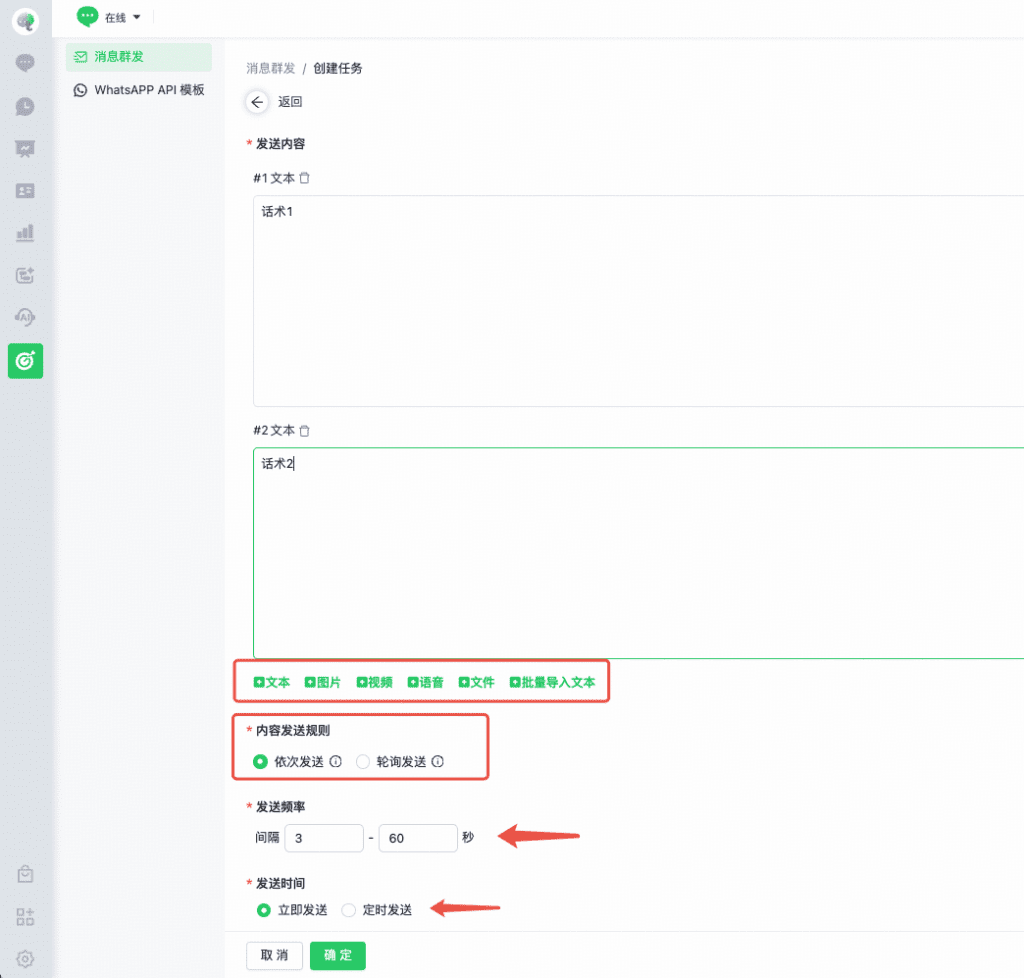
Send text, images, videos, audio, or files. Text content can also be imported in bulk.
Choose the content delivery rule carefully, especially when using multiple WhatsApp numbers:
Sequential: Send all content to one customer in order before moving to the next customer.
Round Robin: Rotate content across customers. For example, with three messages, customer A receives message 1, B receives message 2, and C receives message 3.
5. Sending frequency
Set an interval between messages. The default range is 3–60 seconds.
6. Sending time
Send Now: Start immediately after confirming the task.
Schedule: Choose a time zone and time.
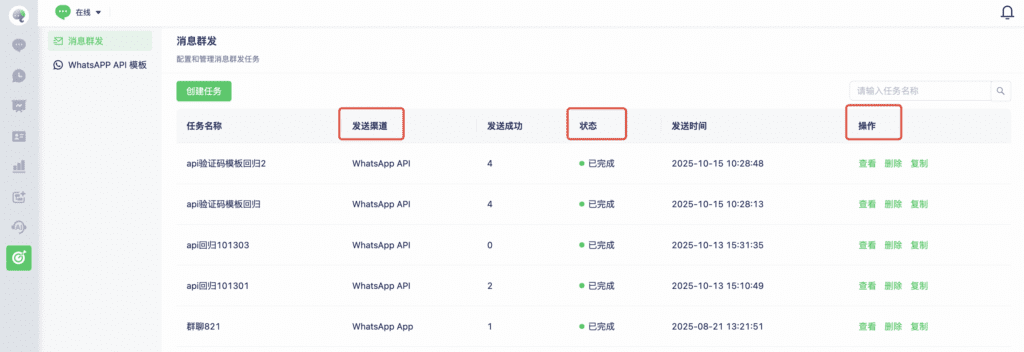
3. Manage tasks
Pause or resume, view, delete, or copy a created task.
Step 2: WhatsApp API templates
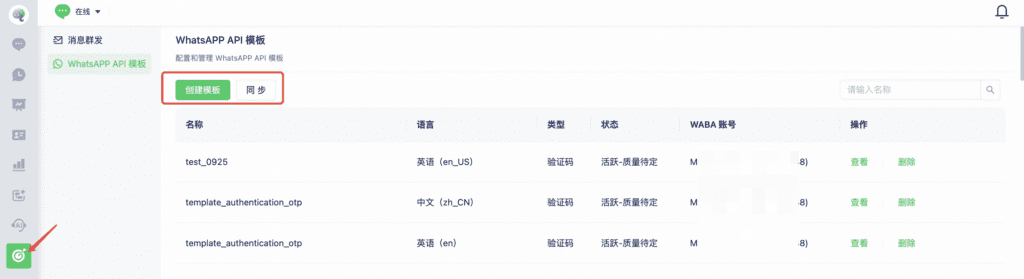
1. Create a template
Select Create Template and enter the details. A live preview appears on the right.
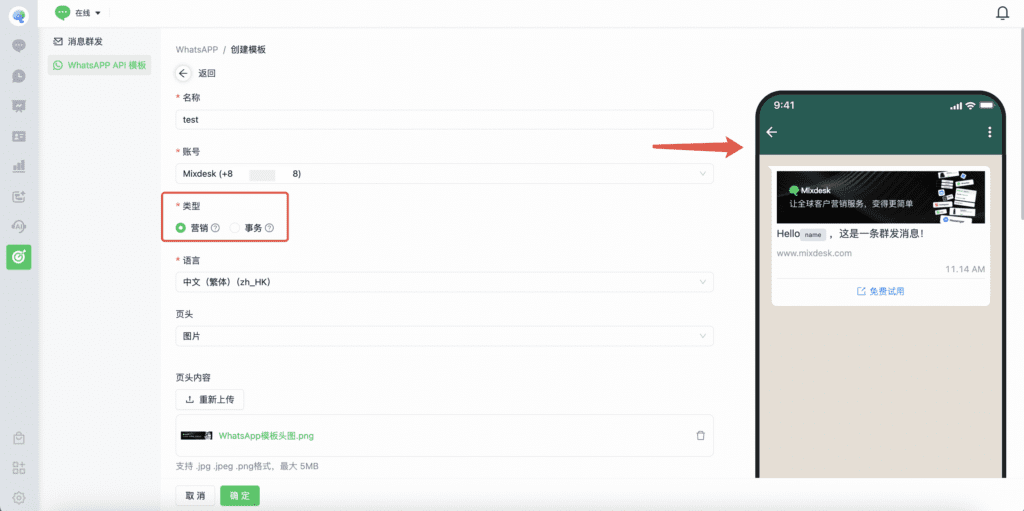
1. Name: Enter a name that makes the template easy to find.
2. Account: Select the business phone number.
3. Type: Choose marketing or utility according to the message content. An incorrect category can cause rejection.
4. Language: Choose the message language.
5. Header: Optionally add text, an image, a video, or a file.
6. Header content: Enter the content for the selected header type.
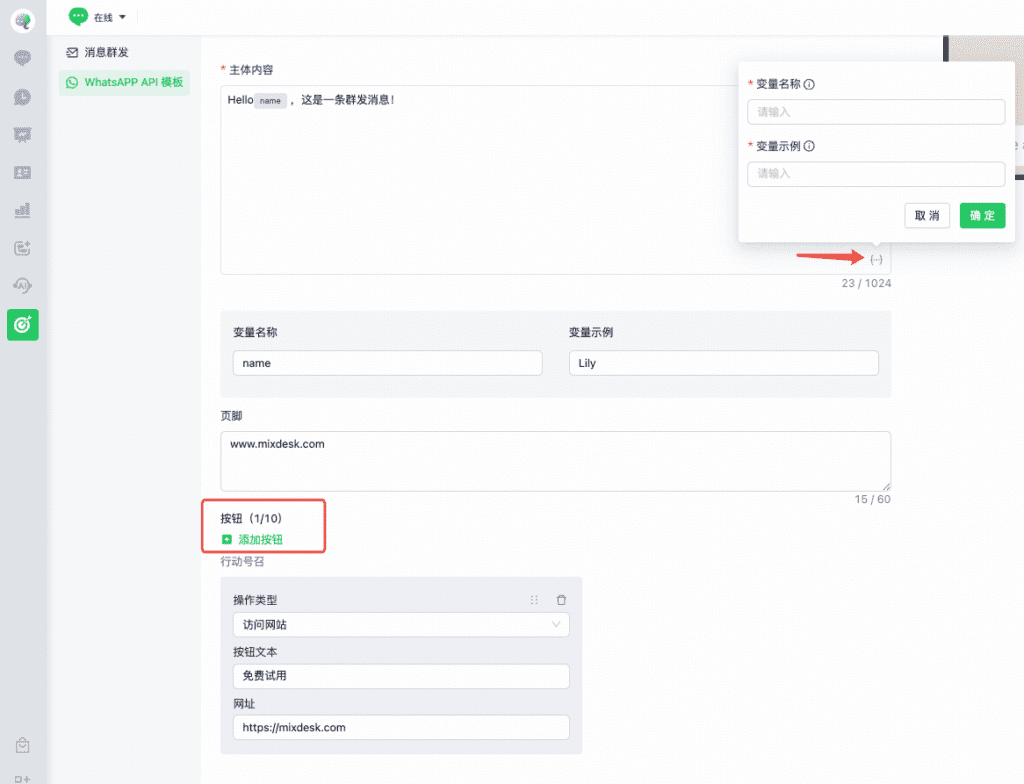
7. Body: Enter the complete message. Variables are supported.
- Variable name: For example, name, id, or URL.
- Variable example: Provide a sample value, such as Lily for a variable named name.
8. Footer: Optionally include brand information, such as your website or brand name.
9. Buttons: Add buttons such as text replies, phone calls, or website links.
Select Confirm to save. The template enters Pending Review. The source guide notes that review usually takes a few minutes.
2. Send WhatsApp API template messages
After completing template setup, create a bulk-messaging task.
1. Choose WhatsApp API as the channel and Template Message as the message type.
2. Filter or import the contacts to message.
3. Choose System Matching or Specified Account for the sender. Imported contacts require Specified Account.
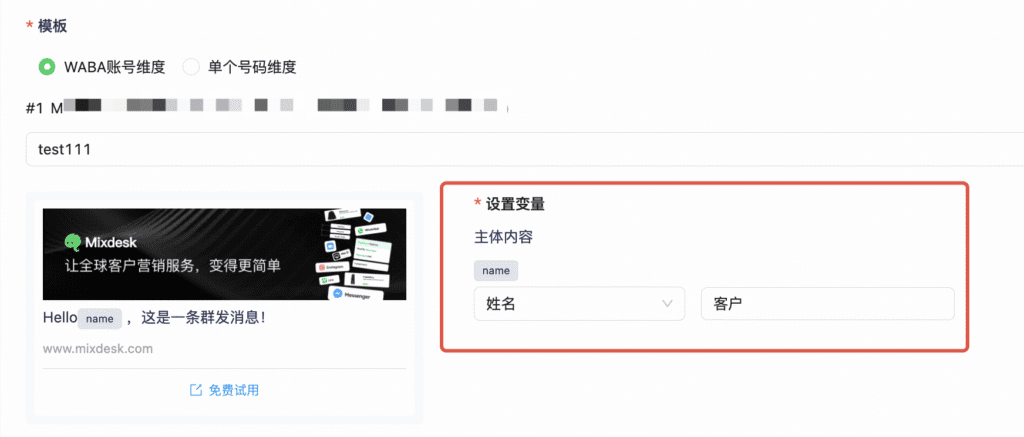
4. Choose WABA Account to use one template for all sending numbers, or Individual Number to choose a different template for each number.
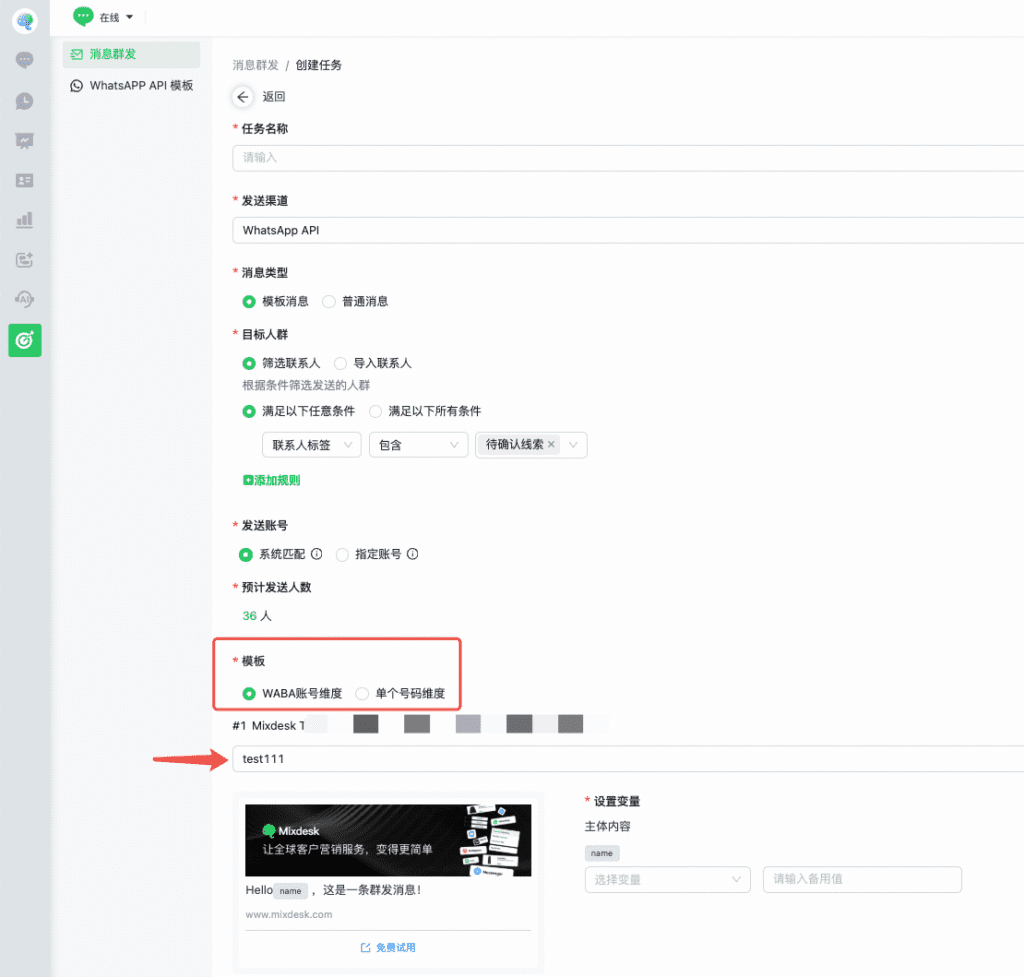
5. Set variable values
Contact us if you need help configuring bulk messaging.