Overview
Connect multiple Instagram professional accounts to synchronize comments and direct messages, manage replies and contacts, and send bulk messages to selected customers.
AI Agents can respond to customers in these conversations around the clock.
Setup steps
Step 1: Sign in to Instagram
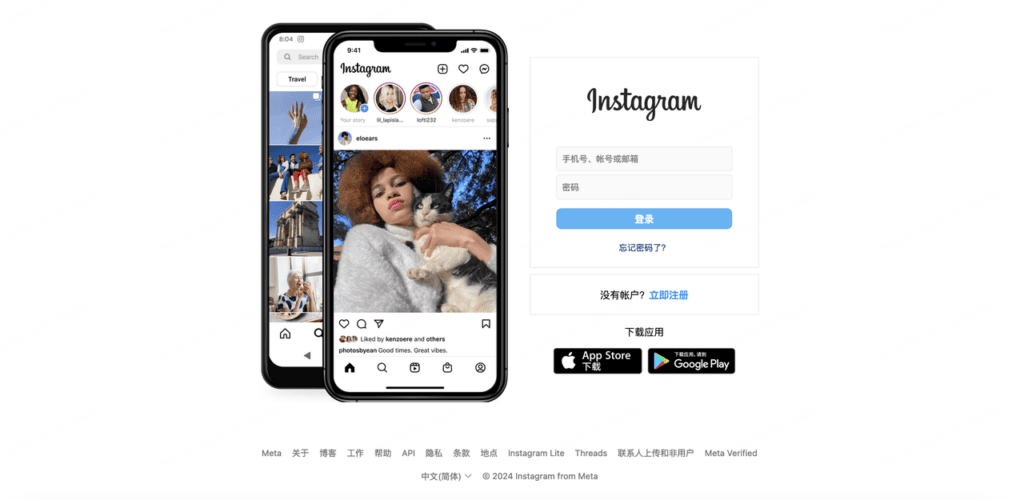
Open https://www.instagram.com/ and sign in. If you do not have an account, select Sign Up.
Step 2: Switch to a professional account
Skip this step if you already have an Instagram professional account.
On desktop
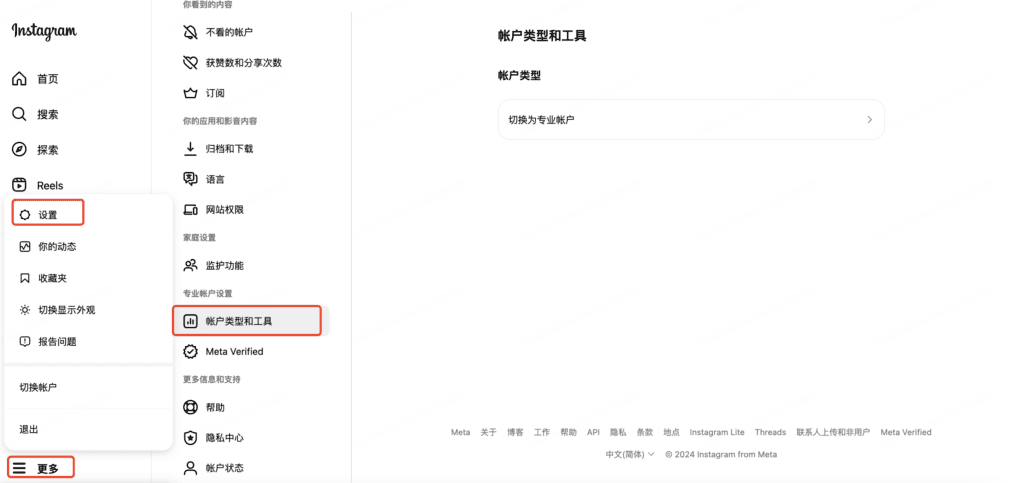
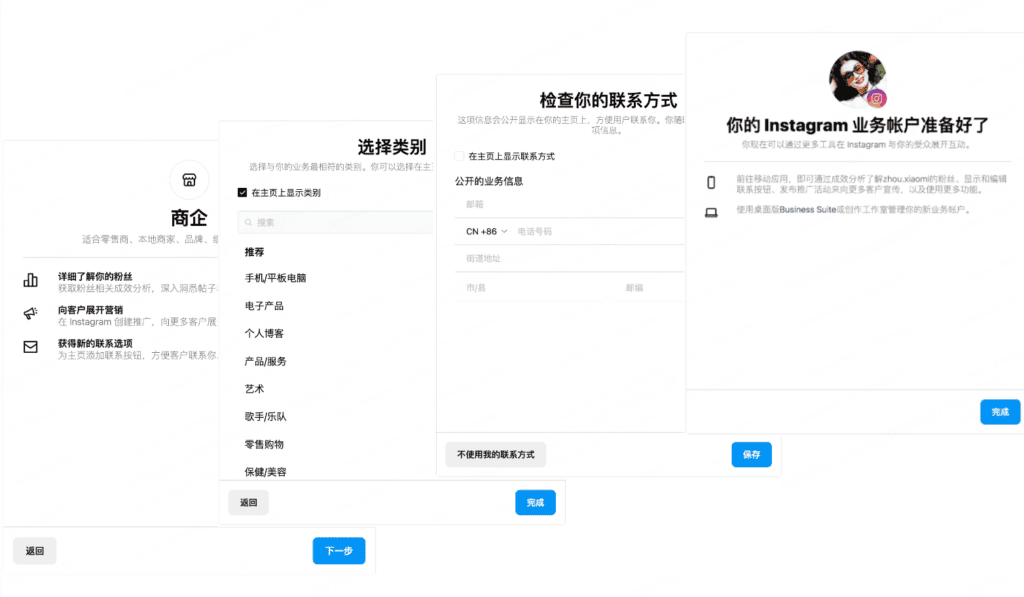
1. After signing in, select More > Settings in the lower-left corner. Scroll to Account Type and Tools and select Switch to Professional Account.
2. Follow the prompts and select Creator or Business. Both account types are supported. This example uses Business accounts.
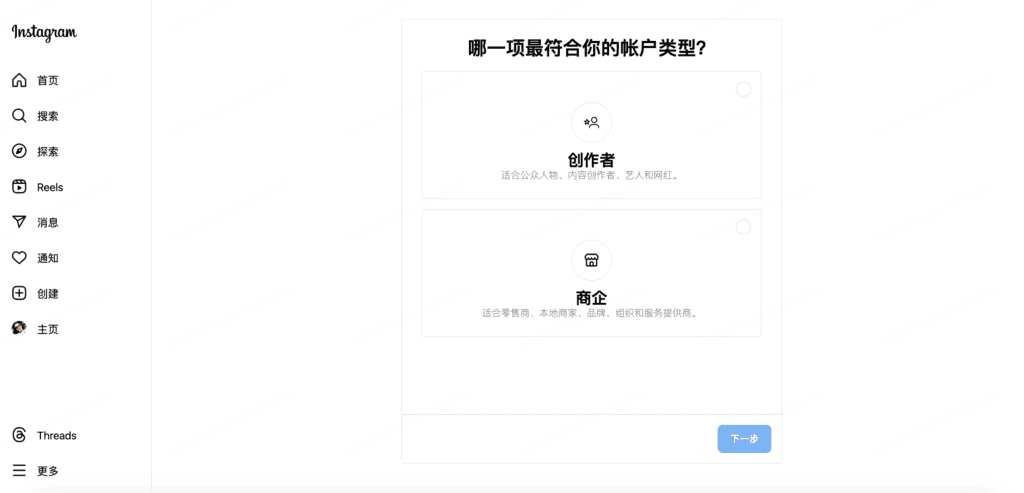
3. Select Next
4. Choose the category most relevant to your business, then select Done.
5. Enter your contact details and select Save.
Contact details appear on your profile. To keep them hidden, select Don’t Use My Contact Info.
6. Your professional account is ready.
On mobile
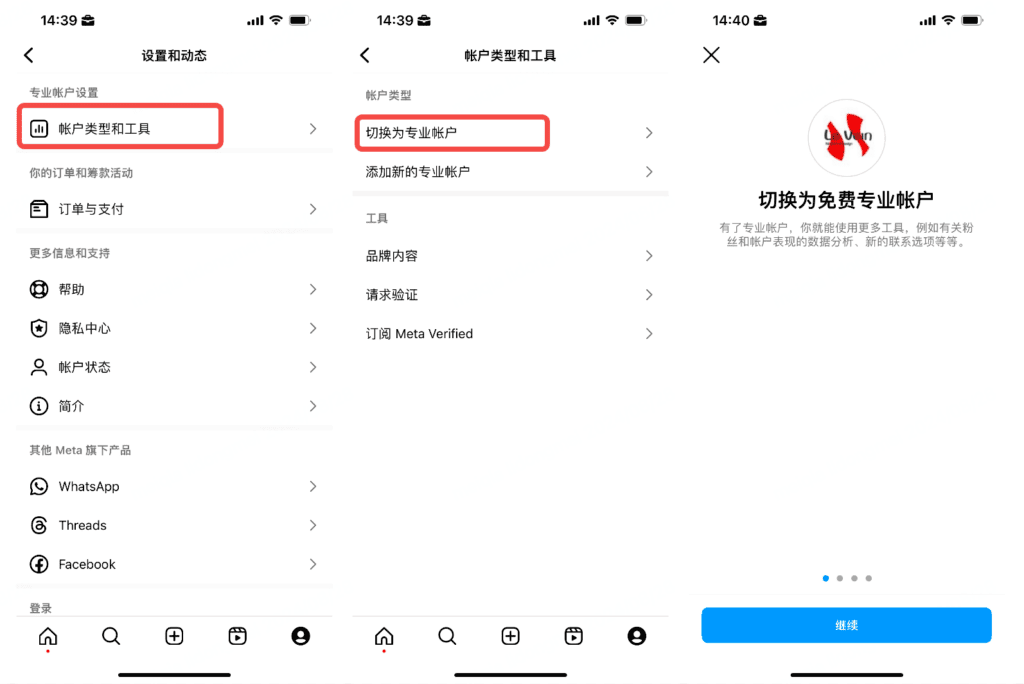
1. On your profile, open the menu in the upper-right corner and go to Settings > Account, then select Account Type and Tools.
2. Select Switch to Professional Account and follow the prompts.
Step 3: Link a Facebook Page
If you do not have a Facebook Page, see: Create a Facebook Page
If you already have a Page, follow either method below.
Method 1: Use the Instagram app
1. Open Instagram and sign in to your professional account.
2. Select your avatar in the lower-right corner to open your profile, then select Edit Profile.
3. Under Public Business Information, select Page.
4. In the new window, you can manage connections or change or create a Page. Select Continue.
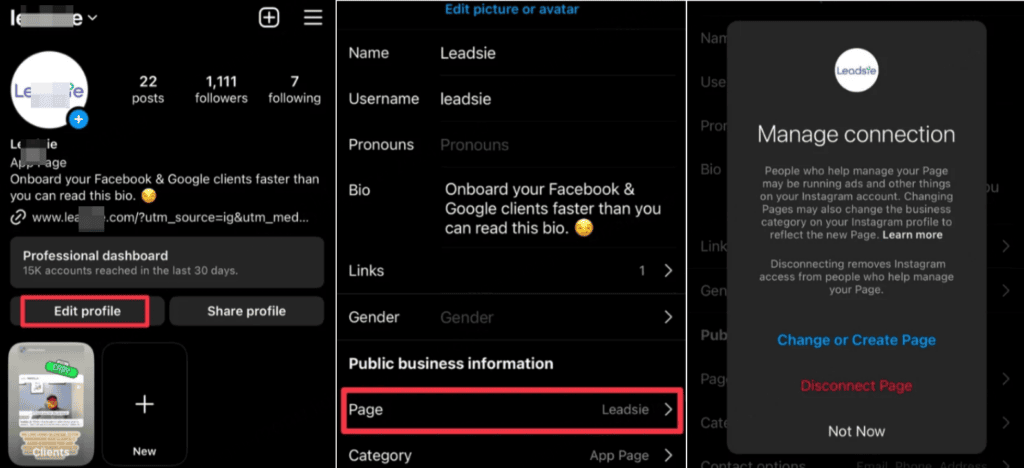
5. Sign in to Facebook to link the account to Instagram.
Method 2: Use Facebook on the web
1. Sign in to Facebook, choose the Page, open Manage Page, and select Settings.
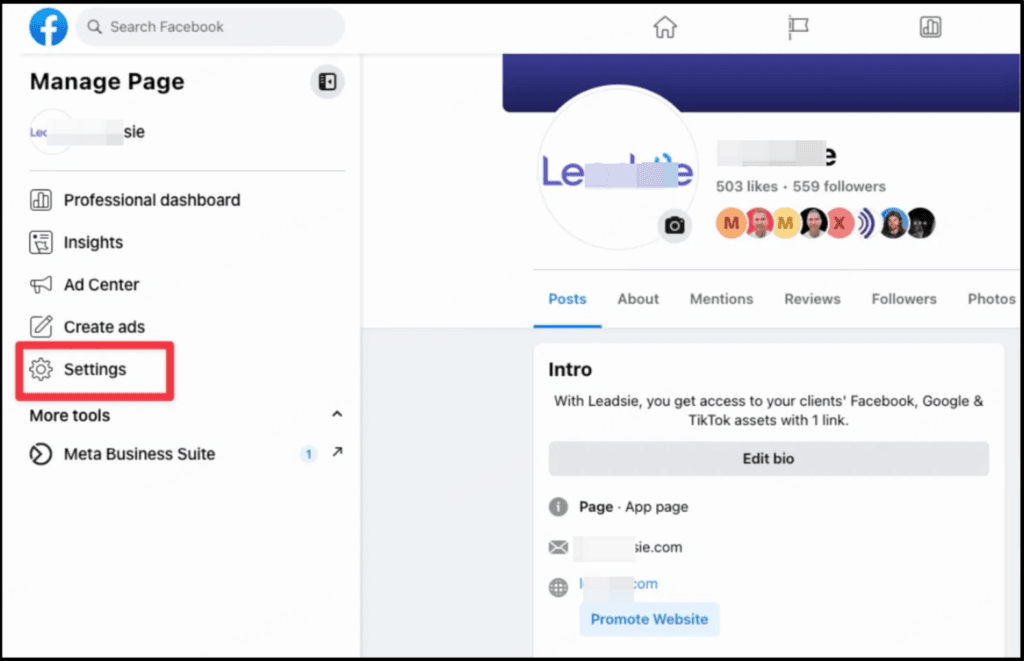
2. In Settings, select Linked Accounts.
3. Select Connect Account.
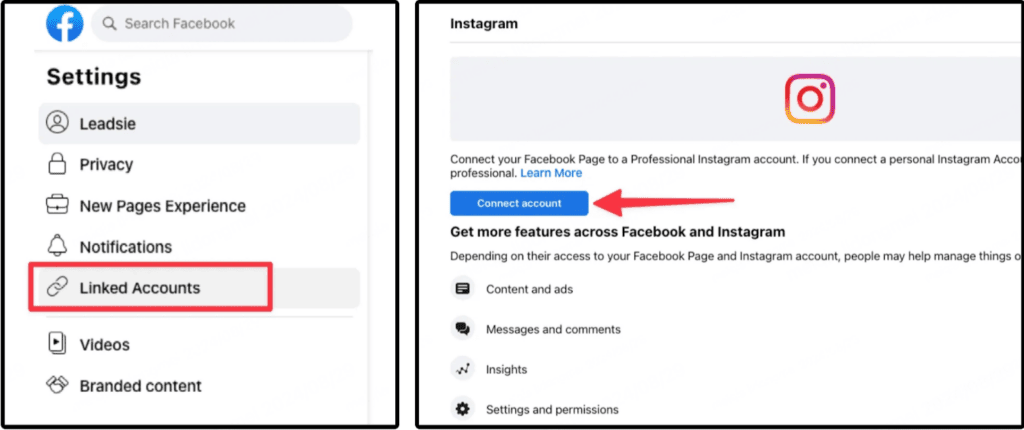
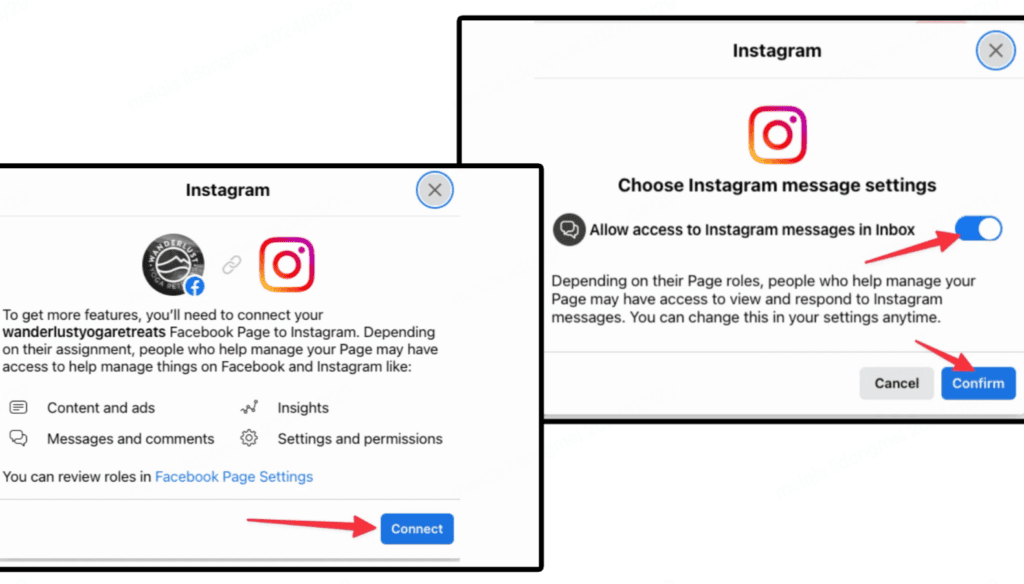
4. In the blue panel, select Connect.
5. The system opens the Instagram login window. Sign in to your account.
6. After returning to Facebook, select Allow Access to Instagram Messages in Inbox, then select Confirm to complete the connection.
Step 4: Connect Instagram in Mixdesk
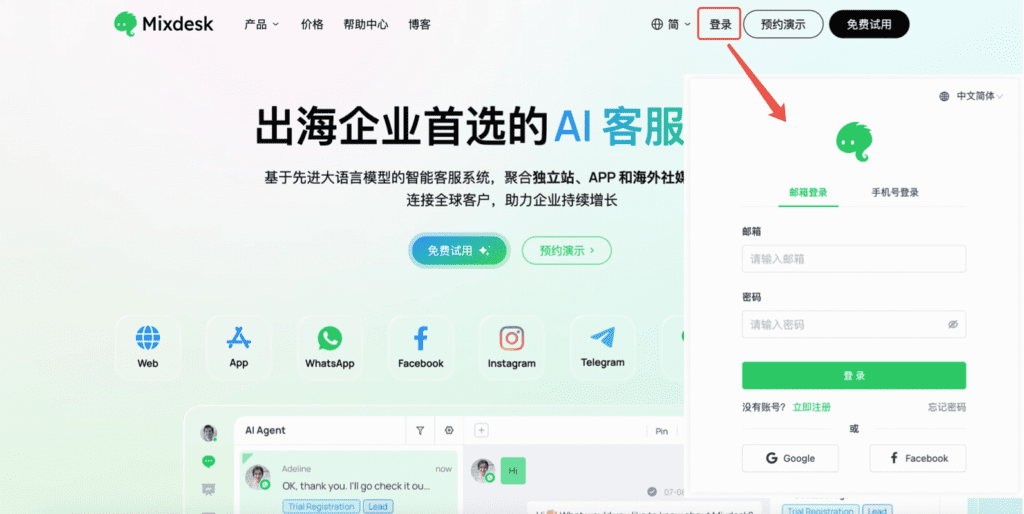
1. Sign in to Mixdesk
Visit mixdesk.com. In the upper-right corner, select Log In and enter your credentials.
If you do not have an account, register and sign in.
2. Open the channel connection page
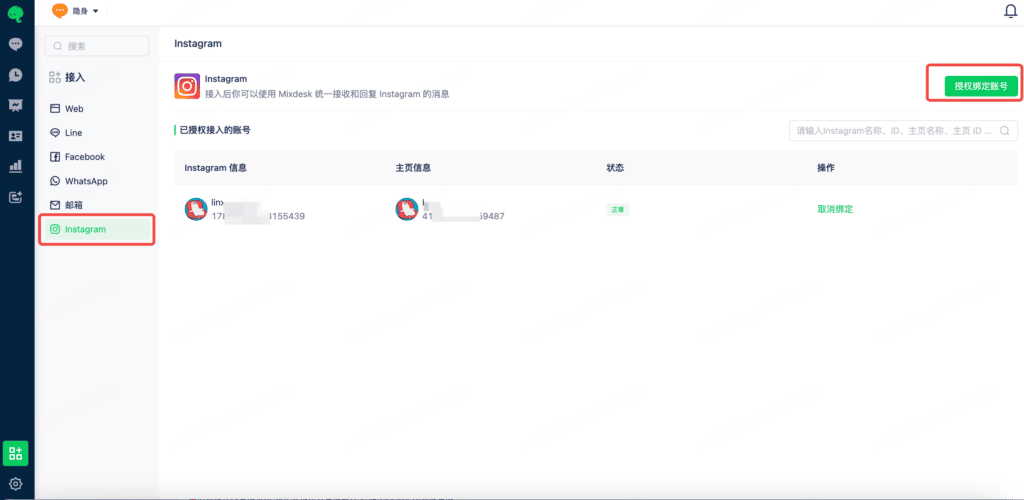
In the left sidebar, select Channels and choose Instagram as the channel. In the upper-right corner, select Authorize Account.
Here you can authorize accounts or disconnect them.
3. Sign in to Facebook and authorize the connection
After selecting Authorize, sign in to Facebook and follow the on-screen authorization prompts.
Step 5: Test the connection
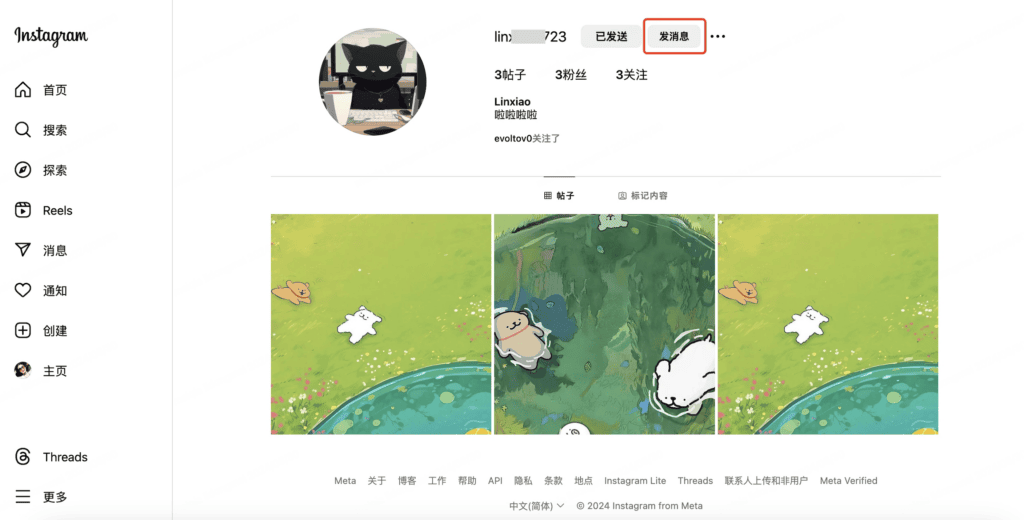
1. On desktop
Using a different Instagram account, find the connected professional account’s profile and select Message.
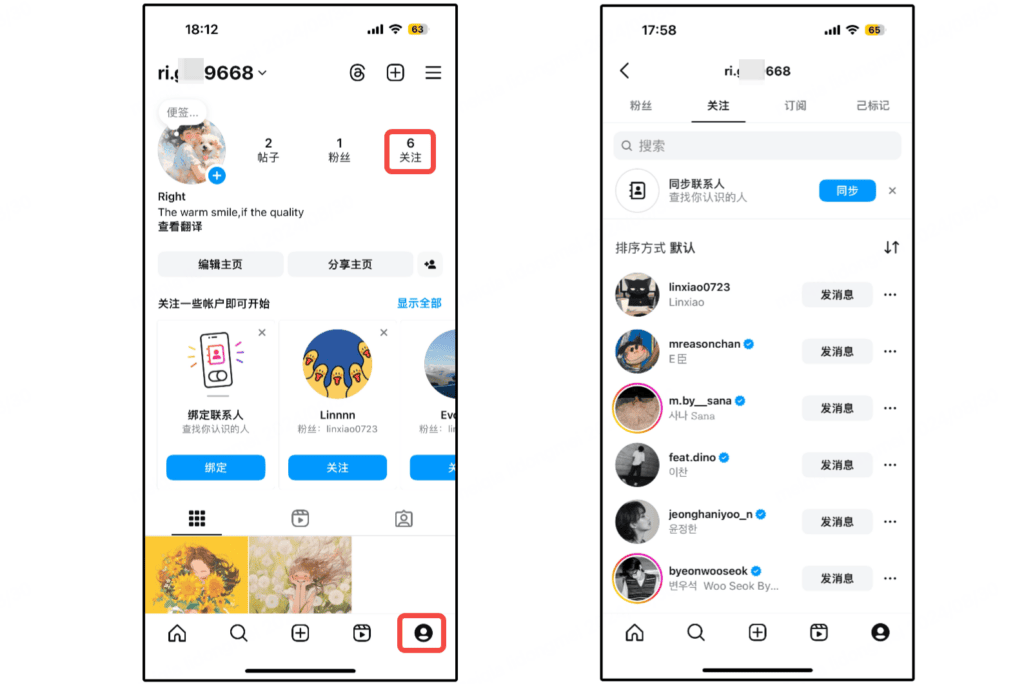
2. In the app
Method 1: Sign in to Instagram and select your avatar to open your profile, then select Following to find a profile you follow and send a message.
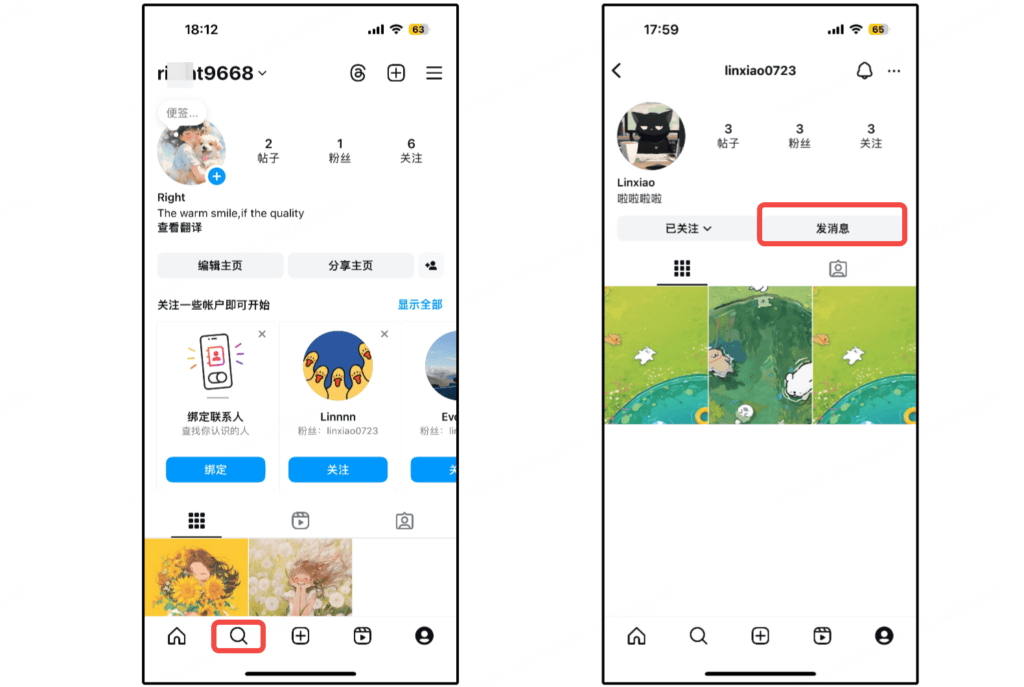
Method 2: Select Search and enter the profile name to find the profile. Open it and select Message.
Reply in Mixdesk to test the conversation.
Reply from the connected account in Instagram to check that messages synchronize.
Note: In rare cases, sending a message after connecting produces error (#100): the action is invalid because the app is not the thread owner.
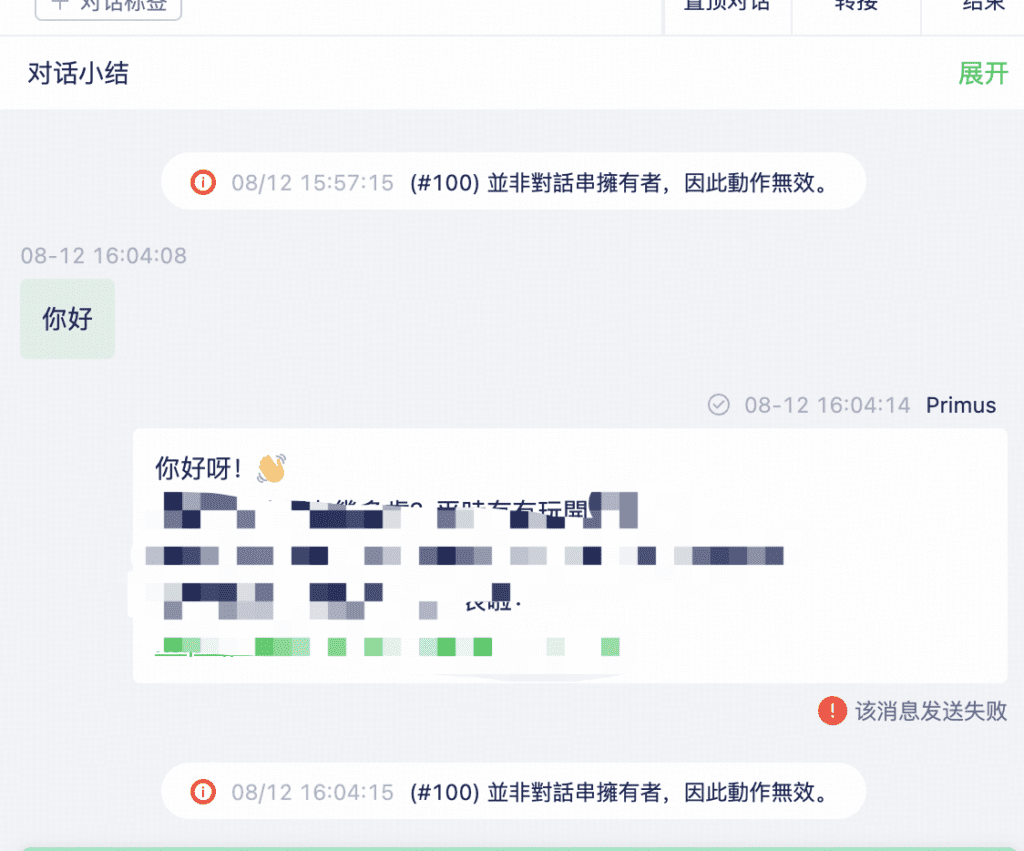
This indicates incorrect permissions. Adjust Facebook permissions as shown below.
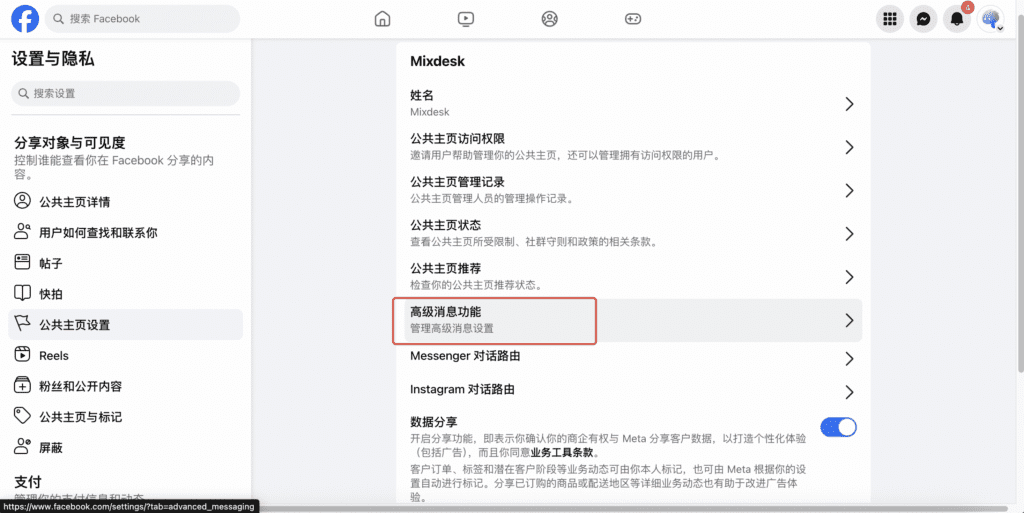
1. In the Facebook Page settings shown below, open Advanced Messaging.
2. Under Handover Protocol, find the Instagram receiver and select Configure.
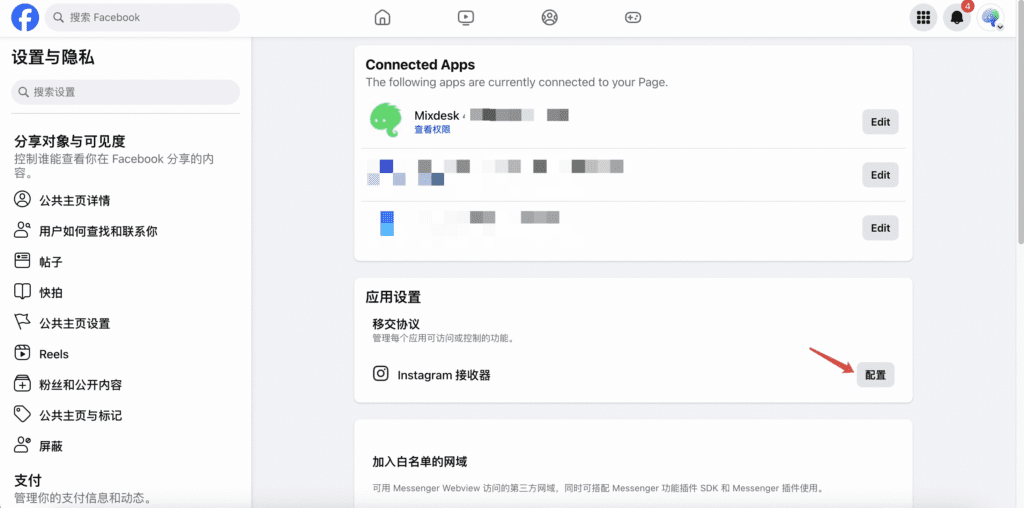
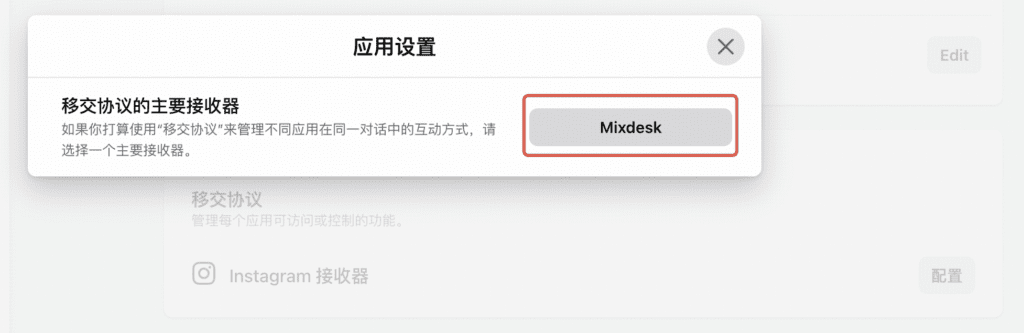
3. Select Mixdesk as the primary receiver for Instagram messages.