
Overview
Connect multiple business mailboxes to read and reply to email in Mixdesk. Assign each mailbox to the appropriate support group for different service needs.
Connection steps
Add a mailbox
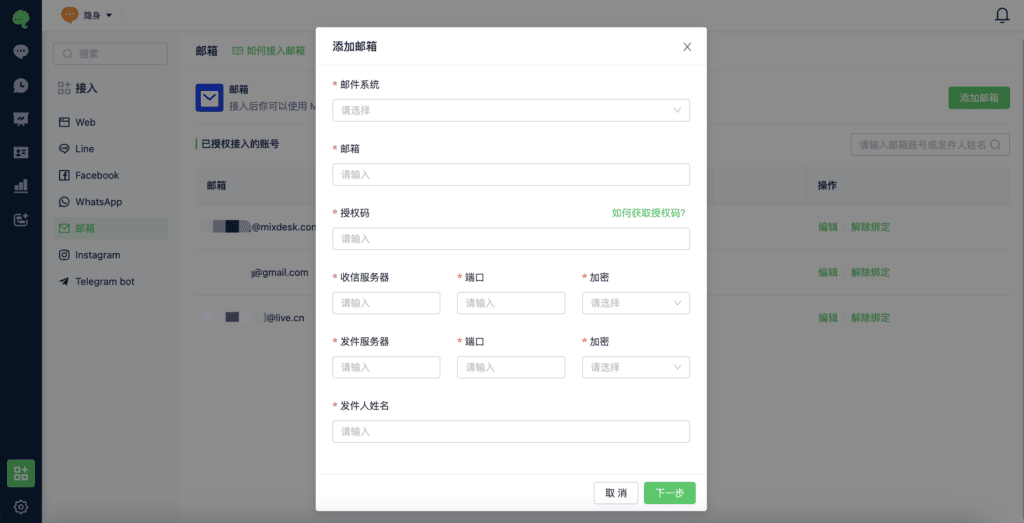
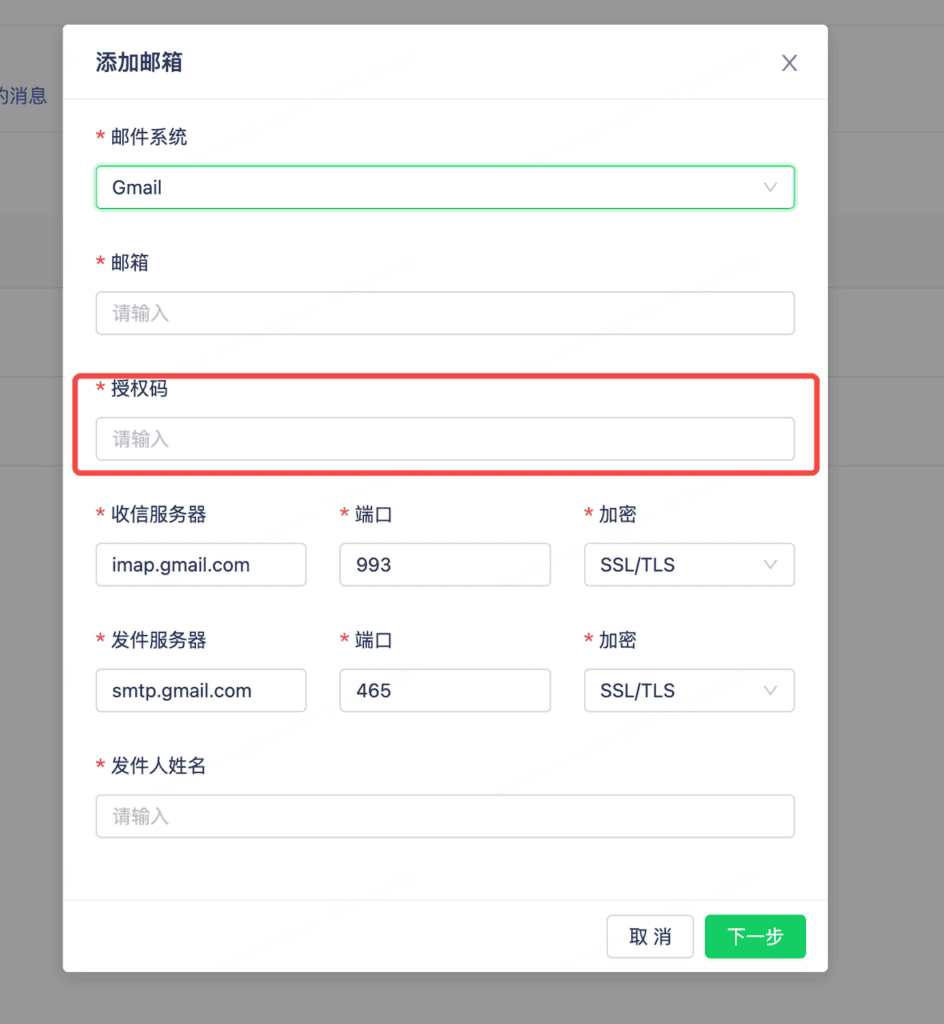
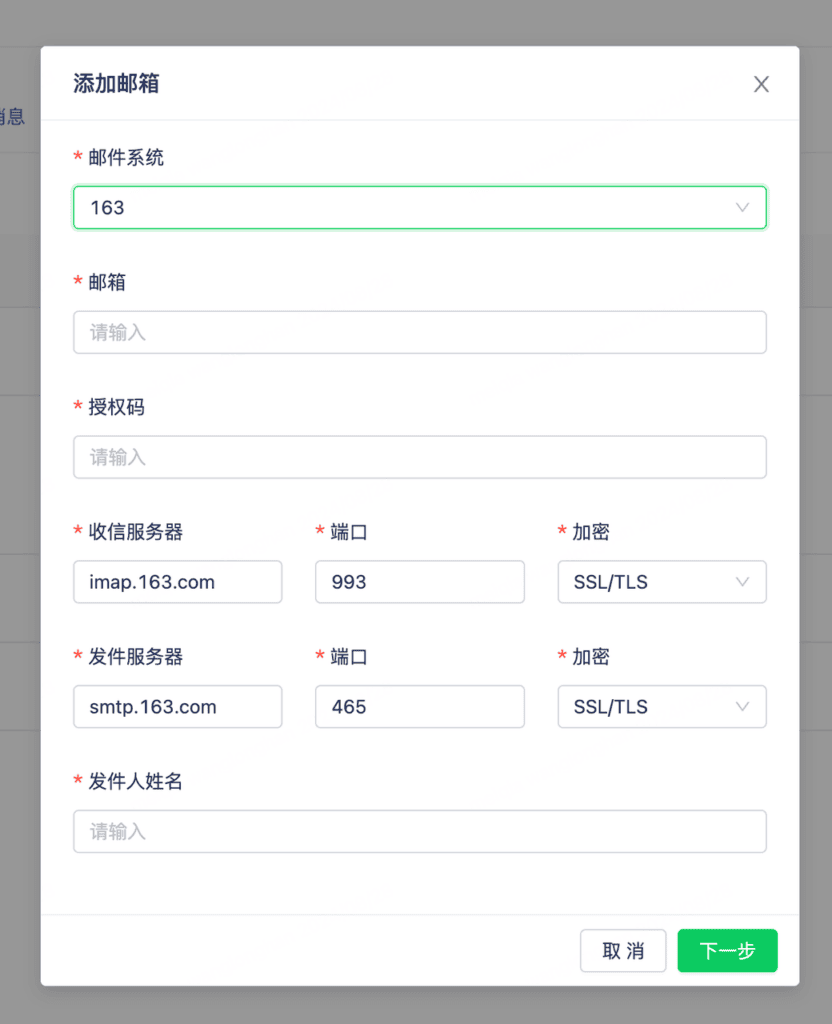
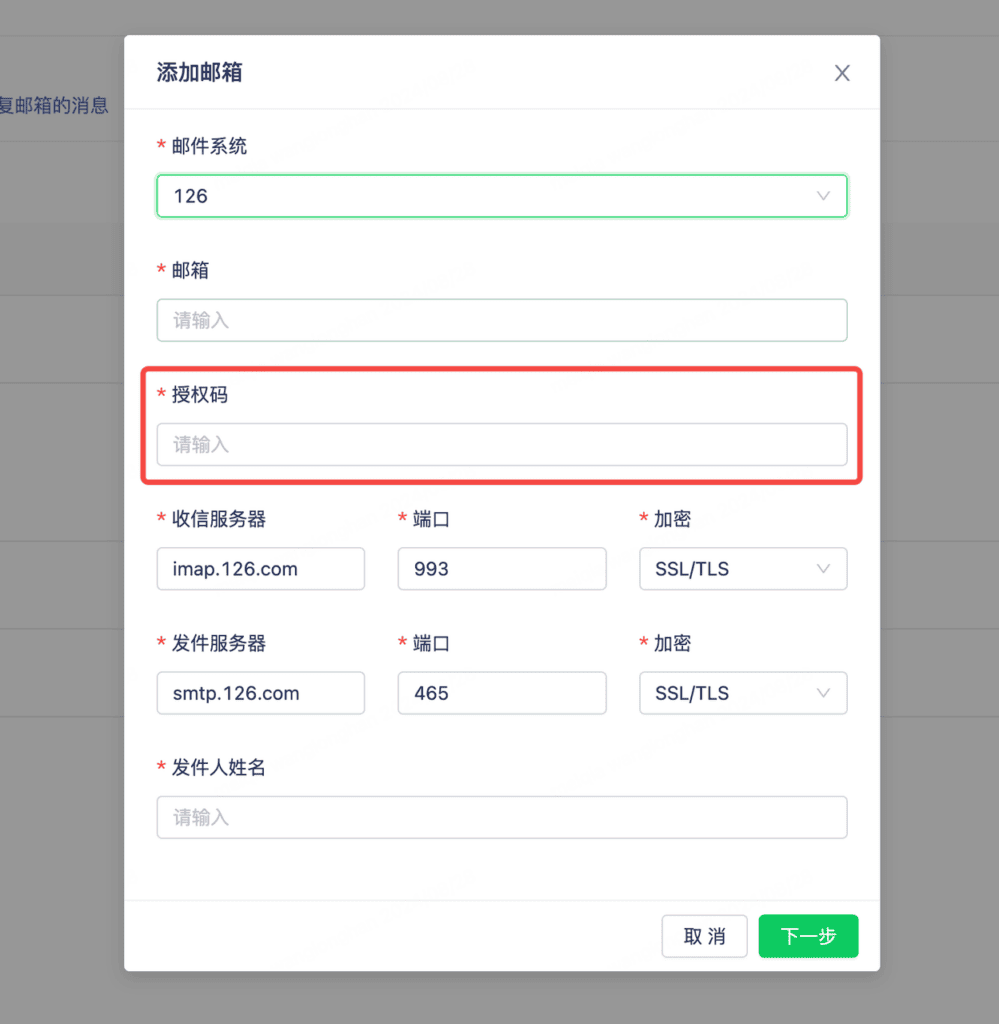
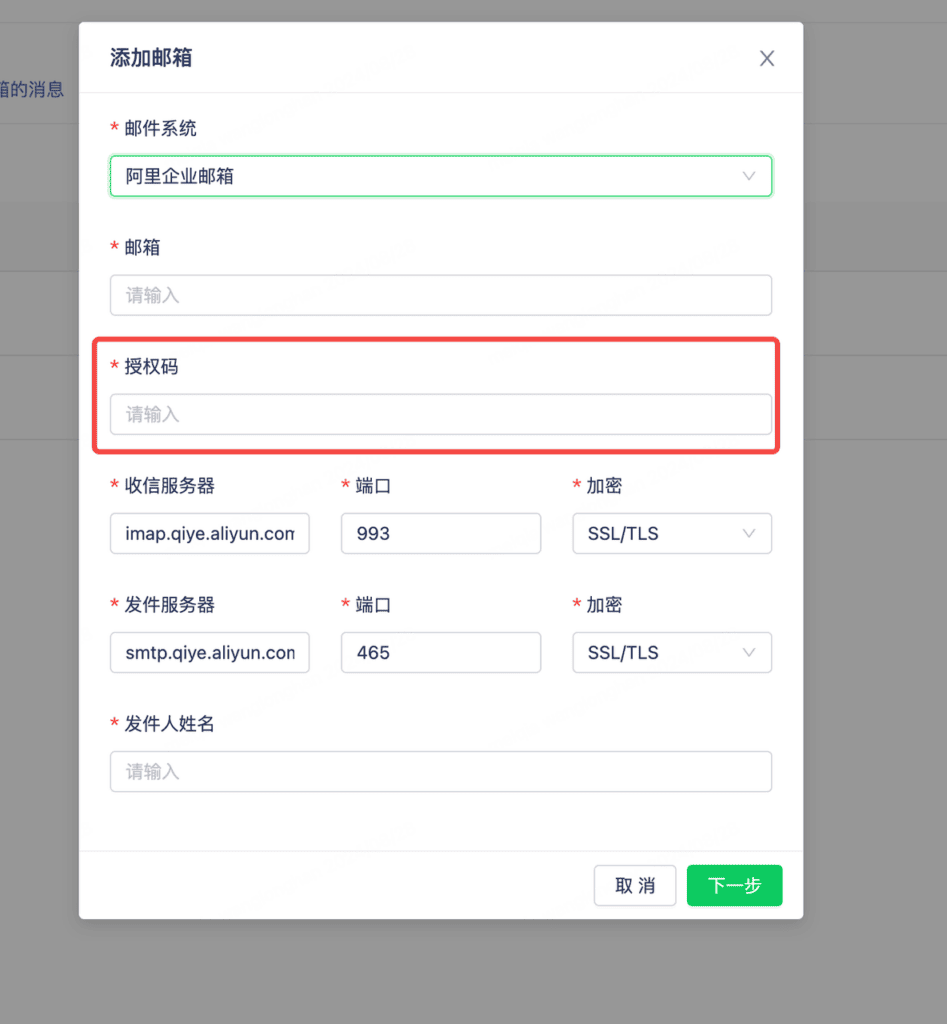
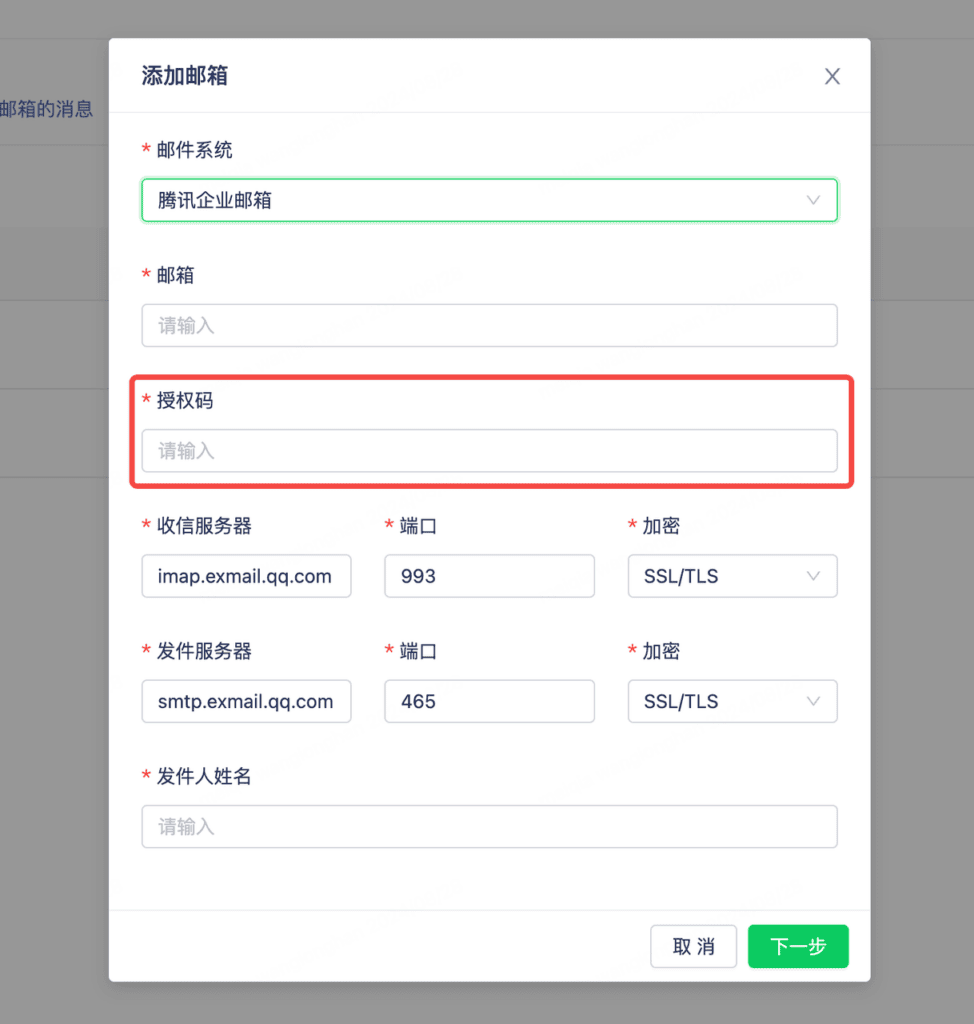
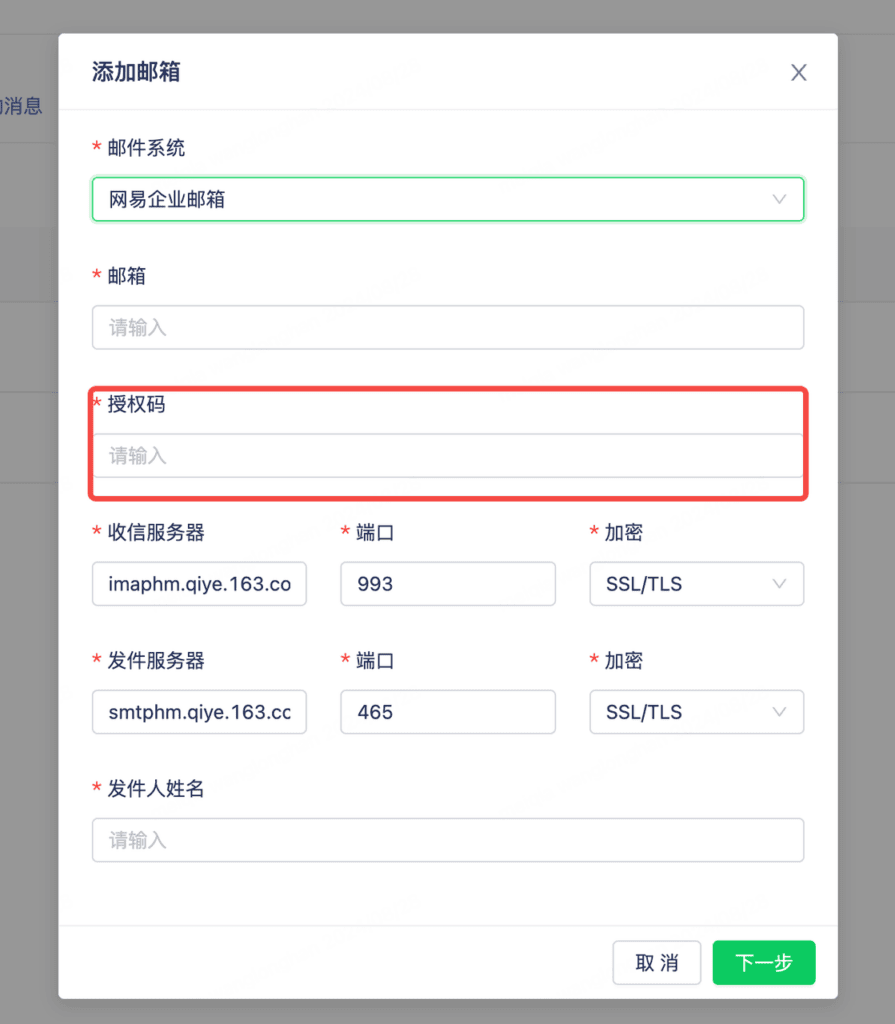
- Go to Channels > Email > Add Email. Choose the email provider and enter the email address, authorization code, sender, and other required details.
- See the instructions below to obtain an authorization code.
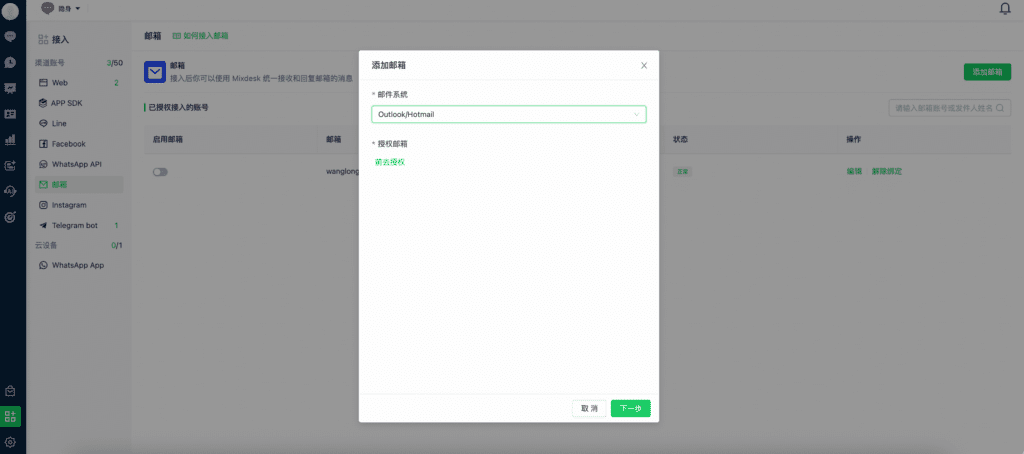
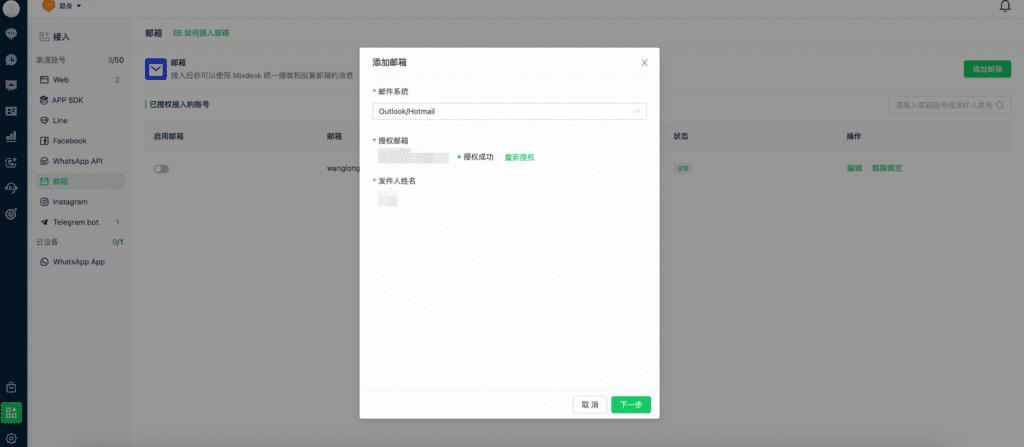
- For Outlook & Hotmail, use the authorization flow below.
- After adding the mailbox, its details appear in the list.
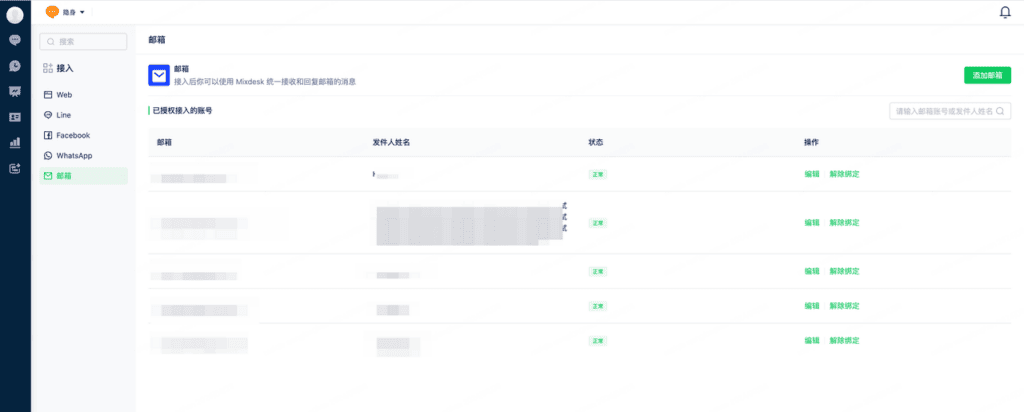
Enable the channel and select all Sent folders for the account to synchronize replies sent from other email clients.
Obtain an authorization code
Gmail
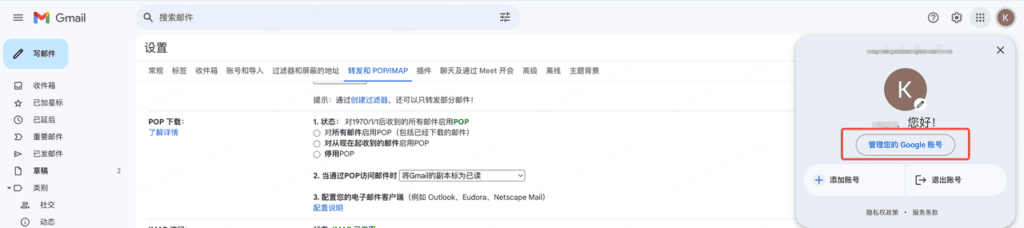
- Select your avatar in the upper-right corner, then Manage Your Google Account.
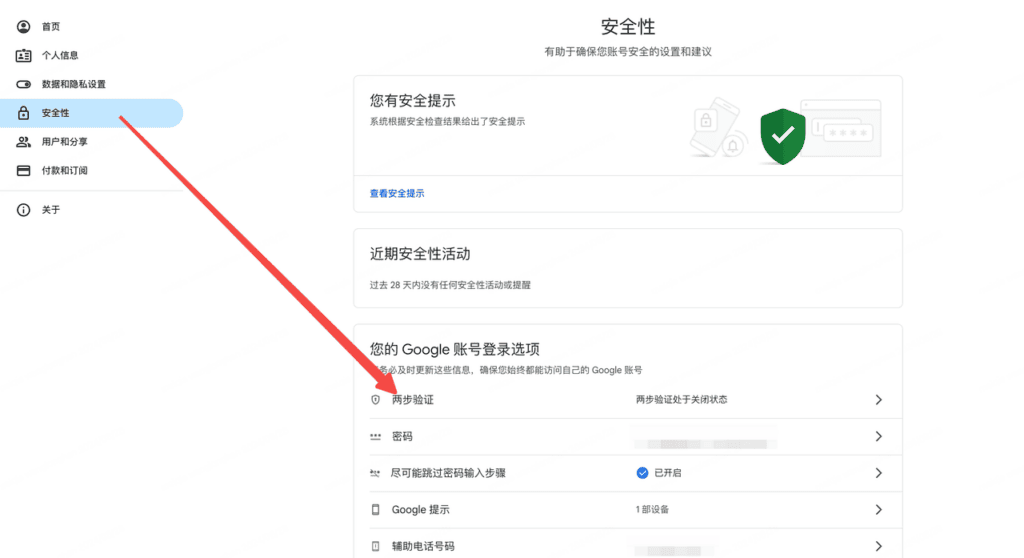
- Go to Security > 2-Step Verification and follow the instructions to enable it.
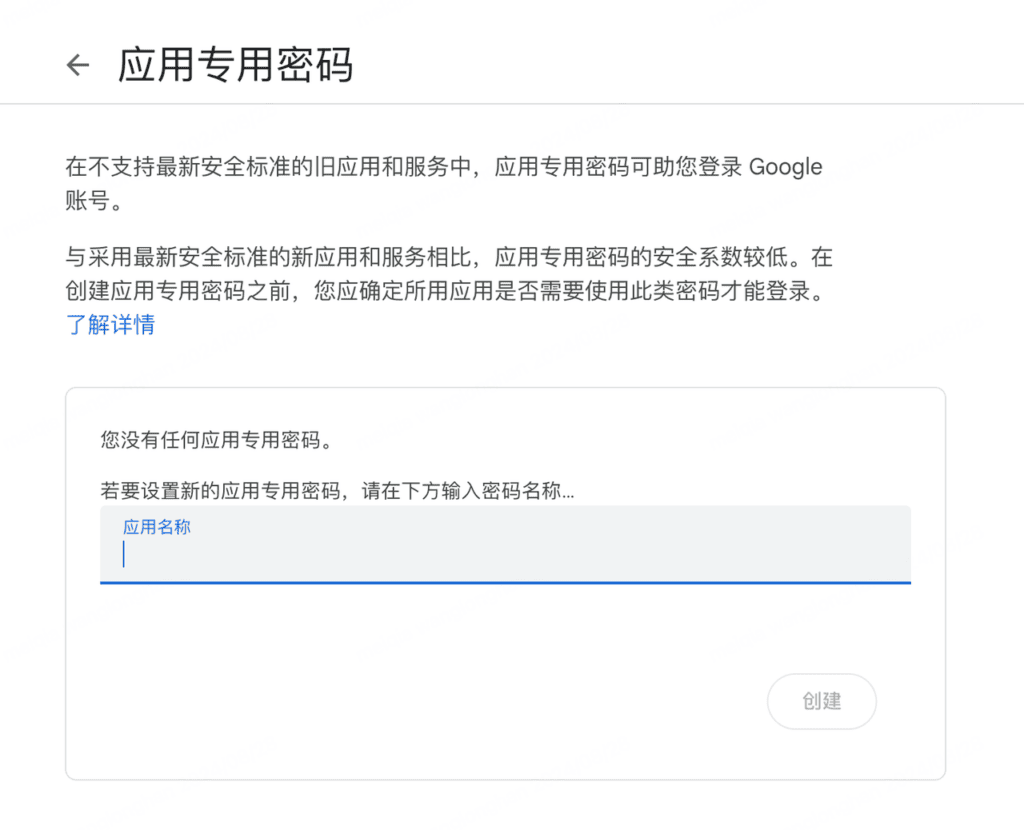
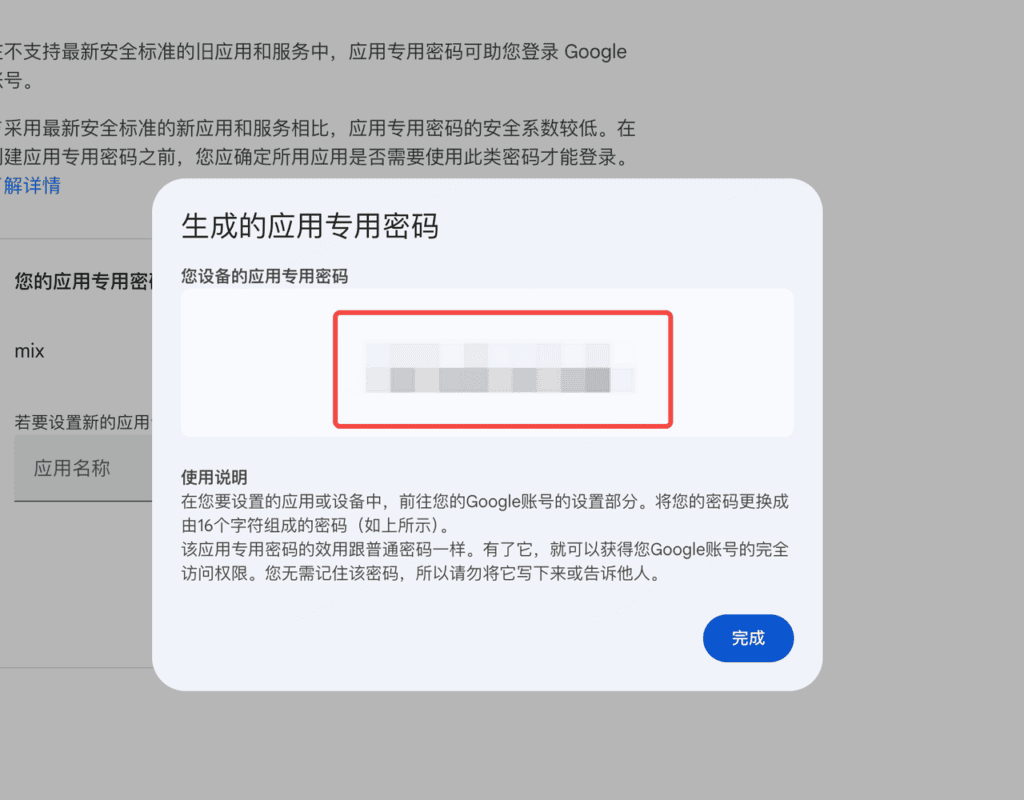
- Open https://myaccount.google.com/apppasswords and create an app password.
- Enter the app password in Authorization Code.
163 Mail
- Sign in to webmail (https://mail.163.com/) to open 163 Mail.
- Select Settings > POP/SMTP/IMAP.
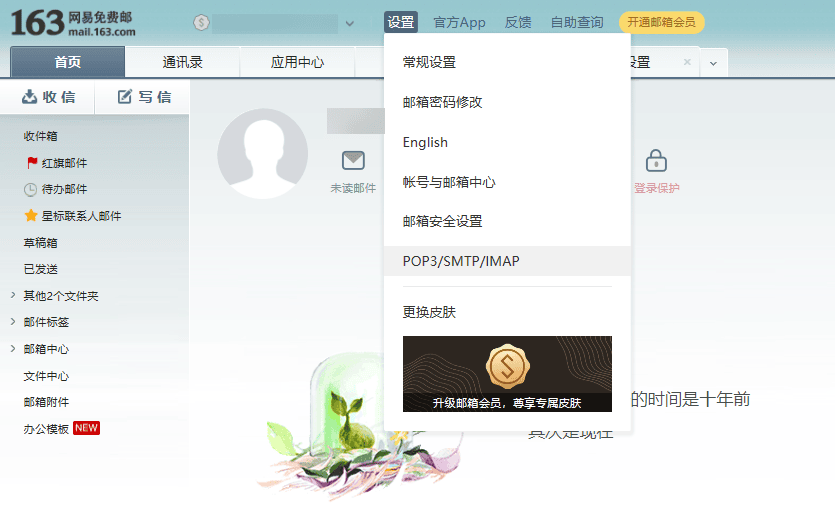
- Find IMAP/SMTP Service and select Enable.
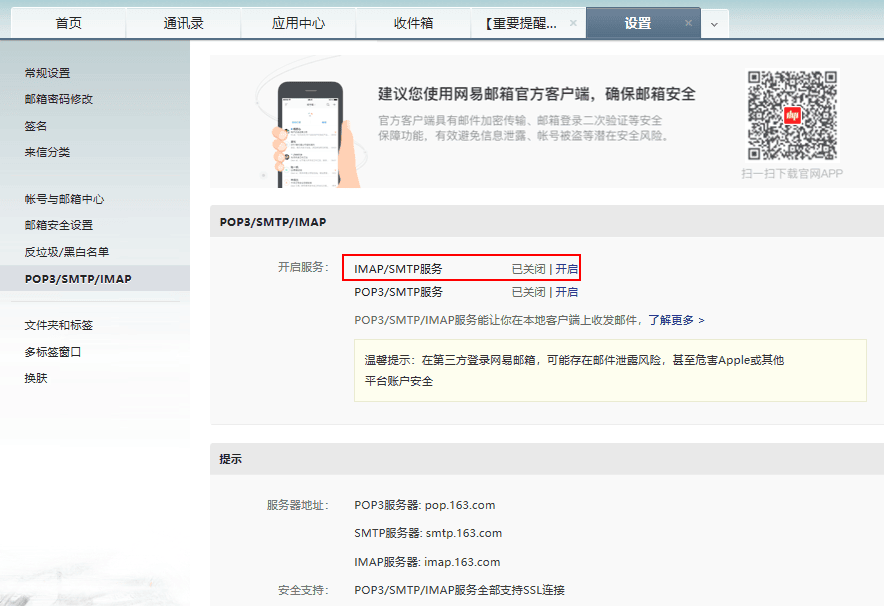
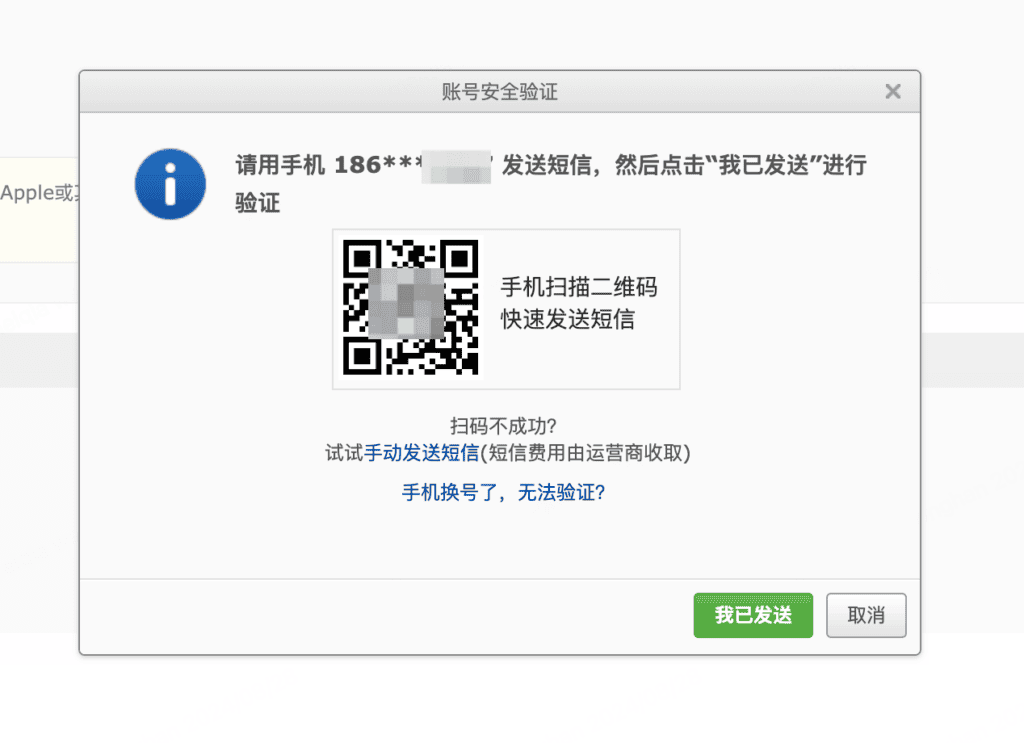
- In the dialog, select Continue to Enable. Scan the QR code to send a verification text message, or select Send Text Message Manually.
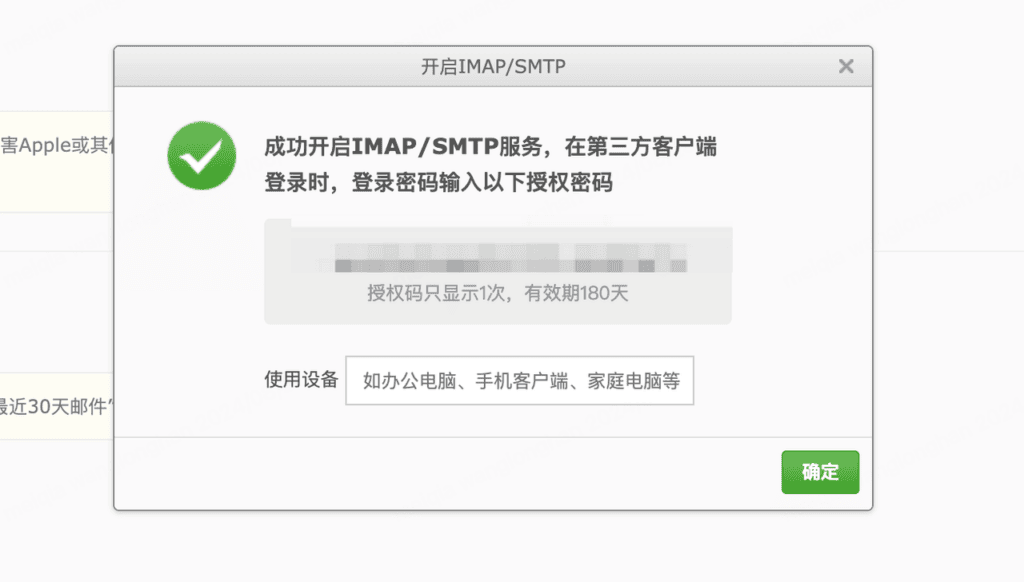
- Enter the generated code in Authorization Code.
126 Mail
- Sign in to webmail (https://mail.126.com/) to open 126 Mail.
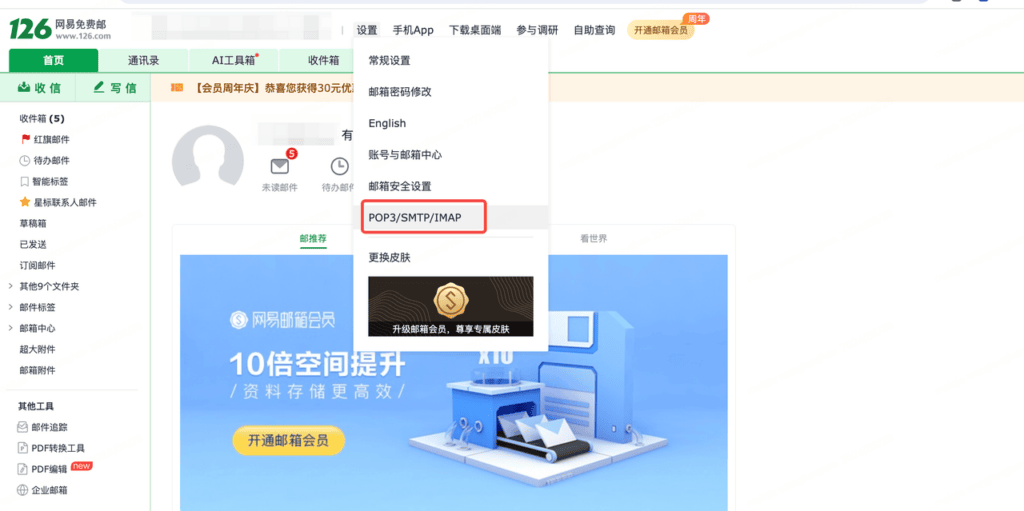
- Select Settings > POP/SMTP/IMAP.
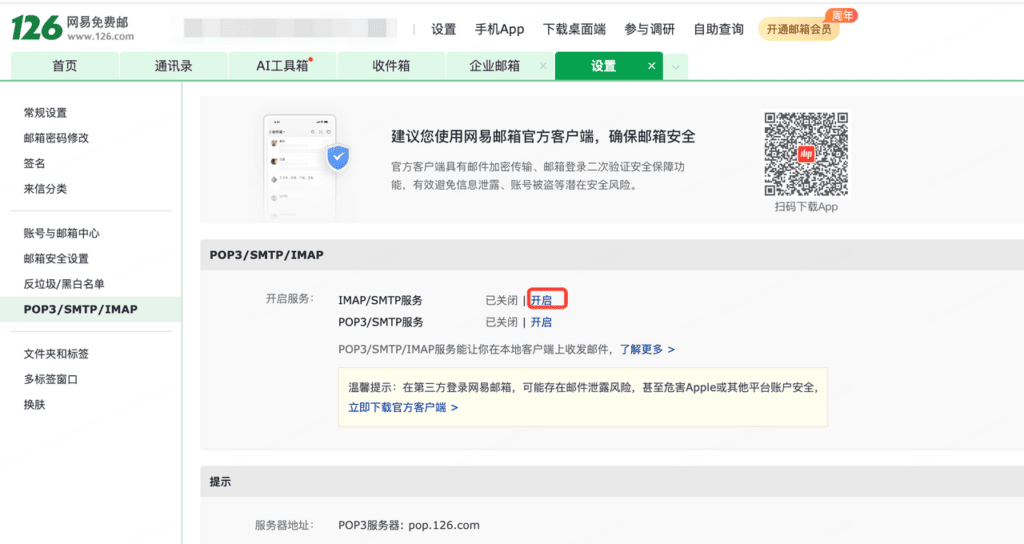
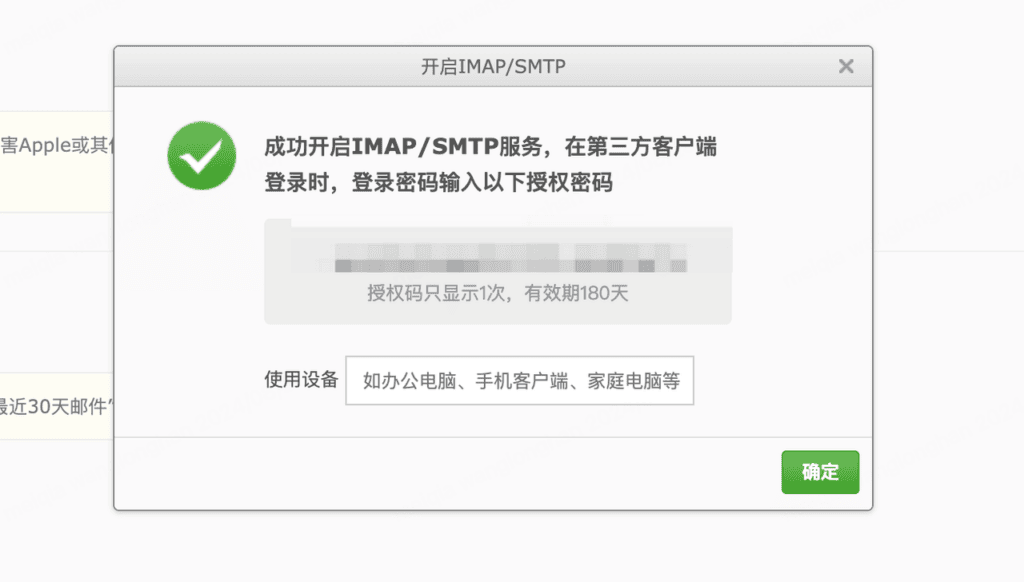
- Find IMAP/SMTP Service and select Enable.
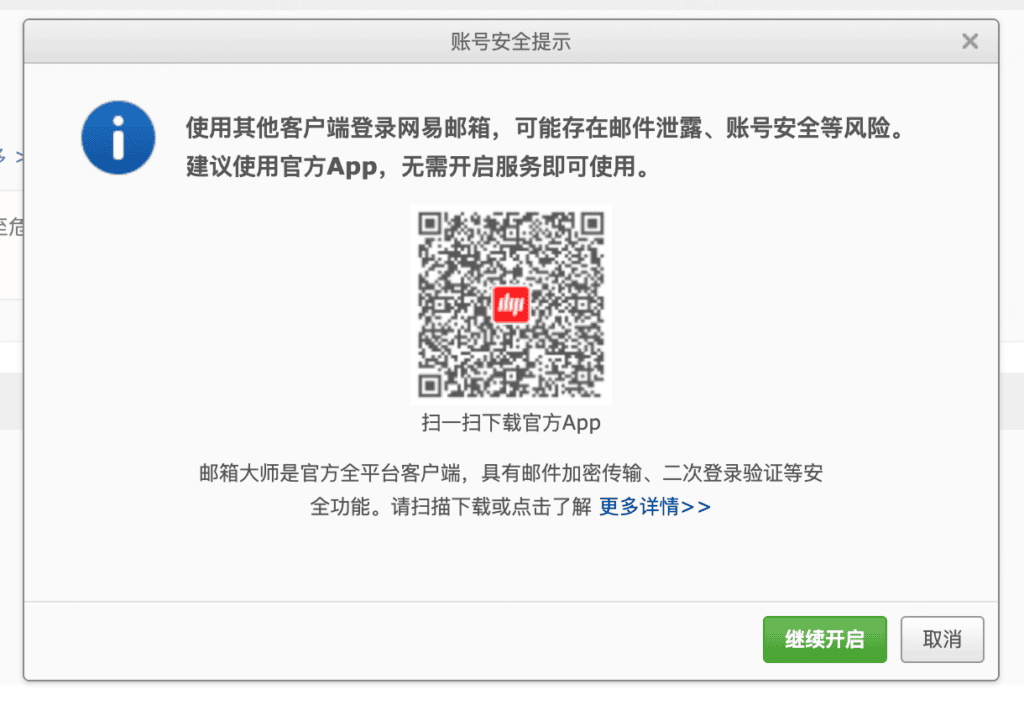
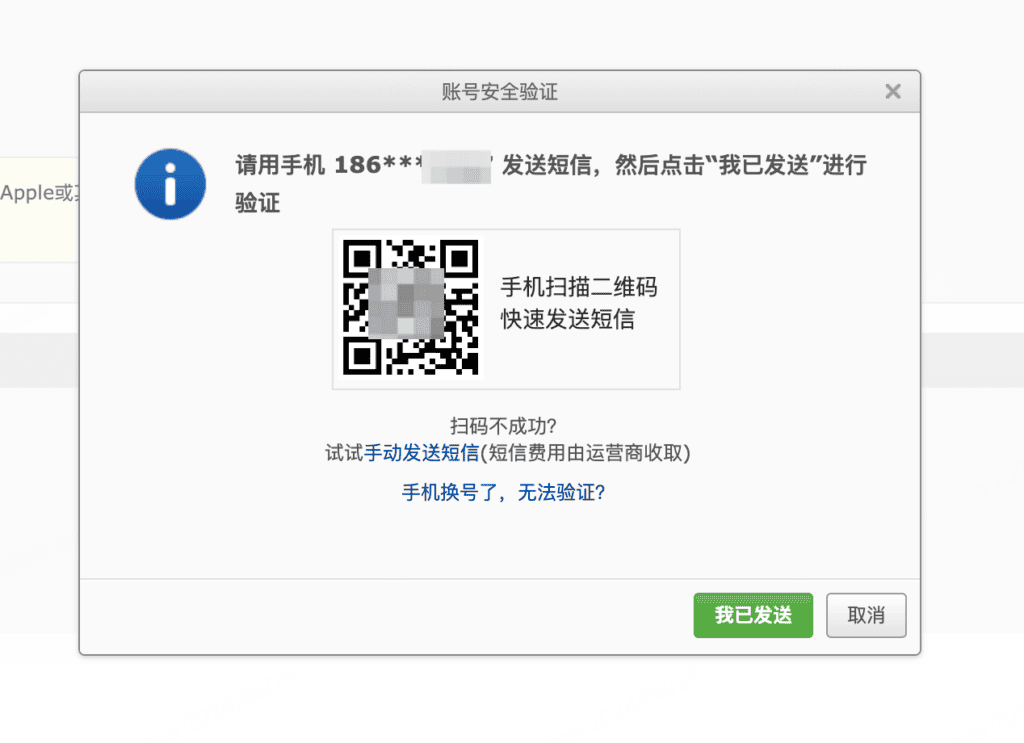
- In the dialog, select Continue to Enable. Scan the QR code to send a verification text message, or select Send Text Message Manually.
- Enter the generated code in Authorization Code.
- Sign in to webmail (https://mail.qq.com/) to open QQ Mail.
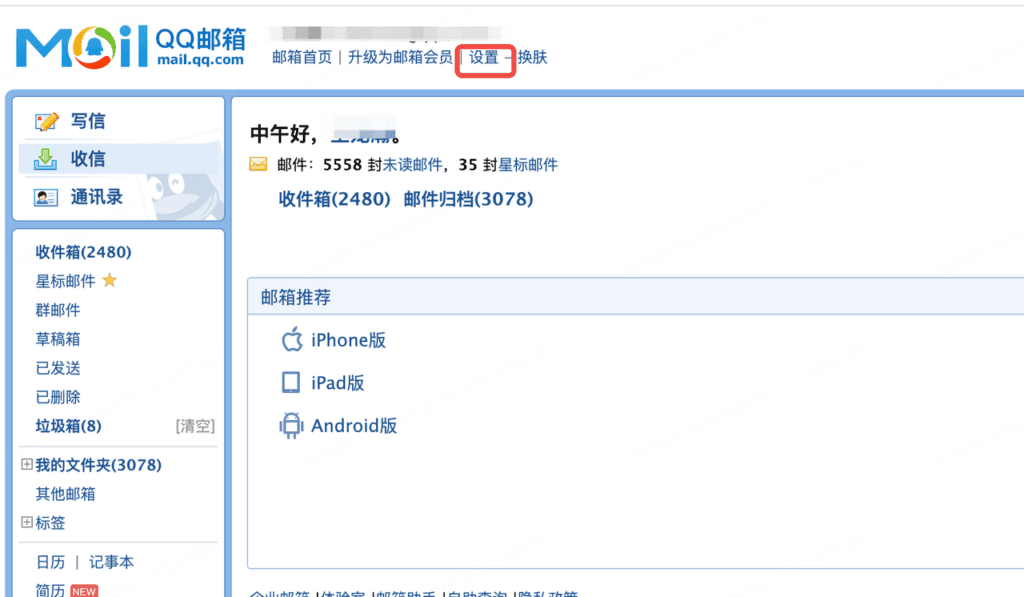
- Select Settings at the top.
- Select Account.

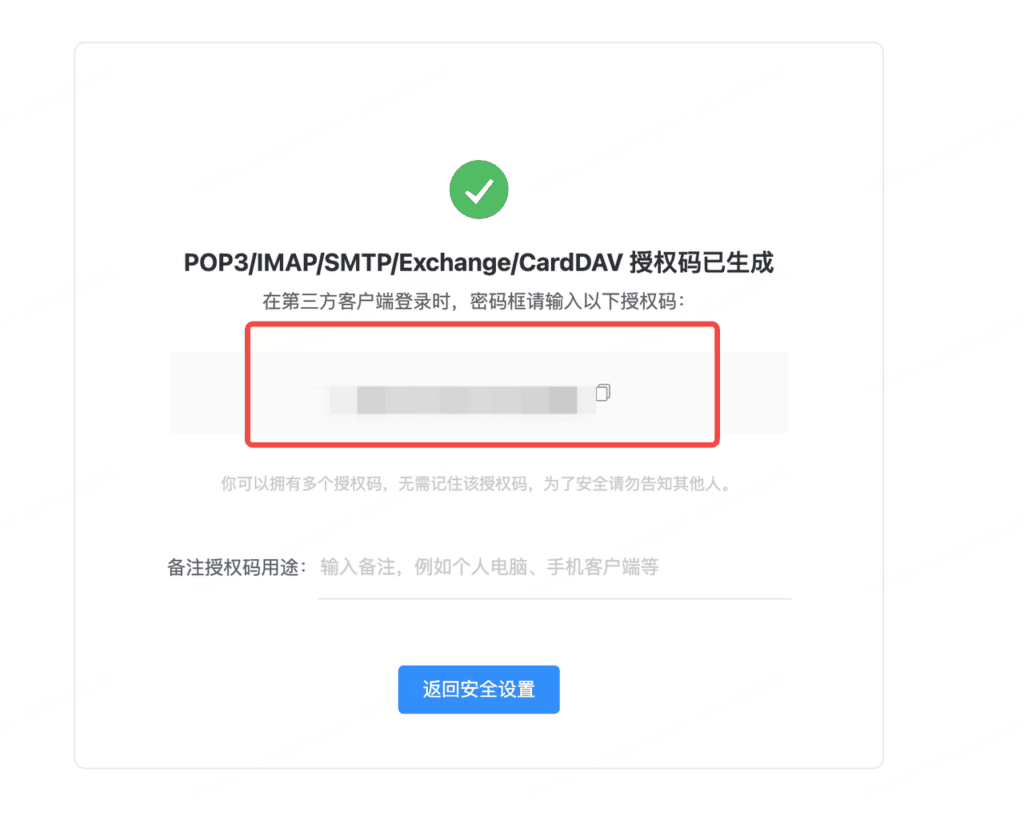
- Find POP3/IMAP/SMTP/Exchange/CardDAV/CalDAV Services and enable the service.

- Follow the instructions to scan the code or send a verification text message manually.
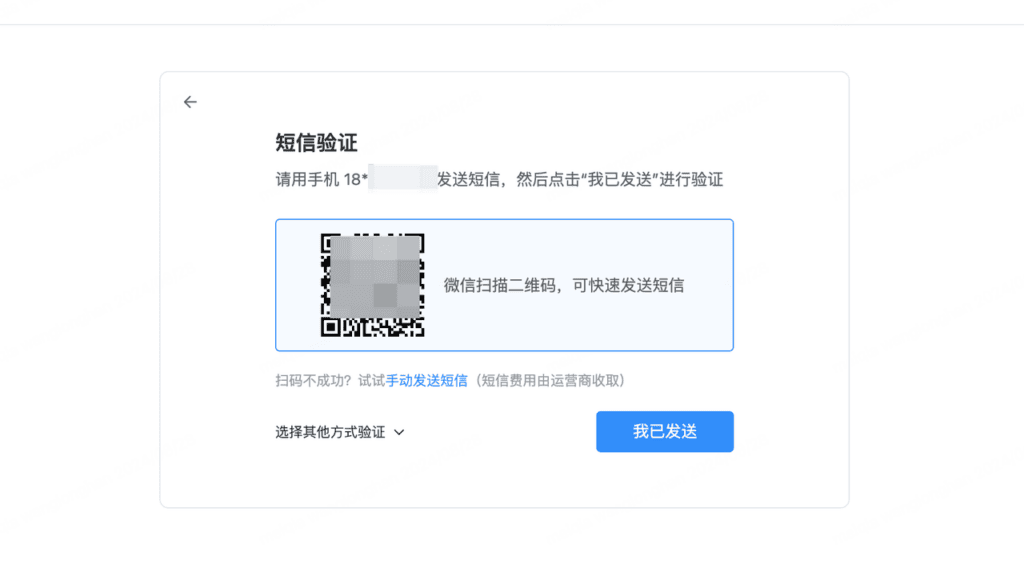
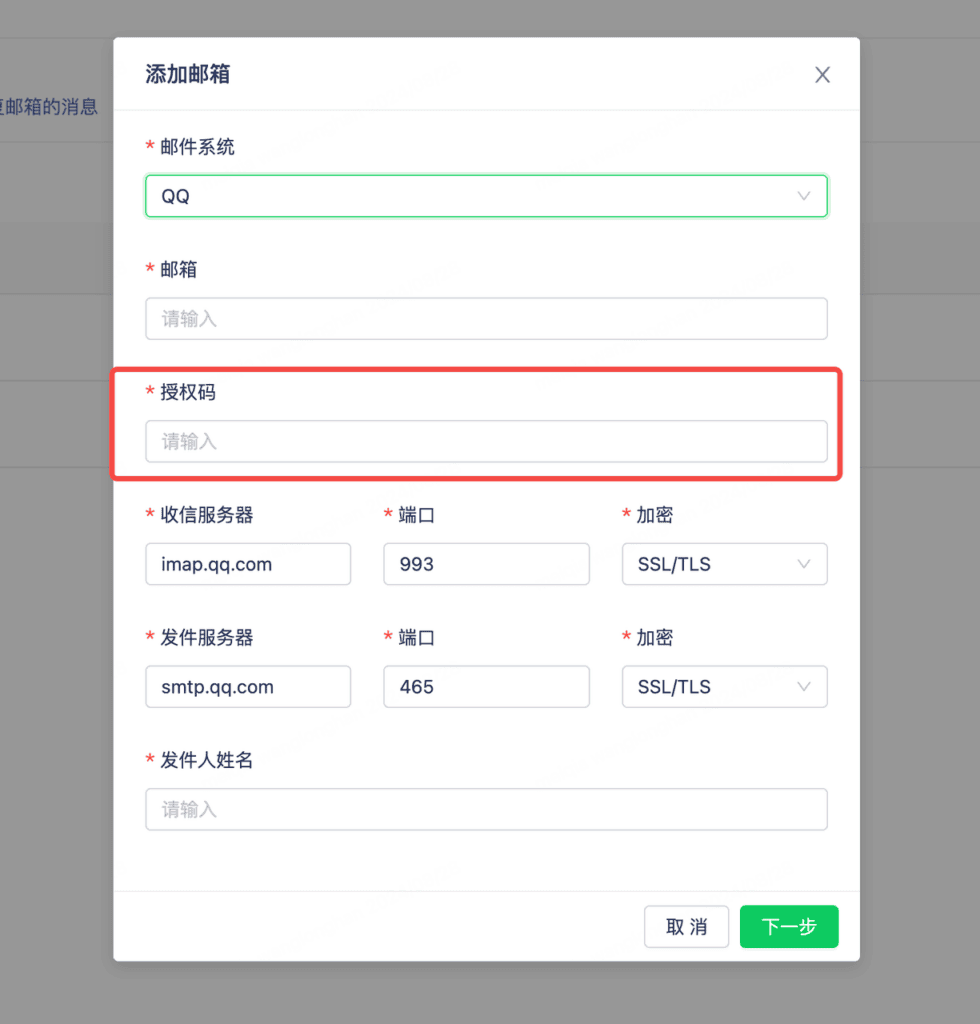
- Enter the generated code in Authorization Code.
Alibaba Mail
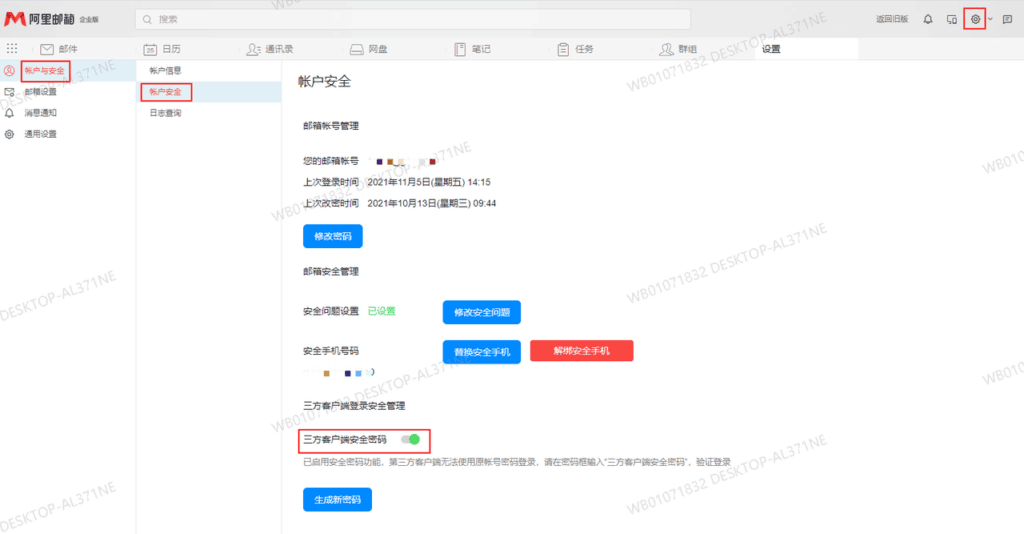
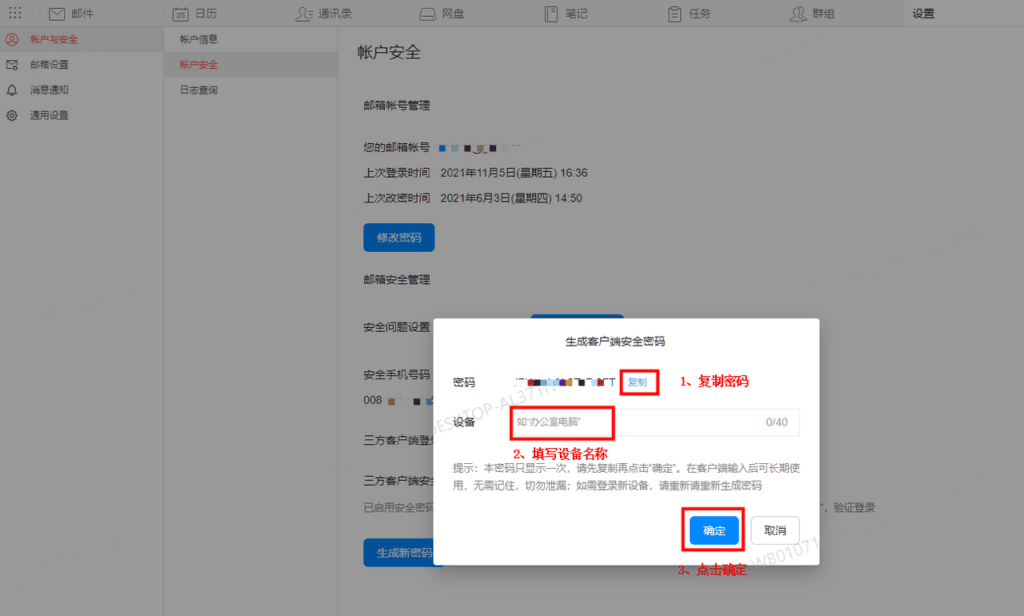
- Go to Account & Security > Account Security and enable Third-party Client Security Password.
- Verify using your linked phone number.
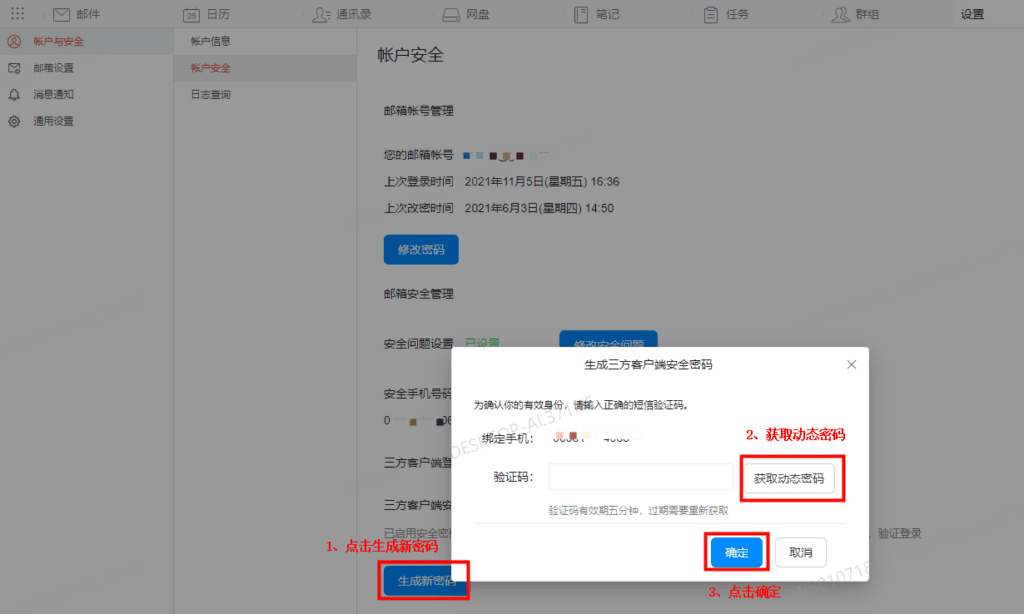
- Enter the generated code in Authorization Code.
Tencent Enterprise Email
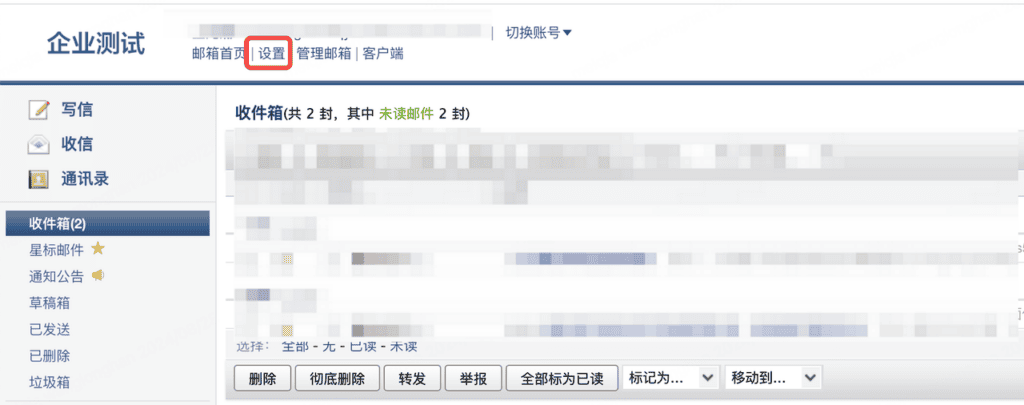
- Open the mailbox and select Settings at the top.
- Select Account.
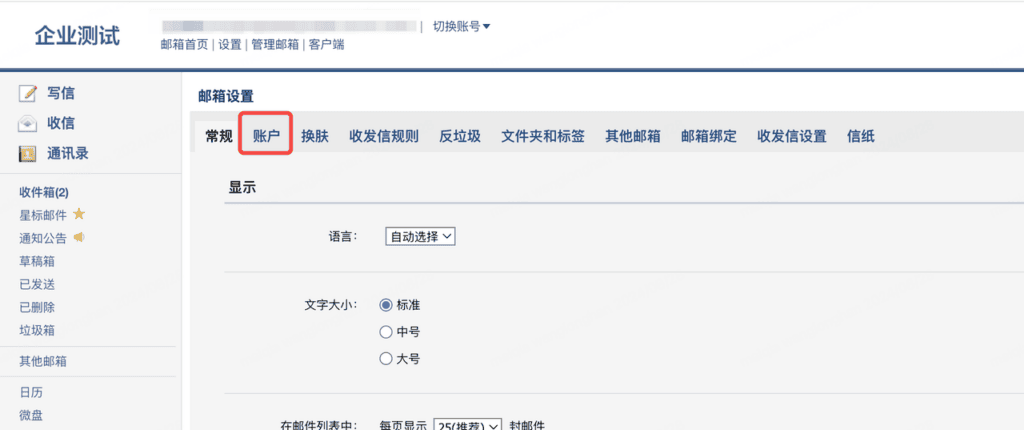
- Find Client-specific Password and generate a new password.
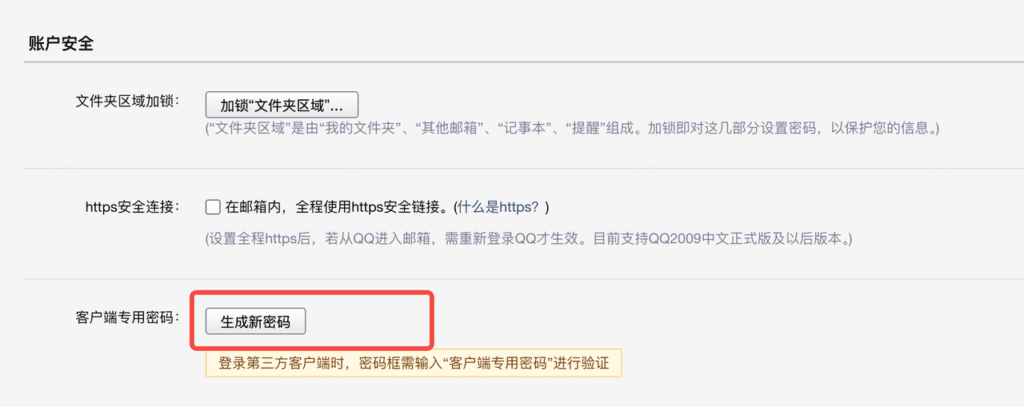
- Enter the password in Authorization Code.
NetEase Enterprise Email
Classic version
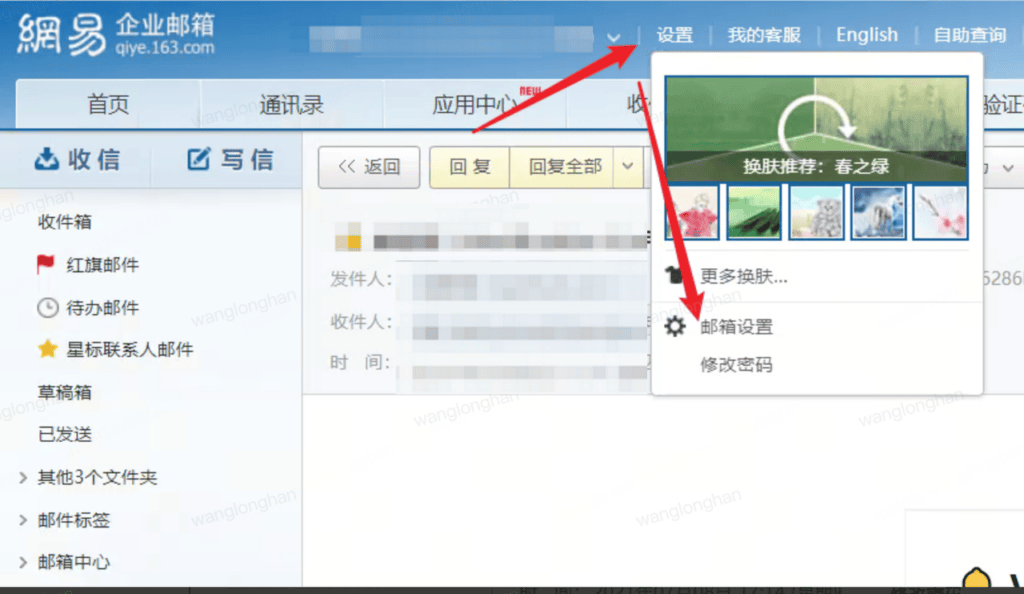
- Go to Settings > Mail Settings.
- Find Client Settings, enable it, and generate an authorization password.
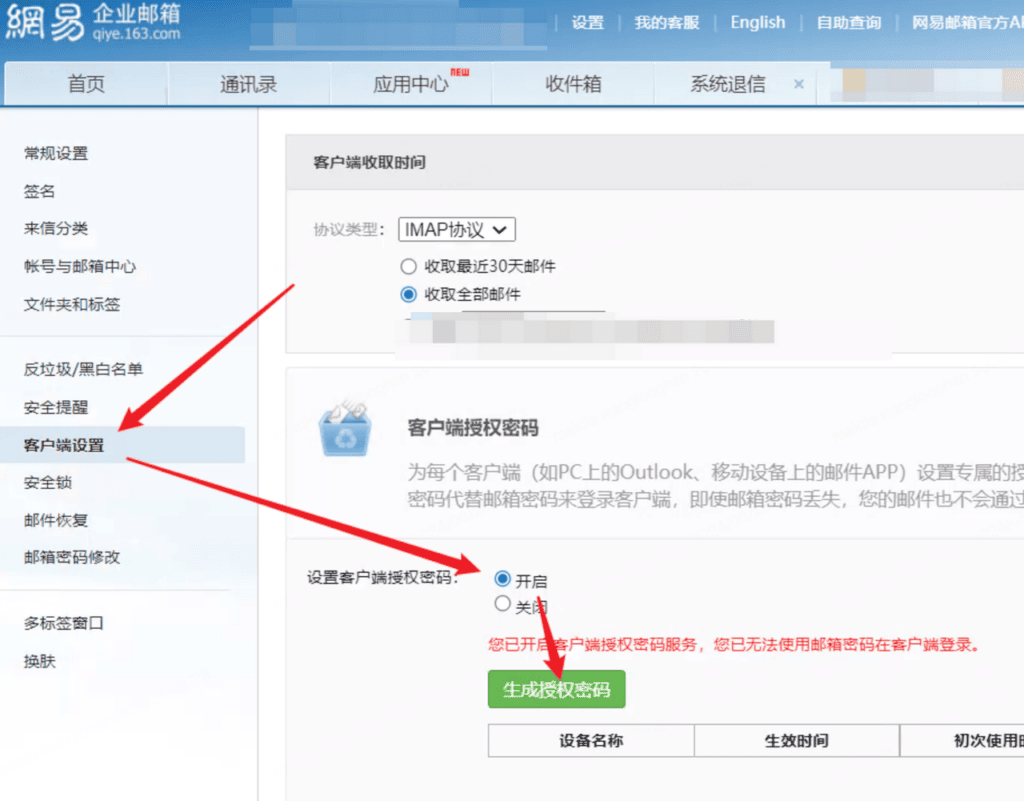
- Enter the generated code in Authorization Code.
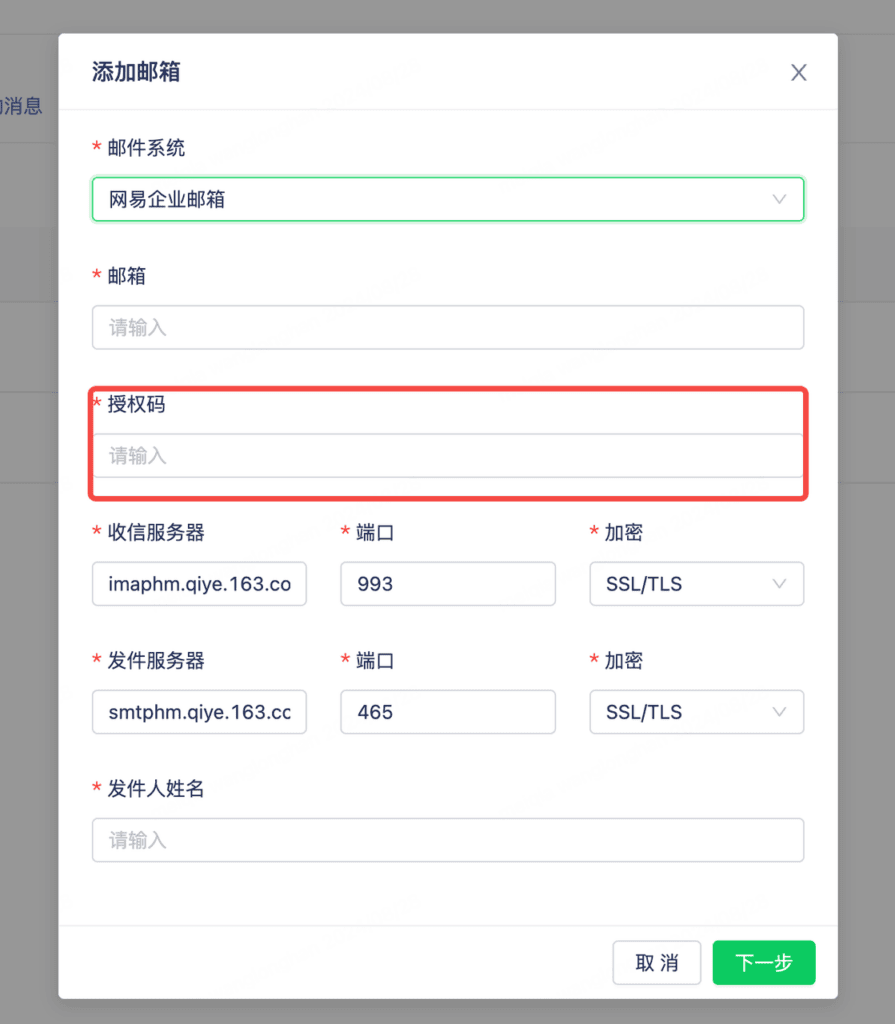
Lingxi Office version
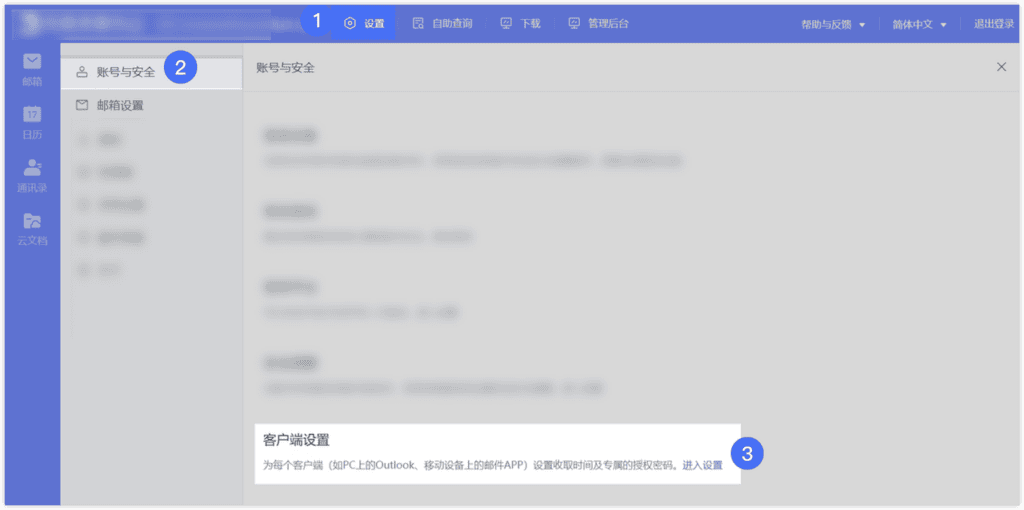
- Go to Settings > Account & Security > Client Settings.
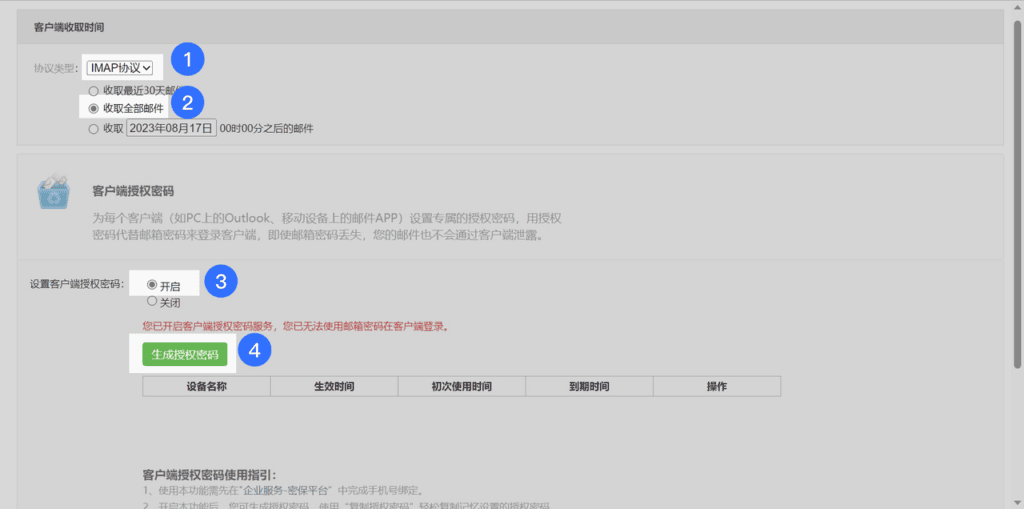
- Choose IMAP and select Receive All Mail. Enable Client Authorization Password and select Generate Authorization Password.
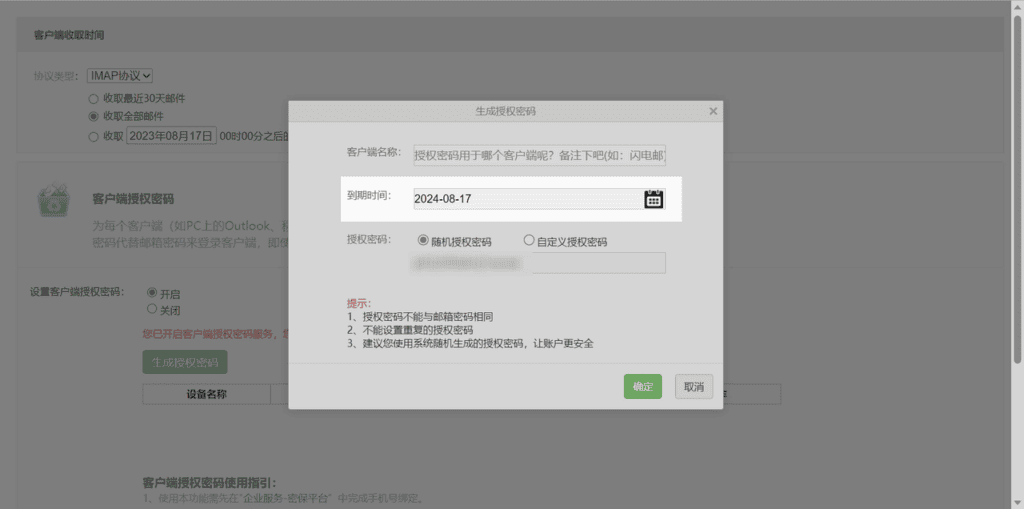
- Enter the generated password in Authorization Code.
Authorize Outlook & Hotmail
Go to Channels > Email > Add Email. Choose Outlook & Hotmail, select Authorize, and follow the authorization steps.
Authorize a managed user account
1. Go to Channels > Email > Add Email, choose Outlook & Hotmail, and select Authorize.
2. When the managed user signs in, a prompt may require administrator consent.
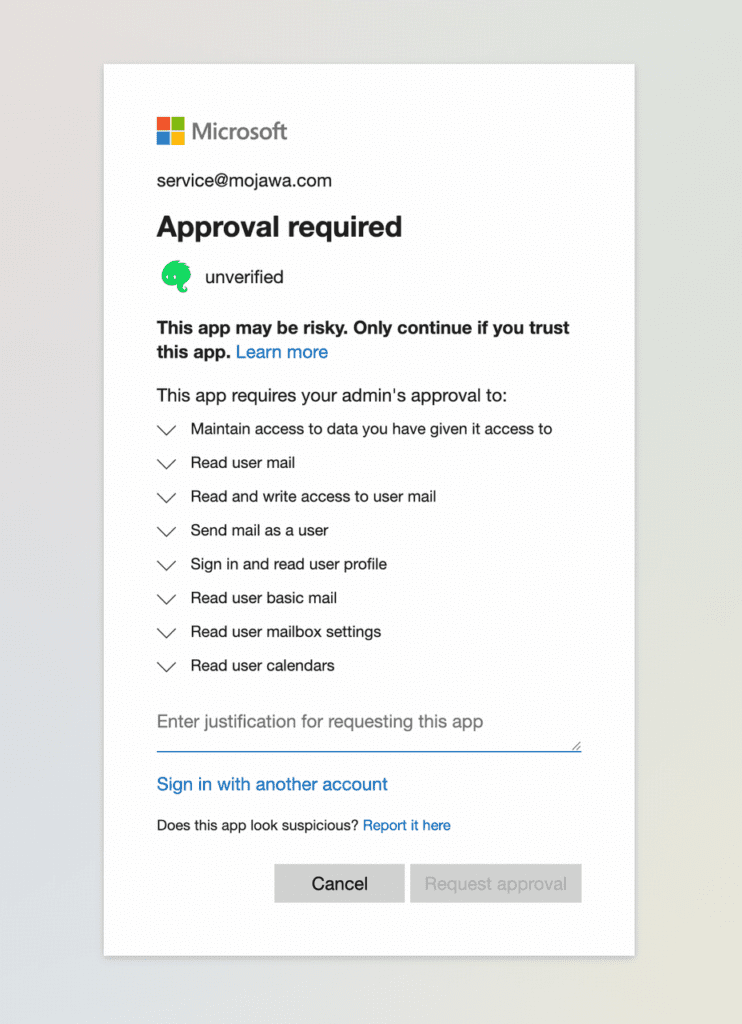
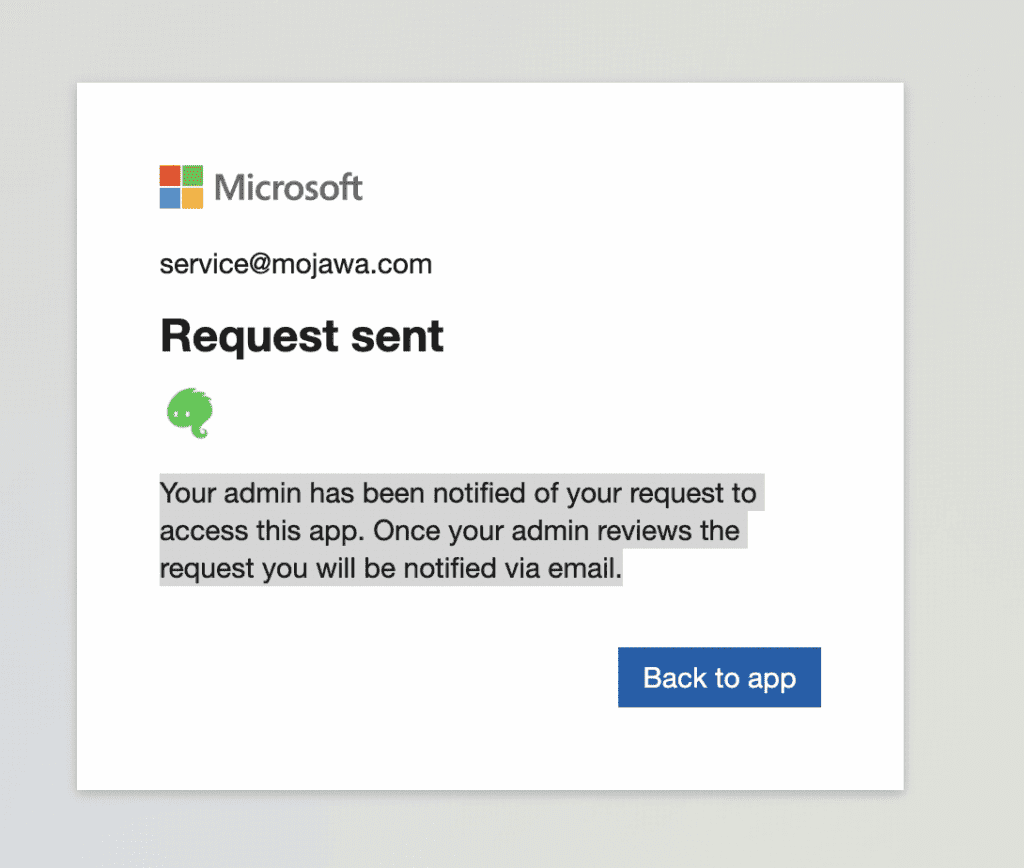
3. An administrator must find Mixdesk among the applications in the Microsoft Entra admin center and grant access to the relevant user.
4. After access is granted, repeat the authorization flow using that user account.